1/142 Revell North Sea Fishing Trawler .. A voyage to the fishing grounds of the Arctic. Building the vessel.
I've been quietly pootling along building this nice looking kit for a few weeks now.
Initially I was going to make it in to a rusty old wreck, but it's too nice a kit to trash - not just yet anyway!
I'm going to try and model her leaving port, head butting the North Sea and then in the Arctic fishing grounds.
Unfortunately I made a start before I remembered to take the sprue pictures......:upside:
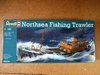
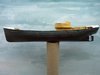
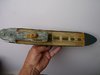
So here's the box art and remaining sprues.
View attachment 309130
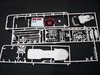
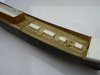
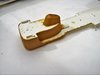
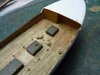
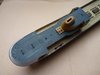
Two little crew members are included.( below the coil of rigging)
View attachment 309131
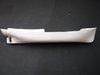
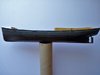
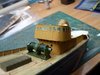
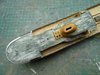
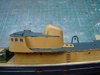
Two piece hull glued together and foredeck added. I was going to hack off the lower hull but I'll need some of it left on for future use......:thinking:
View attachment 309132
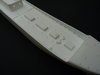
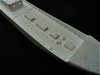
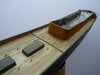
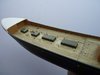
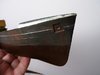
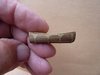
Nice moulded deck detail but the deck planking is way too wide and will have to be scraped off using an old wood chisel. - Sorry G.C. Race!
View attachment 309135
Cheers.
Ron
I've been quietly pootling along building this nice looking kit for a few weeks now.
Initially I was going to make it in to a rusty old wreck, but it's too nice a kit to trash - not just yet anyway!
I'm going to try and model her leaving port, head butting the North Sea and then in the Arctic fishing grounds.
Unfortunately I made a start before I remembered to take the sprue pictures......:upside:
So here's the box art and remaining sprues.
View attachment 309130
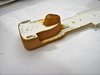
Two little crew members are included.( below the coil of rigging)
View attachment 309131
Two piece hull glued together and foredeck added. I was going to hack off the lower hull but I'll need some of it left on for future use......:thinking:
View attachment 309132
Nice moulded deck detail but the deck planking is way too wide and will have to be scraped off using an old wood chisel. - Sorry G.C. Race!
View attachment 309135
Cheers.
Ron