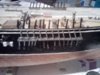
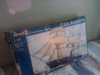
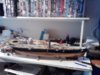
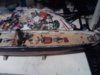
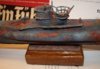
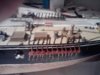
Another ship that I started before hms victory by my self but did not finish the C.S.S. ALABAMA 1:96
I hope you all will enjoy this part built I'm hoping to finish it soon . PS where can I get sailor men for this 1/96 scale, so it looks like they are climbing the rigging and tidying the ropes up, as I lost all that came with it when i opened the bag and they were all loose.I asked The company that made this model does not do this model any more. because I already asked them. or what scale model men can I use to replace them HELP!!
View attachment 119314
View attachment 119315
View attachment 119316
View attachment 119317
View attachment 119318
View attachment 119319
View attachment 232336
View attachment 232337
View attachment 232338
View attachment 232339
View attachment 232340
View attachment 232341
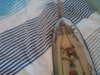
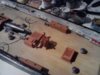
I hope you all will enjoy this part built I'm hoping to finish it soon
. PS where can I get sailor men for this 1/96 scale, so it looks like they are climbing the rigging and tidying the ropes up, as I lost all that came with it when i opened the bag and they were all loose.I asked The company that made this model does not do this model any more. because I already asked them. or what scale model men can I use to replace them HELP!!View attachment 119314
View attachment 119315
View attachment 119316
View attachment 119317
View attachment 119318
View attachment 119319
View attachment 232336
View attachment 232337
View attachment 232338
View attachment 232339
View attachment 232340
View attachment 232341

![P120915_15.40_[01].jpg](/data/attachments/32/32084-45d81e99f476341efacda24fca0e12fa.jpg?hash=udpEHzygg4)
![P120915_15.40_[02].jpg](/data/attachments/32/32090-fa2fccbf30933fbbb49056afd74b3691.jpg?hash=k9ZiFEKyCt)
![P130915_12.59_[01].jpg](/data/attachments/32/32497-e33bedff9735cdc3feb4455b1a7081ec.jpg?hash=d04ZxYoWzS)

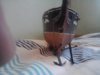
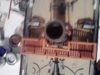
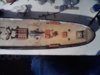
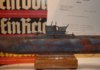
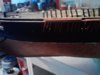
 PS please can some one tell me how to weather the smoke stack so it looks like soot and a bit of rust on it
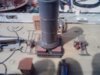

 .
.
")

![P230915_19.53_[01].jpg](/data/attachments/35/35514-34a09a6e36b06fdf7953b62c063cabbd.jpg?hash=Iq6r93GLrj)
![P230915_19.53_[02].jpg](/data/attachments/35/35522-d7eb70a5e6daa564d734bc0a183ba156.jpg?hash=btIWMZjB8X)
![P240915_17.50_[01].jpg](/data/attachments/35/35877-b574487399ccb2ddb786e7a9c9509539.jpg?hash=2aFED1Doj1)