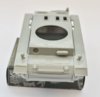
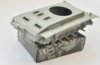
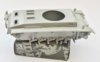
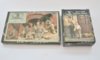
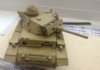
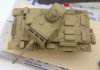
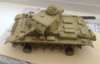
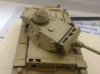
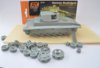
Theme editor

Scale Model Shop

Flamming Panzer

Status
Not open for further replies.

Steve Brodie

New member
Joined
Sep 17, 2014
Messages
4,652
Reaction score
0
Points
0
1/3
Thread owner

Attachments

  • FUJ_7205-1.jpg
    FUJ_7205-1.jpg
    2.6 KB · Views: 0
  • FUJ_7208-1.jpg
    FUJ_7208-1.jpg
    1.3 KB · Views: 0
  • FUJ_7206-1.jpg
    FUJ_7206-1.jpg
    2.2 KB · Views: 0
Should be a nice one!


Good luck Steve ;)


The cobbled street is from Verlinden..?
 
Nice rare vehicle,sure you will do it justice. Need to get back to work on my Super Pershing, have been a bit busy of late around the farm but will get back on track.
 
Thread owner
\ said:
Should be a nice one!
Good luck Steve ;)


The cobbled street is from Verlinden..?
No its from Field Of Glory Models;


http://www.fieldsofglorymodels.co.uk/135-scale--cobbled-street-section-with-manhole-cover-resin-1087-p.asp


Bargain at £5.49
 
Really interested in following this build, nice selection of figures Steve ;)
 
Thread owner
What with work in the day and photography in the evenings and weekends haven’t had much time to get anything done on the tank, however had a quite week, so got on and sorted out the tracks and added the final bits to the shell. Spent a few hours yesterday trying to get some paint on her , but was having a nightmare, firstly paint splatter and then no matter what setting on the compressor no pressure thru the brush at all (Iwata) plugged in my freebie brush and was blowing a gale, so not the hose or compressor. Stripped back the iwata bit by bit until all that was left was the handle and needle and lots of air. In the end found it was the small nozzle at the tip of the brush at fault – must have had clogged dried paint in it. Once sorted the brush behaved well and the AK paints went on fine.


Vallejo black primer; Dunkelgelb Dark Base, around lines lower hull, Dunkelgelb Base over whole tank in a misting motion, Dunkelgelb Light base over highlights ( found this to light so mixed with the base colour and overlaid a fine mist again, repeated this until I was happy(ish) with the colouring of the tank. In a place now where I can start adding weathering to her and see how we go.


Tip i picked up watching a Meng YouTube video, keep a bit of cleaner in the brush if not using for a while, stops any paint build-up.


View attachment 115350

View attachment 115351

View attachment 115352

View attachment 115353


View attachment 228373

View attachment 228374

View attachment 228375

View attachment 228376
 

Attachments

  • IMG_0254.JPG
    IMG_0254.JPG
    2.1 KB · Views: 0
  • IMG_0253.JPG
    IMG_0253.JPG
    2.4 KB · Views: 0
  • IMG_0252.JPG
    IMG_0252.JPG
    2.1 KB · Views: 0
  • IMG_0255.JPG
    IMG_0255.JPG
    2.4 KB · Views: 0
Nice work.


I bought the h&s nozzle cleaner. It looks like a needle with part of the side of the tip removed and a small channel. A quick go with this keeps everything to top
 
\ said:
Nice work.
I bought the h&s nozzle cleaner. It looks like a needle with part of the side of the tip removed and a small channel. A quick go with this keeps everything to top
I'd watch those needle cleaners Dougie - seems to me that it'll scratch the inside of the nozzle, leaving microscopic grooves for paint to cling to.
 
looking good Steve,and nice progress,


I think the figure of the German with the brolly is cool, ;)
 
Status
Not open for further replies.
Back
Top