so heres my entry for the GB
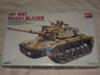
had this in the stash for a very very long time, i can remember buying it on ebay when i got back into modelmaking so it must have been 2007 or 2008, often thought of doing it but chickened out to do something else but its time has come lol
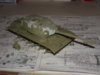
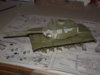
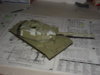
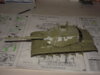
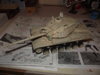
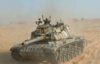
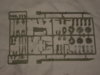
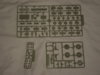
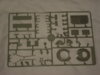
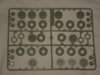
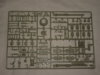
its certainly the largest AFV kit ive attempted
View attachment 113298
View attachment 113299
View attachment 113300
View attachment 113301
View attachment 113302
View attachment 113303
View attachment 113304
View attachment 113305
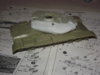
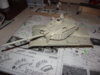
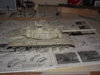
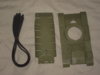
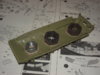
done my old trick of making a hole and gluing in a nut,,,,i have a threaded rod which then screws thro the bottom of the hull giving me a 'handle'
ive also bonded in a few large heavy nuts. this will add some mass to the whole thing. ive done it before and it helps to make it sit on the tracks a bit better, and makes it feel a bit more substansial if you pick it up
View attachment 113306
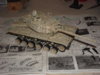
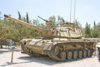
and heres the real deal......plan is to make a simple sand covered base for it all some how
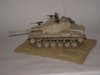
seems they started out in a green colour, often overpainted in a sandy colour.....ive seen pics of some extremely weathered ones where the sand paint is worn away but thats way beyond my abilities, so its going to be a sandy one lol
View attachment 113307
View attachment 113308
View attachment 226321
View attachment 226322
View attachment 226323
View attachment 226324
View attachment 226325
View attachment 226326
View attachment 226327
View attachment 226328
View attachment 226329
View attachment 226330
View attachment 226331
had this in the stash for a very very long time, i can remember buying it on ebay when i got back into modelmaking so it must have been 2007 or 2008, often thought of doing it but chickened out to do something else but its time has come lol
its certainly the largest AFV kit ive attempted
View attachment 113298
View attachment 113299
View attachment 113300
View attachment 113301
View attachment 113302
View attachment 113303
View attachment 113304
View attachment 113305
done my old trick of making a hole and gluing in a nut,,,,i have a threaded rod which then screws thro the bottom of the hull giving me a 'handle'
ive also bonded in a few large heavy nuts. this will add some mass to the whole thing. ive done it before and it helps to make it sit on the tracks a bit better, and makes it feel a bit more substansial if you pick it up
View attachment 113306
and heres the real deal......plan is to make a simple sand covered base for it all some how
seems they started out in a green colour, often overpainted in a sandy colour.....ive seen pics of some extremely weathered ones where the sand paint is worn away but thats way beyond my abilities, so its going to be a sandy one lol
View attachment 113307
View attachment 113308
View attachment 226321
View attachment 226322
View attachment 226323
View attachment 226324
View attachment 226325
View attachment 226326
View attachment 226327
View attachment 226328
View attachment 226329
View attachment 226330
View attachment 226331
Attachments
-
 ivzt4g.jpg2.4 KB · Views: 0
 -
 jpj1ud.jpg6.2 KB · Views: 0
 -
 2qwcwaw.jpg1.7 KB · Views: 0
 -
 2lji3j9.jpg2 KB · Views: 0
 -
 jsomrc.jpg2 KB · Views: 0
 -
 f9i5d.jpg2 KB · Views: 0
 -
 df8sas.jpg2.1 KB · Views: 0
 -
 2dj1hfa.jpg2.3 KB · Views: 0
 -
 1zwopee.jpg2.2 KB · Views: 0
 -
 4j3p7r.jpg2.2 KB · Views: 0
 -
 2s7jtl0.jpg2.5 KB · Views: 0
")