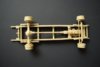
I would class myself as a dyed in the wool sports car builder able to bash together a reasonable looking kit. Recently however I've been looking at some stunning military models and diorama and I got to thinking 'How hard can it be!' famous last words ey.
I'm not straying too far from my usual genre in the respect that it still has wheels but I am itching to try out some of the weathering techniques that I see executed so well around here. Might even have a go at a little diorama!!
Wish me luck.
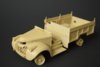
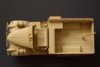
View attachment 84155
View attachment 84156
View attachment 84157
Thanks for looking
Jason
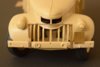
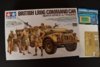
View attachment 197178
View attachment 197179
View attachment 197180
I'm not straying too far from my usual genre in the respect that it still has wheels but I am itching to try out some of the weathering techniques that I see executed so well around here. Might even have a go at a little diorama!!
Wish me luck.
View attachment 84155
View attachment 84156
View attachment 84157
Thanks for looking
Jason
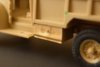
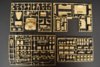
View attachment 197178
View attachment 197179
View attachment 197180
")

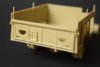
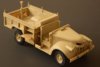
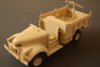
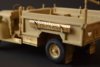
") . I also won another Chevy on Ebay, unfortunately no Breda gun but it was only a tenner so couldn't resist it. The seller has glued the chassis together but it should be fine. That ought to be enough vehicles for the dio I have in mind, maybe a few more figures and a camel needed though
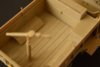
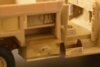
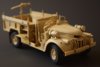
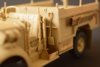
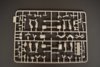
. I also won another Chevy on Ebay, unfortunately no Breda gun but it was only a tenner so couldn't resist it. The seller has glued the chassis together but it should be fine. That ought to be enough vehicles for the dio I have in mind, maybe a few more figures and a camel needed though . So after much cursing I gave up and ordered a PE bending tool from John in the shop along with some of those sticky pencils for placing the really fiddly bits and it helps but some of these bits are crazy small. The 6 bits of PE in the cab took an entire evening to get right....I will be persevering with it though, I think it really adds a lot to this already great kit.