Theme editor

Scale Model Shop

Rick's BL2 Locomotive weathering commission

Status
Not open for further replies.

rickoshea52

Well-known member
Joined
Dec 20, 2011
Messages
4,103
Reaction score
70
Points
48
1/3
Thread owner
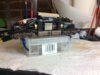
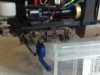
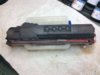
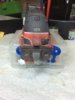
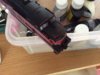
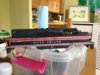
This is my latest commission for a friend at Andover Model Railway Club. It's a BL2 American diesel locomotive in Rock Island livery. The model is made by Proto 2000 in HO scale. The photo in the background is the weathered finish I am aiming for starting with Mig Rainmarks wash. Later I will use pigments, oils and an airbrush for the under frame which has been separated from the body for this job.

View attachment 84294


View attachment 197317
 

Attachments

  • image.jpg
    image.jpg
    2.9 KB · Views: 0
Looks nice Rick, should look even better after you have worked your magic. Do you use pigment fixer to apply the pigments?

Si:)
 
Thread owner
The Mig wash wasn't playing ball in sticking to the factory finish of the loco so I used Abteilung faded UN white thinned to a wash to fade and rainstreak the black livery. When dry I have applied Mig black smoke for the roof and body side grills, Star Dust dark rust on the foot plates and bonnet with Mig light rust in the centre to get that sun bleached/worn paint effect.

I have applied a mix of Mig track brown and industrial city dust on the buffer beam and side skirts.

The chassis will be next when I settle on the shade and level of dirt I want.

When done it will be sealed with a coat of pigment fixer applied by airbrush at about 10psi.

View attachment 84311


View attachment 84310


View attachment 197333

View attachment 197334
 

Attachments

  • image.jpg
    image.jpg
    2.7 KB · Views: 0
  • image.jpg
    image.jpg
    3.1 KB · Views: 0
Thread owner
\ said:
Looks nice Rick, should look even better after you have worked your magic. Do you use pigment fixer to apply the pigments?Si:)
When I did an O gauge loco is used fixer to push the pigment into all the nooks and crannies you get on bogie side frames, this also creates the appearance of crusty deposits that build up in areas like this. See what I mean in this link - http://www.scale-models.co.uk/gallery/o-gauge-diesel-locomotive-weathering/p8323-weathered-heljan-o-gauge-hymek.html

When using as a standard weathering effect I apply with a suitably sized flat brush or round brush depending on the effect and surface being weathered. When it's all done I seal with fixer through an airbrush at 10 psi so you don't blow away your pigment.

I also brush away any loose pigment with a large soft brush or scrub with an old toothbrush to create streaks. I find it useful to work over a piece of A4 paper to collect any loose pigment and tip it back into the pot it came from.
 
You can do a very interesting work!

Mmm...Suppose I will start to weathering my locos and wagons at the end of the summer...your threads will be an excellent reference ;)
 
\ said:
When I did an O gauge loco is used fixer to push the pigment into all the nooks and crannies you get on bogie side frames, this also creates the appearance of crusty deposits that build up in areas like this. See what I mean in this link - http://www.scale-models.co.uk/gallery/o-gauge-diesel-locomotive-weathering/p8323-weathered-heljan-o-gauge-hymek.htmlWhen using as a standard weathering effect I apply with a suitably sized flat brush or round brush depending on the effect and surface being weathered. When it's all done I seal with fixer through an airbrush at 10 psi so you don't blow away your pigment.

I also brush away any loose pigment with a large soft brush or scrub with an old toothbrush to create streaks. I find it useful to work over a piece of A4 paper to collect any loose pigment and tip it back into the pot it came from.
Nice one Rick, thank you for that. I use pigment fixer via brush etc but not used it via a AB, will have to try.

Si:)
 
This will look good when it's done. I have already pulled my chair up to the screen popcorn in hand.

scott
 
Thread owner
View attachment 85716

View attachment 85717

View attachment 85718

View attachment 85719


After being away for nearly three weeks I need to get back on the case with this commission. Today I sealed the pigments with fixer, sprayed the under frames and applied oil and grease effects from the Mig and Lifecolor range on the bogie side frames. A bit of roof dirt was also applied. It's probably a bit too subtle for the camera to pick up though.

View attachment 198739

View attachment 198740

View attachment 198741

View attachment 198742
 

Attachments

  • image.jpg
    image.jpg
    2.7 KB · Views: 0
  • image.jpg
    image.jpg
    2.7 KB · Views: 0
  • image.jpg
    image.jpg
    2.4 KB · Views: 0
  • image.jpg
    image.jpg
    2.4 KB · Views: 0
Status
Not open for further replies.
Back
Top