Theme editor

Scale Model Shop

Tamiya sdkfz 251/1 (ish)

  • Thread starter Thread starter Guest
  • Start date Start date
Status
Not open for further replies.
G

Guest

Guest
Thread owner
I'm just starting this with the plan being that it'll tow my PaK40.
It's going to be in German Grey and Russian front era, so I'll need to make sure I get the decals right! :smiling:
Quite likely I'll be giving this a white winter camo coat, although I've not got winter clothed personnel but that shouldn't be a problem.

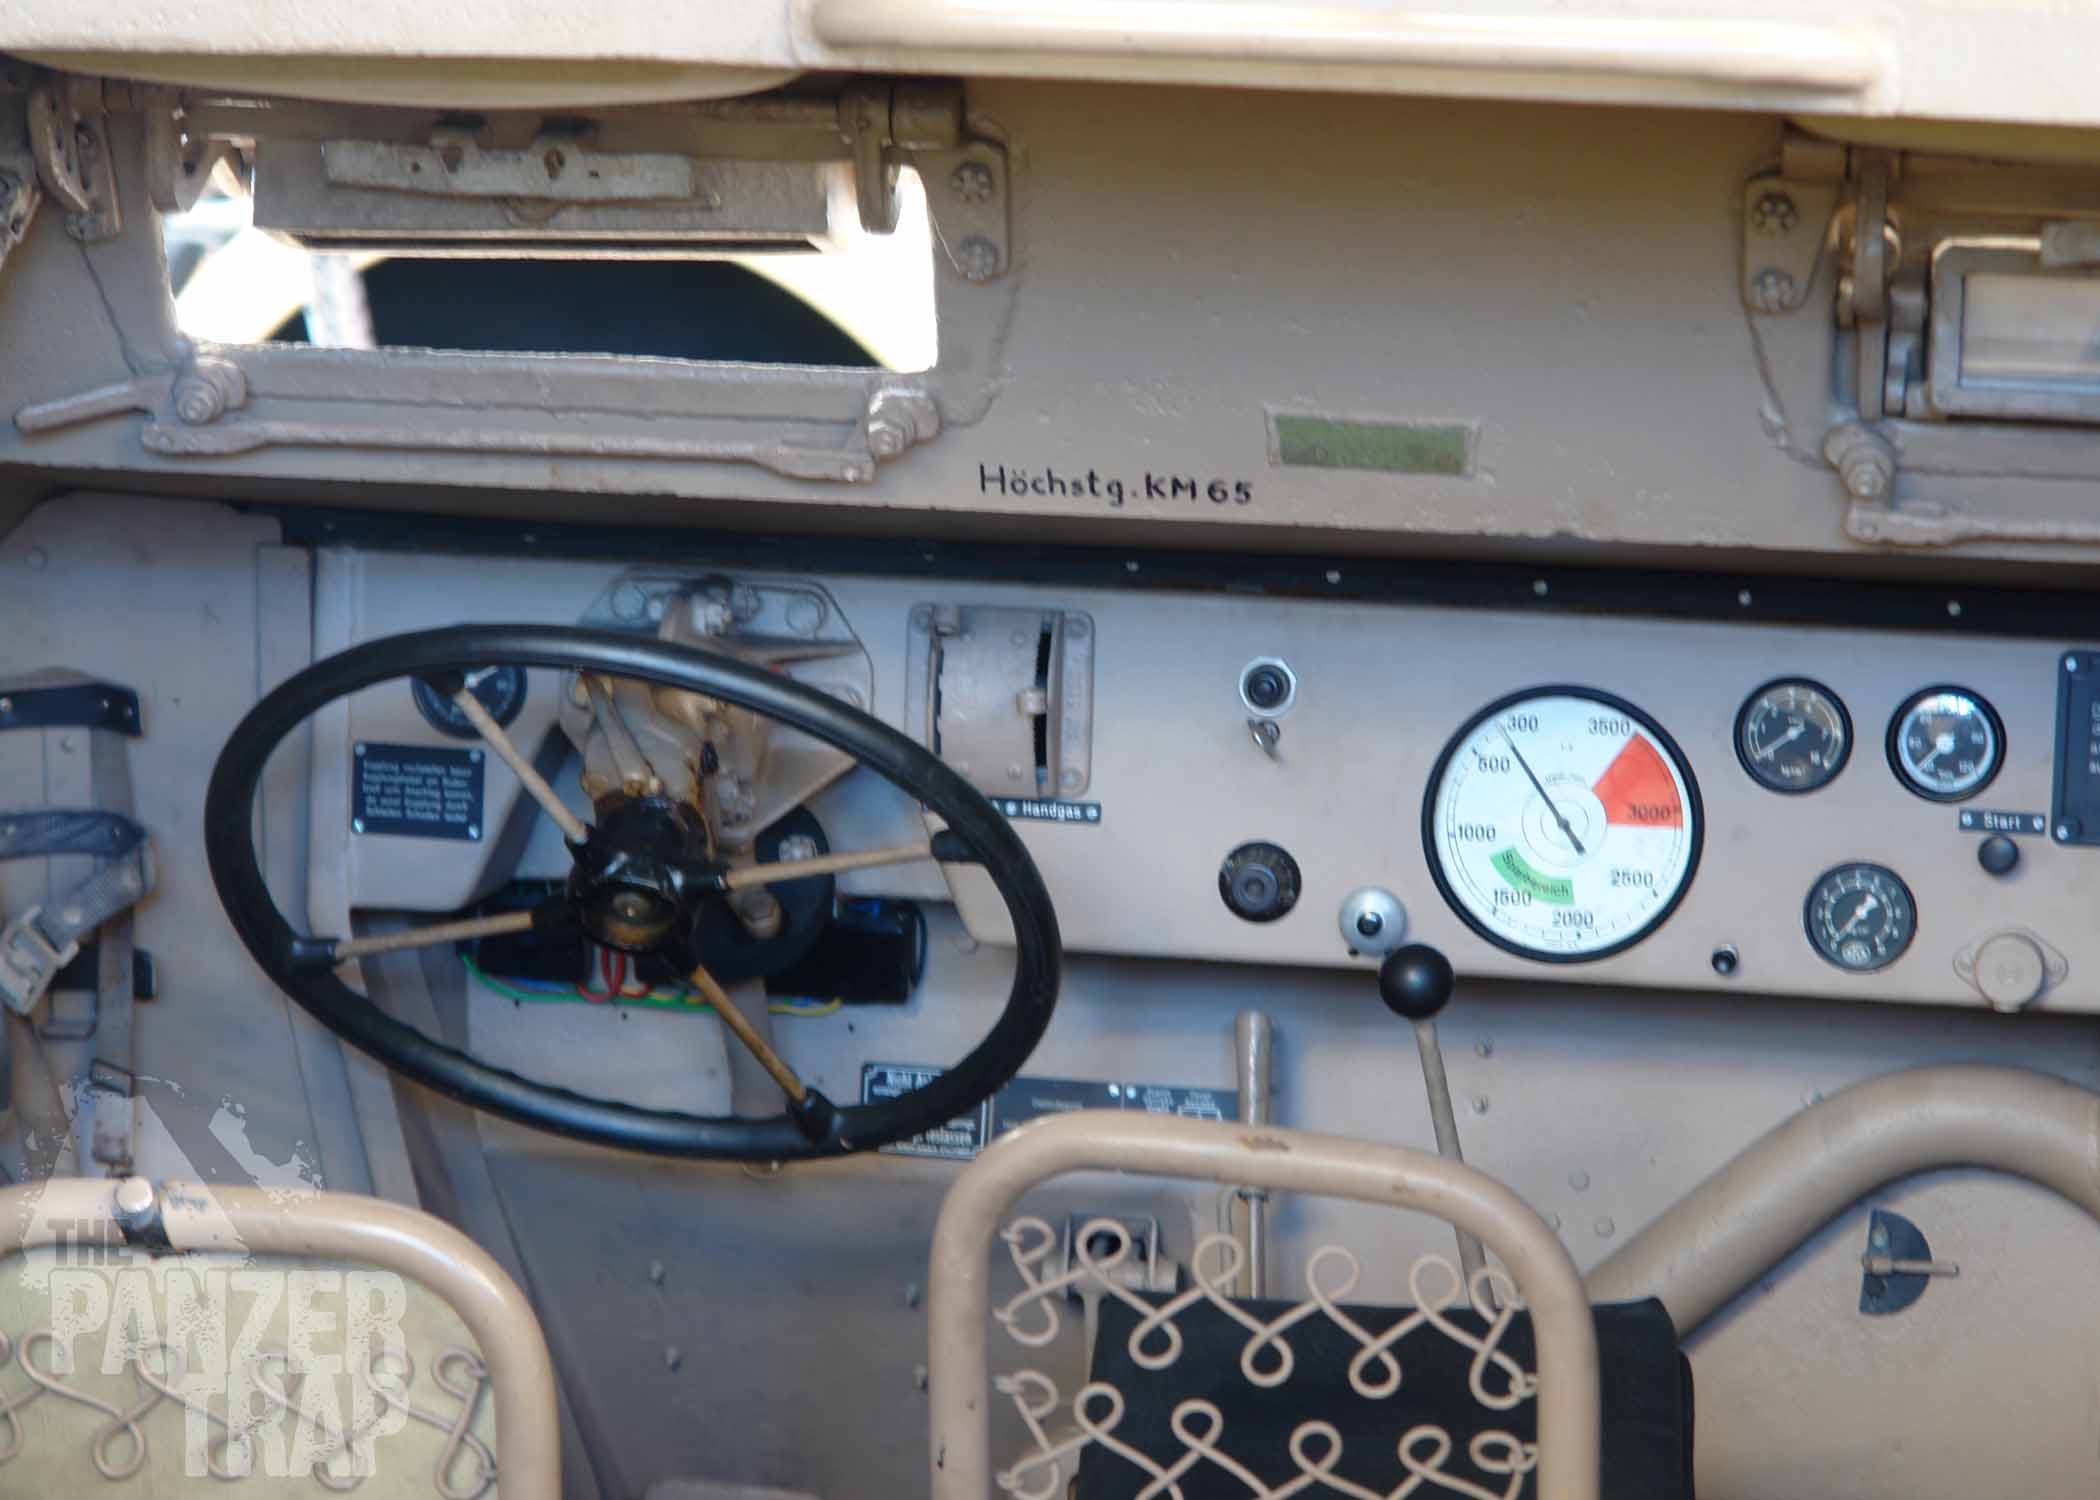
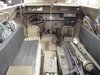
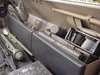
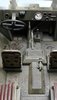
My first stumbling block is what colour to do the interior. A bit of Googling reveals a German Grey interior with the possibility of a lighter (perhaps Ivory) colour around the drivers area which wouldn't have been visible from the air...is this correct?
 
Thread owner
Do you mean an Sd.Kfz. 251/1 instead of a 250? (The 251 is the bigger of the two.) If so, you can still change the title of the thread using the buttons at the top right :)

Anyway, the interior could well be like you describe: the rear area in the same colour as the outside, the driver’s cab in ivory — I’m looking at photographs of the cab interior in the book Schützenpanzer by Bruce Culver and Uwe Feist (Bellingham: Ryton Publications, 1996), and where it’s clearly visible, all of them seem to show a pale-coloured front plate, dashboard, footwells, etc., just a bit darker than the large white speedometer in the middle of the dashboard. However, it’s also possible that the colour in the photos is dark yellow, since on many pictures of dark yellow 251s, it’s clear the whole interior is the same colour, and that would not have been ivory.
 
Thread owner
Do you mean an Sd.Kfz. 251/1 instead of a 250?

Indeed I did...well spotted! :flushed:

Anyway, the interior could well be like you describe: the rear area in the same colour as the outside, the driver’s cab in ivory — I’m looking at photographs of the cab interior in the book Schützenpanzer by Bruce Culver and Uwe Feist (Bellingham: Ryton Publications, 1996), and where it’s clearly visible, all of them seem to show a pale-coloured front plate, dashboard, footwells, etc., just a bit darker than the large white speedometer in the middle of the dashboard. However, it’s also possible that the colour in the photos is dark yellow, since on many pictures of dark yellow 251s, it’s clear the whole interior is the same colour, and that would not have been ivory.

This is pretty much what I've found, albeit all are in B&W and it looks pretty dingy down where the driver is anyway. I don't really trust museum photos for colour originality although they do provide help in many other ways.
I think I'm going to do a cream/ivory dash only, and leave the walls grey, it could get tricky in deciding where to end the lighter colour towards the grey otherwise. The metal walk-boards (?) in the back would be grey too, and the seat 'covers' probably grey as well.
There seem to be many variations to the dash compared with the very basic one that this model offers, so I'm guessing it's a very early one/APC only!
Thanks for the info too :smiling2:
 
Thread owner
First problem has been what appears to be an extension to the steering wheel which appears in a lot of the photos I’ve seen where the wheel is actually angled down. I had to bodge a bit of sprue & heat it slightly to form a bend...it should look a bit better when painted.

View attachment 322923

Also the back of the seats had obvious holes in the front that didn’t correspond to what was on the back of them. So I had to fill the back & drill new holes (little hand held drill arrived this evening to do this)

View attachment 322924
 
Hi George, working on a bunch of these in 1/87 scale as we speak. Fun build and numerous photos out there of them towing guns from 105mm on down.
Great choice for a Pak 40. Good progress so far.
Cheers, Rick H.
 
Thread owner
George,
I will sit in and take notes, so far things are looking good, I do like the corrected seats and do not worry too much about the steering wheel - out of sight, out of mind.
Cheers, Mike.
 
Thread owner
George,
I will sit in and take notes, so far things are looking good, I do like the corrected seats and do not worry too much about the steering wheel - out of sight, out of mind.
Cheers, Mike.

After having posted the steering wheel 'thing' it dawned on me that perhaps there was some kind of retractable arm (the thing I've made for it) that would slide back into the dash to make it easier for the driver to get in & out of the seat? If so, and I have no driver, then the steering wheel would quite possibly be pushed back against the dash...I'd assume. And Tamiya would be right in having it where the instructions say...
 
Thread owner
I don't really trust museum photos for colour originality
Most museum vehicles have been repainted, and certainly in the past, often on a “that looks good” basis instead of trying to get it looking the way it did in service. So yes, it’s a good idea to distrust those completely until proven otherwise for any given museum vehicle.

I think I'm going to do a cream/ivory dash only, and leave the walls grey, it could get tricky in deciding where to end the lighter colour towards the grey otherwise.
Sounds like a good enough solution to me.

The metal walk-boards (?) in the back would be grey too, and the seat 'covers' probably grey as well.
I’m not sure what the seat cushions were made of, off the top of my head, but if they’re smooth they’re probably leather and so might have been brown in colour.

There seem to be many variations to the dash compared with the very basic one that this model offers, so I'm guessing it's a very early one/APC only!
I don’t think the dashboard would have differed much between variants. The old Tamiya kit, with the rear end angling both forward and back, is an Ausführung B, which means produced until the mid-part of the war. Very early ones (Ausf. A) were similar, but had a couple of vision ports in the hull sides for the passengers, cooling vent hatches around the engine compartment, and other differences that aren’t as noticeable.

After having posted the steering wheel 'thing' it dawned on me that perhaps there was some kind of retractable arm (the thing I've made for it) that would slide back into the dash to make it easier for the driver to get in & out of the seat?
To enable the driver to get in and out, the steering wheel was angled backwards, not upright like it is in most cars:

251%2019.jpg
 
Great photos.
Regarding the perforated seat backs- these are supplied in etch AM sets and not supplied in the kits except for what appears to be spares attached to the inner hull side.Any one know what their function is?
Jon.
 
Thread owner
Jon, do you have a picture (for example from an instruction sheet) to show what you mean?
 
Several variants had fold-up jump seats eg. /16 Flam were right behind driver & co-driver seats on the hull sides. Maybe those? PaulE
 
Thread owner
Most museum vehicles have been repainted, and certainly in the past, often on a “that looks good” basis instead of trying to get it looking the way it did in service. So yes, it’s a good idea to distrust those completely until proven otherwise for any given museum vehicle.


Sounds like a good enough solution to me.


I’m not sure what the seat cushions were made of, off the top of my head, but if they’re smooth they’re probably leather and so might have been brown in colour.


I don’t think the dashboard would have differed much between variants. The old Tamiya kit, with the rear end angling both forward and back, is an Ausführung B, which means produced until the mid-part of the war. Very early ones (Ausf. A) were similar, but had a couple of vision ports in the hull sides for the passengers, cooling vent hatches around the engine compartment, and other differences that aren’t as noticeable.


To enable the driver to get in and out, the steering wheel was angled backwards, not upright like it is in most cars:

251%2019.jpg
As per out Ferret vehicles.
 
Thread owner
in the lower fret,the two seat backs are top row.These are Eduard.They are 2nd and 3rd from left.
What I meant was a picture of where you say they should be fitted, as that’s the part I don’t quite understand :)
 
Thread owner
I've found one of these on ebay. Not sure that it's really worth me getting it since I've never used photo etch before...:flushed:
There has to be a first time for everything, but my advice would be to not bother with it just yet, and also to only buy it for a kit that’s better anyway than the old Tamiya ones you’ve been building so far. I find adding expensive photoetched parts, metal barrels, etc. to kits that are iffy in basic dimensions is approaching putting pearls before swine. Sure, you can make a very good model out of an old and relatively inaccurate one, but you might as well save yourself a lot of work by beginning with a more accurate one and then replacing the details it didn’t get quite right.
 
Hi, I've built this old Tamiya Sdkfz251, it's an Ausf C, but has the rear bench seats of the earlier A or B. I scratched new bench seats & the storage bins that fit behind the seat backs.
Photos for discussion purposes only.
View attachment 322976View attachment 322977
 

Attachments

  • 25103.jpg
    25103.jpg
    3.5 KB · Views: 0
  • 25105.jpg
    25105.jpg
    3.5 KB · Views: 0
The /4 prime mover variant had ammo bunkers in place of front left & rear right seats. Otherwise same as /1 as far as I can tell. Although, I think dropped with Ausf D. PaulE
 
Status
Not open for further replies.
Back
Top