Stunning build!

-
-
Thank you Theuns
Of the large Airfix kits this is my personal favourite (although I do fancy the GR. 3 Harrier!) so [COLOR=rgb(39,42,52)]i'll be following this 1/24 build with interest.[/COLOR]
You're doing a fine job with the interior and I look forward to further progress.
Will you be doing a Battle of Britain Stuka?
Cheers
PaulComment
-
I will do a BoB one yes.
I got all the kit's bits for the engine painted up aswell as the frewall. After they go in I will make and add the electrical, fuel and controll links from the firewall to the engine.
It will have to wait a bit, Im off to go do my bi-anual PPL "check ride" and the wind is pumping with a cold front moving in....going to be fun.
TComment
-
After a fight I finally got the engine to fit, the one forward radiator hose is abot 2mm to short and I will have to fill this in.
The kit is also lacking all the fuel, electrica and controll links to the engine from the firewall so these will have to be made and installed but I will do that after painting is complete.
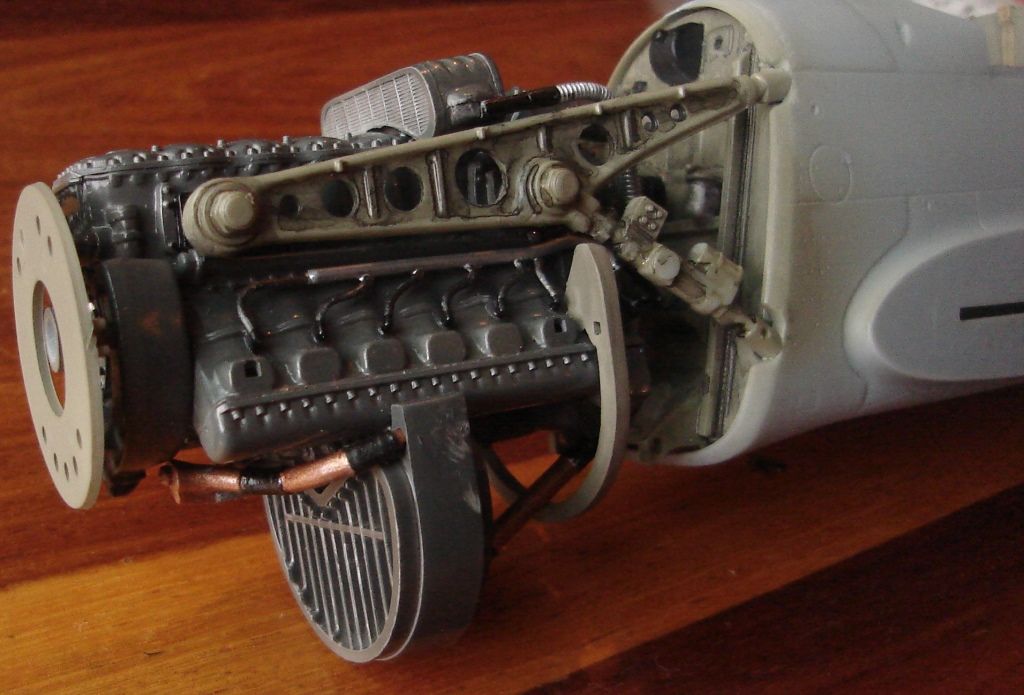
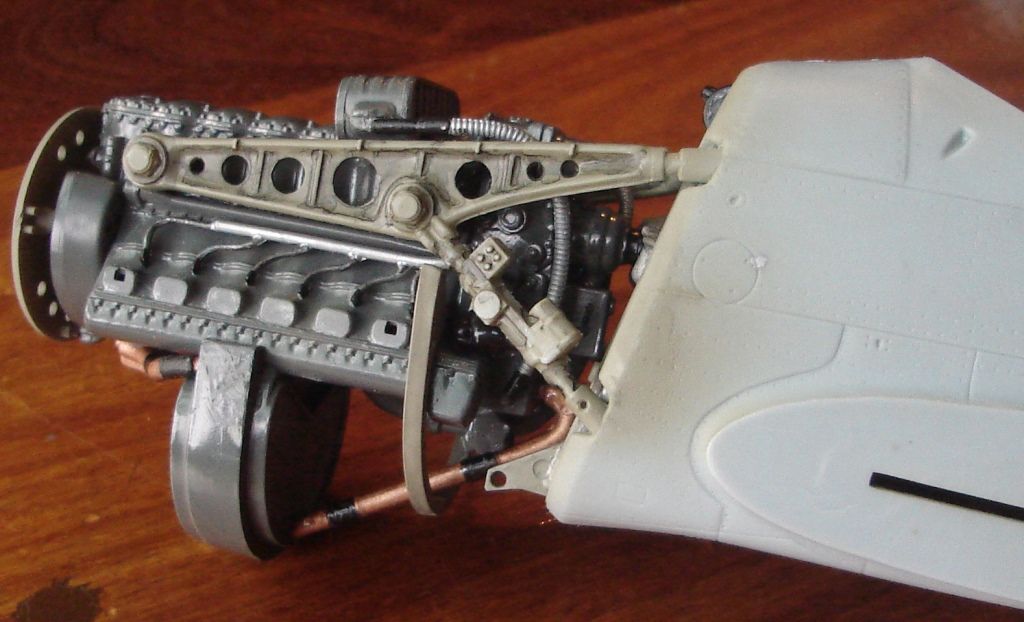
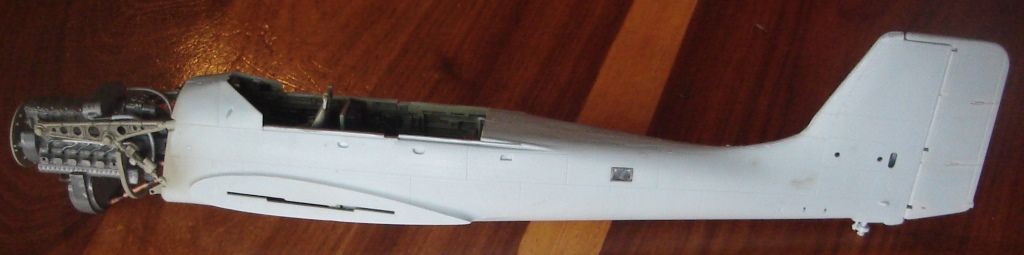
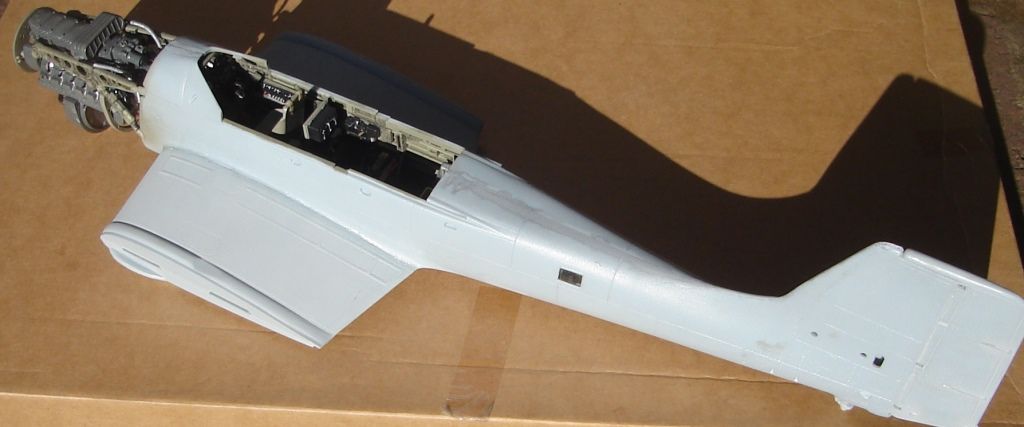
The fuselage fit on the bottom is poor and loads of filling/sanding will be needed, this is one BIG model!
TheunsComment
-
Looks good Theuns. How did your 'check ride' go?Comment
-
Hi Joe, thanx.
Check ride was OK, the trip to the CAA to get the "papers" was OK so all good for the next two years .
TheunsComment
-
I was not happy with the very pebly rough texture of the moldongs and the raised rivets so I will sand it smooth and drill out each of the rivets witt a .3mm bit and pin vice.....thats gonna be fun!Comment
-
that's looking great, like the fully detailed officeComment
-
Looking good Thuens. Yes, this is one rather large aircraft! In 1/32 it is big in 1/24 it'll be a monster!
keep up the good work
PComment
-
Thanx.
I tested the rivet drilling on the underside of one inner wing pannel and did not like the results...it is to haevy.
I will have to come up with some other way to get the rivet detail back...
TheunsComment
-
[COLOR=rgb(50,61,79)] [/COLOR]I was not happy with the drilling of the rivets, it was to heavy so I put a cone shaped grinding bit into my dremmel to make new reccessed rivets and the results are allot more subtle.[COLOR=rgb(50,61,79)]I will do the rest of the airframe the same way.[/COLOR][COLOR=rgb(50,61,79)]There is a substantial gp under the bottom of the wingroot fairing that will need filling, tht top seam is OK.[/COLOR]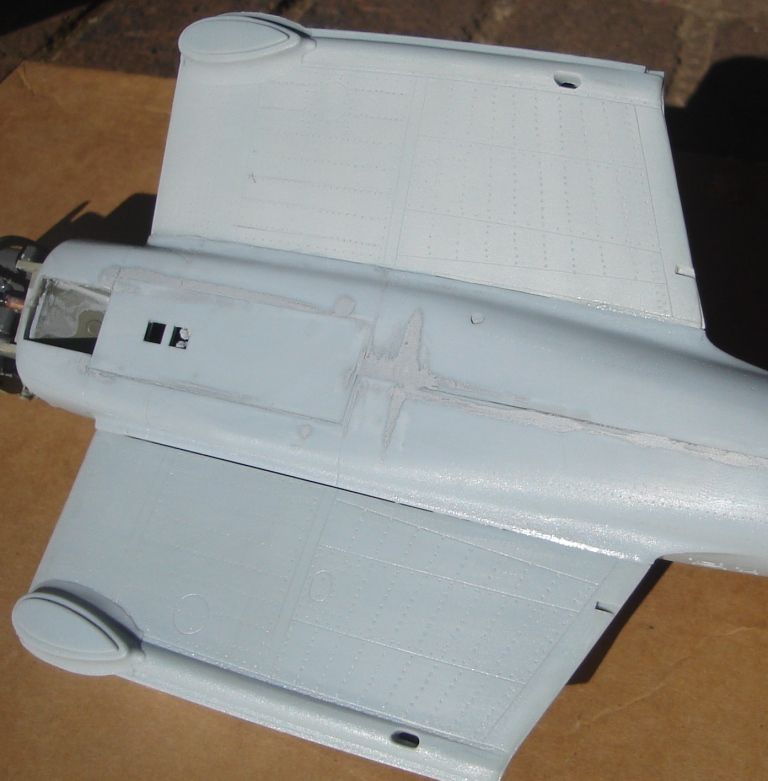
TheunsComment
-
I started with this project again...
The wing fit is not to good and needs some work.
Theuns
Comment
-
what stumps me with this kit is that one side of a part will fit the rest beautifully, like the tail root fairing to the fuse, yet the other side (lined up the same way) does not fit atall and will need allot of filling and sandig....
TheunsComment
-
Does anyone maybe have the 4 views of what the standard RLM splinter scheme on the 87b looked like?
Thanx
TheunsComment


Comment