
-
-
I am still here Doug. Coming along nicely. I may see a helicopter in my future.SteveComment
-
See you are having fun with this one. For your wind deflectors, if you want thinner clear plastic, use the plastic covers that come with some food products and cement in place with pva.Comment
-
I do hope next year! In 1/48 would be a good companion to the SK!! I was after the Fujima Wasp but wasn't able to find one, other than eBay and I don't like buying from eBay!!
Fun is not exactly the word I would use for this one Mike - Oh No!!
At the moment, I have selected a piece of clear plastic from the 'King' I plan to cut to size using a waxed length of cotton. The Wasp kit has 2 x stretchers, (for the Scout conversion), that I can also chop to size and add as the solid lower portion than some plastic card for a triangular bracing piece at the bottom!! IF, I can I will make them from these pieces, If not plastic card and food container plastic as you suggest!!! (Thanks for the tip by the way :thumb2: ).Comment
-
Todays progress!! I made some!!!
I managed to spend the vast amount of my free time removing flash and seams from some quite small pieces. A couple less than a cm long. However, I did manage to get the main rotor gearbox,, ECU struts, (engine), then the drive shaft, intermediate gearbox and the MGB support struts, (The tiny bits), fitted. Sounds a lot but they're so small that they collectively amount to sod all really!! Oh!! I nearly forgot, the single hydraulic reservoir!! (Rumoured to have come from an aileron ram on a WW2 bomber!!)
Eyes couldn't take any more - I'm too old for 1/72!!!
Almost in a position to prime - almost!
Pic 1
Comment
-
waspie
( quote)
Eyes couldn't take any more - I'm too old for 1/72!!!
THATS WHY Doug i said go for a 1/32 scale chopper then no trouble seein them bits lol but you are doin a great job on this little beast stick at it boyo
chrisbComment
-
Arm was up my back on this one Chris. LF are currently the only Wasp producer and it happened to be in 1/72. The next is a tad bigger, 1/48, wifeys not to happy as its a Russian chopper and she thinks I've sold my soul!! Hopefully if Airfix do bring out a Wasp it'll be at least 1/48 as that would compliment the Sea King. In the real world the pair were a good team. The SK would search and locate submarines then call in the Wasp as a weapon carrier to drop DC's or Torpedo's. ( I can but dream). Either way, it'll be a while before I attempt another 1/72 helicopter!!Comment
-
Looking good Doug!
LOL! 1/72 too small, such nonsense! You need to build one in 1/144!
 Arnold Judas Rimmer BSc SSc
''Happiness is a Triple Fried Egg Sandwich with Chilli Sauce and Chutney''Comment
-
YES Doug i think Arnie is right as they are dear little kits in 1/144 scale as on my USS NIMITZ carrier i built 54 revel aircraft includein 4 choppers in 1/144 scale an they were 2 sea hawks an one super sea stallion an a even smaller R/N lynks an that was a test on the ole eyesight then but they looked very good even fitted nav lights an motors for engines in the hawkeyes SO its all possible an Doug HAVNT you got a head an eye magnifiyer to see the small parts as i found it was very helpfull on the ole mark 1 eyeball lol
chrisbComment
-
Ok perspective time!! I have sat on Nimitz 1:1 flight deck in a Wasp and the rotor diameter is just as wide as Nimitz white centre line when landing zoomies!!!
That said, in 1/72 my eyes simply struggle to cope!! And nope, I as yet don’t have a magnifying aid. I only wish I did!!! It’s high on my wish list. :thumb2:Comment
-
Comment
-
More of the same today, loads of filing and sanding all the undercarriage parts. Then a bit of 'clagging' I would have said glueing but for this, 'clagging' seems a better term!!! Trying to sort out the geometry of the bits then 'trying' to get them to magically appear in the right place!! The instructions show locating holes yet mysteriously - there ain't any!! so it a case of applying the TeT, letting it start to set then attaching the part, if I attached the part too early it simply slipped away from its nominated location. (When is that third and fourth arm when you need it?).
Oh! I did drill a few holes in the struts to locate the oleo's but that was about it.
I only managed to complete the rear assemblies due to fighting it out with BMW over my MoT. "Sorry can't fit you in until your MoT is a week out of date" So I can't use my car!! Aghhhhhhhhhh
I digress.
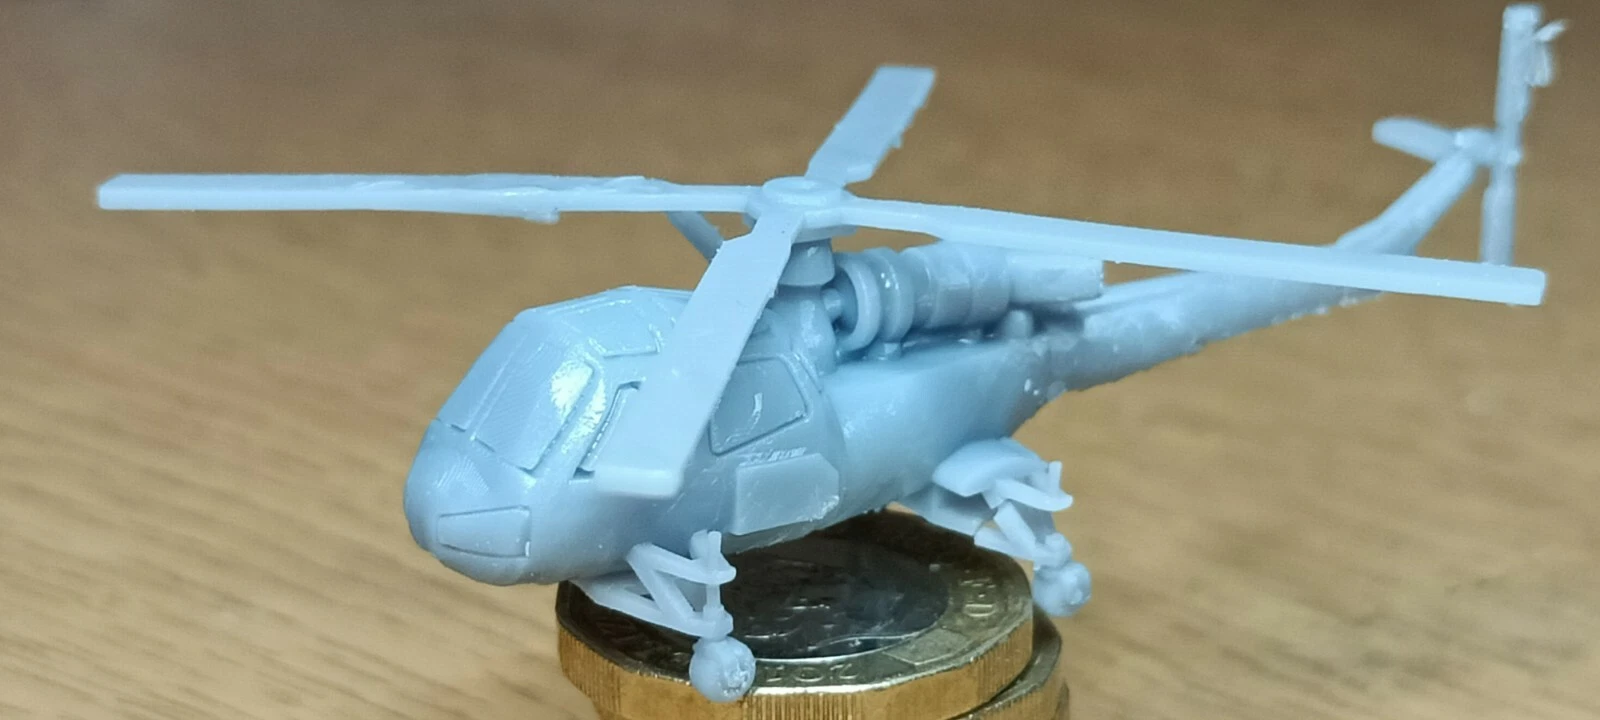
Pic 1
Starboard undercarriage in place! (Ish) Wheels castored fore and aft as it will be on the ground!!
Pic 2
Both rear U/C's in place. Not the easiest of jobs. I have to say. A bit of help in the form of better instructions and actual locating detents would have been useful. Luckily, I have quite a few pics I can use for reference to ensure I get the geometry correct!!! It would be easy to fit the U/C wrong!
That was/is it for today. The front is even fraught with more issues. A job for another day.
As they, 'that's all folks'. What a day!
C&C's as usual - all welcomed.Comment
 :tears-of-joy: :tears-of-joy:
Comment