All right, the moment of truth . . . the unveiling of the paint . . . I have to say I like it but now it's just crying out for some chipping and weathering (LOL! A build is never finished!)

-
-
Doctor Cranky is salivatin' for this one to get some weathering but I'm going to start the weathering with the chassis and the Zombie crucher/crusher/roller first!
Here are a couple of more pics, hope you won't mind:Comment
-
Amazing what can be done with a mix of parts and a good imagination, I wouldn't know where to start with something like that.
Looking forward to the weathering, keep it coming.Comment
-
Thanks, chap. I'm letting everything sit overnight to dry thoroughly and then I will have more tomorrow. Stay tuned in . . .Comment
-
Virgil just a question about your procedure, you go to so much trouble to get shading in your base camoflage colour of grey but then only put a single tone of the second camoflage colour, the brown. Do you think it would generate a more even effect if you did the shading over the two colours so apply the grey and then the brown and then applied filters over them both?
It seems like such a lot of the earlier work with the grey has subsequently been covered over with the brown camoflage.Comment
-
Richard, you are right in that I flipped it here and ended up with a lot more khaki . . . which is fine with me, it's that voyage thing where you never know what's going to happen next, but I did add several colors to the yellow. If it's any help, here's where I am now . . . I unified the whole body with an airbrushed wash of brown/rust color . . . which in essence has flipped the dominant color from grey to yellow . . . so this thing is looking more like a desert fighter than a city fighter. LOL, we'll have to reinvent some of the story!
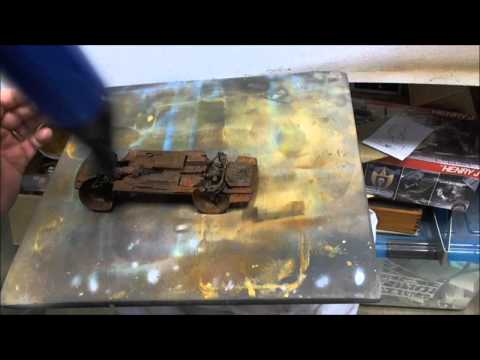
All right folks, the painting continues before the prepping for weathering, which is going to include in the first round a little bit of salting on the chassis . . . here's a round of pictures to give you an idea of where it's at. The body was sprayed with a thinned out rust . . . and the chassis has been give several coats of rust and brown . . .Comment
-
Here's a better angle . . .
Now, I went ahead and dry brush a mixture of stone and grey randomly to bring out the panel edges and lots of the details . . . which also helps unify all the parts . . . I think you can see it well in these few pics . . .
Remember that nothing has been weathered yet. I still have to add the chipping and some washes, etc . . . we are still far from getting done.Comment
-
Folks, it is germaine for the impending weathering process that I ask you to watch how easily the "salting" method it is to apply, and the best way to show you is through this video
It's so easy you will run and try it. I hope so! :lol:
Comment
-
Here's part two. Let me know if you have any questions . . . remember that there are no rules (and therefore no mistakes) when it comes to this method . . .
Comment
-
All right, after the three vids, here's the progress I've made. Remember that this has all been the painting process . . . weathering has yet to began, and it probably won't until mid week . . .
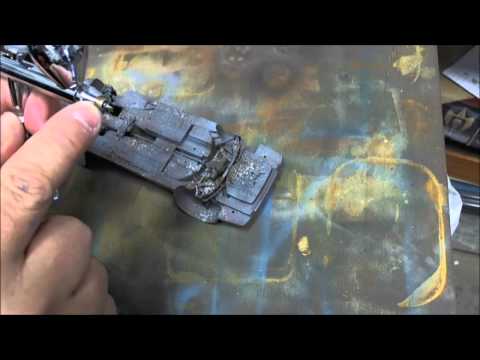
Here's the chassis . . . after the salting and a few of the other elements put in . . . (I will weathering everything without the wheels and tires. I will do them separately.):
I like the way the aluminum of the wheels looks cruddy and beat up . . .
Stay tuned in for more . . .Comment
-
Here are some pics of the body awaiting weathering . . .Comment
-
Excellent salt technique, its making me want to break out the salt shaker and put rust on everything, looking at your work reminds me of an old 80's gamesworkshop game called Car Wars, i think it was done by Steve Jackson, very armoured cars and trucks trying to survive on the open road. can't wait to see some zombie brain splattered across this one.Comment
-
Thanks, Darren . . . the beauty of the salting process is that it is highly addictive, and therefore raises one's blood pressure! LOL.Comment
-
hey cranky. this build is starting to look slightly absurd. i love it.
i watched your videos on the salting, which were very good by the way. but i have 2 questions:
1. do you put down a clear coat before salting?
2. does the salting have a negative effect at all on any of the paint types? acrylics imparticular in my case since that's what i use.
thanks.Comment
-
Jim, some times the salt can make the paint look bleached or faded. Which is not always a bad thing. If you really need to remove the "bleaching" I believe thinners is the way.
Virgil, this is one freaky commuter car! I could use one of those some times over here.
Ian MComment
Comment