
The "Other" Babylon 5 Starfury: Sheridan's "Tigermeet" fighter
Many years ago in the mid 90s, I got one of these kits and built it but not very well. I hadn't been modelling since I was a teenager and the paints I used were rubbishy acrylics that I was using to paint metal figures for AD&D, so the end result wasn't very good and in the years since, its been a bit banged up and one of the flaps has broken off. I also managed to get a lot of silvering in the decals because I hadn't worked out you can't apply decals to a matt painted surface.
So now to the present day and I was able to get one off eBay without having to remortgage, in fact I got the Special Edition one - whoo hoo! Badges ahoy!


So I was thinking I'd build the Tigermeet... er I mean Sheridan Starfury...
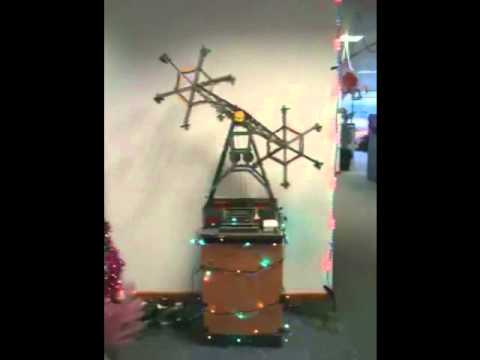
Just for comparison, here is the original Starfury I built in the 90s:


Can't honestly say I'm very impressed and there are all sorts of things wrong with the guns etc - one of the tines broke off during one of my various house moves since the mid 90s, its around somewhere but its one of those things you can't find when you are looking for it but turns up regularly at other times!
This is therefore my opportunity to build a better version. So I've gone a bit mad and ordered the lighting set from Starship Modeller and the coloured lighting parts from Don's Light & Magic (scroll to bottom of page to get past the ST rubbish )
)
Today's Koshism: A stroke of the brush does not guarantee art from the bristles.
[ATTACH]38532.IPB[/ATTACH]
[ATTACH]38533.IPB[/ATTACH]
[ATTACH]38534.IPB[/ATTACH]
[ATTACH]38535.IPB[/ATTACH]
[ATTACH]38536.IPB[/ATTACH]
Many years ago in the mid 90s, I got one of these kits and built it but not very well. I hadn't been modelling since I was a teenager and the paints I used were rubbishy acrylics that I was using to paint metal figures for AD&D, so the end result wasn't very good and in the years since, its been a bit banged up and one of the flaps has broken off. I also managed to get a lot of silvering in the decals because I hadn't worked out you can't apply decals to a matt painted surface.
So now to the present day and I was able to get one off eBay without having to remortgage, in fact I got the Special Edition one - whoo hoo! Badges ahoy!
So I was thinking I'd build the Tigermeet... er I mean Sheridan Starfury...
Just for comparison, here is the original Starfury I built in the 90s:
Can't honestly say I'm very impressed and there are all sorts of things wrong with the guns etc - one of the tines broke off during one of my various house moves since the mid 90s, its around somewhere but its one of those things you can't find when you are looking for it but turns up regularly at other times!
This is therefore my opportunity to build a better version. So I've gone a bit mad and ordered the lighting set from Starship Modeller and the coloured lighting parts from Don's Light & Magic (scroll to bottom of page to get past the ST rubbish
)Today's Koshism: A stroke of the brush does not guarantee art from the bristles.
[ATTACH]38532.IPB[/ATTACH]
[ATTACH]38533.IPB[/ATTACH]
[ATTACH]38534.IPB[/ATTACH]
[ATTACH]38535.IPB[/ATTACH]
[ATTACH]38536.IPB[/ATTACH]


Comment