Scale Model Shop

Collapse

Stand by for Action, we are about to launch Stingray!

Collapse
This topic is closed.
X
X
 
  • Time
  • Show
Clear All
new posts
  • Guest

    #1

    Stand by for Action, we are about to launch Stingray!

    So for a bit of a change after a long and complicated bar-armoured Scimitar build, I thought I'd return to some simpler pleasures:

    I picked this up on eBay a while ago - there is another version out there which has lights and motors and stuff, but I went for the "vanilla" version. Its a remarkably simple kit and looks very much like the wonderful vehicle I remember from my childhood

    As usual there are some discrepancies with various references, for example some model shots from the series have 2 glass portholes in the side of the cockpit but as you can see from the picture above that one doesn't show it! Plus the drawing shows torpedo tubes on the fins which don't appear elsewhere.

    To get you into the mood try this out:


    The biggest failing with this kit is it has nice clear windows but nothing in the cockpit apart from a hole for a light and opening for the "periscope" which doubles as an on/off switch for the lights in the version that has electronics.

    So my plans are:

    1) Add light(s) for the transparent impeller-thingy

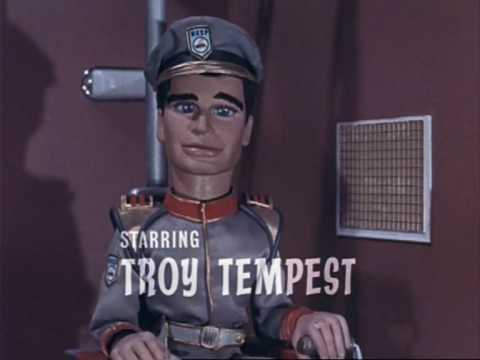
    2) Scratch build cockpit and add figures for Troy Tempest and Phones (but no Marina I'm afraid)

    3) Add light into cocklit

    4) Hide batteries in a scenic base that supports the model

    Anything can happen in the next half hour... er... year!
  • papa 695
    Moderator
    • May 2011
    • 22851

    #2
    I don't think you know what easy is Andrew, you allways add that SOMETING to your builds, and i'm looking forward to this one takes me back to my youth please keep us updated

    Comment

    • Dave W
      • Jan 2011
      • 4713

      #3
      It will be a great disaster!.No,it should be a good,fun build.I look forward to seeing it built and the extra detail you are going to add.

      Comment

      • Guest

        #4
        I loved Stingray as a kid. I always prefered Altanta to Marina, voiced by Lois Maxwell (Miss Moneypenny). I look forward to seeing it, Andrew.

        Keith

        Comment

        • Guest

          #5
          Originally posted by \
          I don't think you know what easy is Andrew, you allways add that SOMETING to your builds, and i'm looking forward to this one takes me back to my youth please keep us updated
          Easy? Hmmm, rings a bell somewhere... I do easy sometimes, I built a Mustang III earlier this year which was mostly OOB - well apart from changing the decals and making a landscape base to represent it in Italy... then there was um...

          (10 mins later) oh yes the Rafale M - that was OOB, well apart from the pilot which was a resin addition and the stand to put it into the flying pose...

          Comment

          • yak face
            Moderator
            • Jun 2009
            • 14072
            • Tony
            • Sheffield

            #6
            "anything can happen in the next half hour!" great choice andrew , im sure its going to look fantastic . Pity you cant get a Terrorfish to go with it ! cheers tony

            Comment

            • yak face
              Moderator
              • Jun 2009
              • 14072
              • Tony
              • Sheffield

              #7
              Edit to my last post: ive just been googling (!!) and apparently Warp resins did a Terror fish kit complete with launcher ! tony

              Comment

              • Guest

                #8
                That's a really change Andrew!!! I'm looking forward to see this one.

                It's risked, but I believe that I never saw or this series was done here (spain).

                I supose it was similar a "sea quest"?

                Polux

                Comment

                • Guest

                  #9
                  but i loved Marina,lol,this is going be a good watch

                  mobear

                  Comment

                  • Guest

                    #10
                    ...and so we begin...

                    First off lets dispose of some of the "toy" features, the most visible on being the huge "spotlight" periscope that doubles as a handle so you can waggle the diving planes! This is a long stick that goes through a hole in the cockpit roof, the floor and connects to the strut that joins the diving planes.

                    Blanking off the hole in the roof then gives me a flat surface where I can build a proper periscope from chopped up pieces of the original connecting stick:

                    Next we will look at the cockpit itself. The original model comes with nothing more than a flat plate and a transparency, through which you could mount a light, but since it would be illuminating nothing, whats the point? So what should the cockpit look like? Here is a selection of pictures and screengrabs I've collected to give an ieda:

                    This next set of photos was taken at the Smallspace model show back in July and shows a scratch built 1:32 scale Stingray:

                    Lovely 60s internal colour scheme there

                    So lets start with cutting a hole in the floor and mounting some seats and consoles...

                    I'm afraid that as usual the white plastic is glaring up a bit there, but you should be able to see the hole in the floor, the central consoles and the side panels starting to develop. The seats are a couple of cheap resin a/m jobbbies - the cheapest I could find at Hannants, so I've no idea what they are now as the packaging got thrown as soon as they arrived! The crew will come from a set of US chopper figures from PJ Productions since they have headphones and peaked caps - okay they might be baseball caps but thats close enough since you will hardly be able to see them inside! The floor has been painted gun metal to replicate that shiny black metallic floor you see in the screengrab.

                    The roof of the cockpit is either beige or grey depending upon the picture you look at, so I've pumped for beige - it is the 60s after all! I've also painted the lower parts red. I thought about trying to mask the transparency but the idea just didn't appeal so I'm going to compromise and leave it alone and let the paint just show through instead.

                    Next, lets look at how this is going to be mounted. Since I will be doing lights, I need a way to pass power up into it as I don't' want to put the batteries inside the body, even though there is a battery box moulded into the lower hull. Speaking of which it now gets in the way of the cut out from the cockpit, so that needs to be trimmed...

                    So, I want to mount the batteries in a box in the stand - just like I do with the Babylon 5 Starfury. I'l also need 6 volts for the LEDs which is another reason I can't use the built in battery compartment as that only has room for 3 AA batteries. So we return to the trusty technique I used for the Aliens Dropship and mount a brass tube to accommodate an acrylic rod as the support from the base. Supplied in the kit is a panel to fit over the battery box which is supposed to take screws. This is an ideal place to out the tube:

                    The base then will be large enough to provide a good support and hold the batteries:

                    Maplins sell these things for a few pounds and they are very sturdy. My plan is to disguise it as rocks and have some green seaweed tendrils which means I can paint the acrylic rod partly green as if it were seaweed! There is a slot cut into the upper surface of the connecting rod to take the wires that will connect to the model. The tip of the rod will have a socket mounted into it and there will be the connector pin at the end of the tube in the model to provide the electrical connection.

                    So finally for this update (I've been working on this for a couple of days and hadn't got round to posting before now) what about the lights themselves? Well the plan is for 3 LEDs, one blue, one green one red. The red one will provide some subtle lighting for the cockpit while the blue and green will light the transparent thingy at the back which is NOT a propeller.

                    The blue one is now glued into the back plate of the impeller thingy and when lit looks a bit like this:

                    Then the green LED will mounted in the hull just behind the impeller to give a green surrounding glow like this:

                    It doesn't come across too well in the photo as the blue tends to dominate but the green effect is quite noticeable to the naked eye.

                    Comment

                    • Gern
                      • May 2009
                      • 9273

                      #11
                      ..... and you said this was going to be straightforward and easy!

                      Gern

                      Comment

                      • papa 695
                        Moderator
                        • May 2011
                        • 22851

                        #12
                        Great work so far Andrew I'm going to love watching this one unfold

                        Dave like i said Andrew dosn't know what easy means

                        Comment

                        • Guest

                          #13
                          Simply brillant.... The base and your idea is amaizing.

                          Comment

                          • Guest

                            #14
                            so liking this so far Andrew, keep posting, you have me at the end of my seat waiting for more

                            great work

                            Comment

                            • mossiepilot
                              • Jul 2011
                              • 2272

                              #15
                              i'll enjoy watching this one come together. I loved the show, Jerry Anderson was king when I was young.

                              Keep the pictures coming mate.

                              Tony.

                              Comment

                              Working...