Theme editor

Scale Model Shop

Academy 1/32 F16i SUFA

BarryW

SMF Supporters
Joined
Jul 23, 2011
Messages
6,145
Reaction score
457
Points
83
Age
70
1/3
Thread owner
My next build is a colourful one, the box
20250227_205258851_iOS.jpg

I have heard a lot of good things about this kit and on opening I get a real quality feel just from how it packed.
20250227_205339094_iOS.jpg
Now for some of the contents
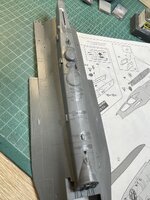
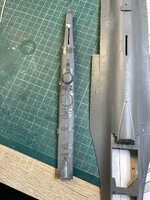
a small etch frame with a few brass pieces including the nose probe.
20250228_114353151_iOS.jpg

The decals look to be very nice indeed, printed by Cartograph, two large sheets.
20250228_113932840_iOS.jpg
A couple of pages from the instructions. Decent enough but not the best I have seen.
20250228_115229663_iOS.jpg
Worth taking a look at the transparencies. A beautifully clear set and one that has the tinted canopy. The clear canopy is so clear I missed it with the camera!!!!!!!!
20250228_114259979_iOS.jpg
Eduard canopy mask set. A little disappointing as it covers the canopy, of course, and the wheels but there are a lot of transparencies without a mask. Tape etc will need to be used not really a big deal.
20250228_114010250_iOS.jpg
The Quinta Studio detailing set. These are the best money can buy and boy, what a lot of money it cost..... The most expensive aftermarket set I have bought. But it is good, very good and will really make the 'pit pop.
20250228_114105865_iOS.jpg

My room cleaned up, materials restocked, sprues labelled and in the rack - ready to cut plastic,,,,
20250228_132359714_iOS.jpg
 
Thread owner
I did something unusual for me. Before starting I washed all the sprues in lukewarm soapy water. It looked as if the might be some grease on some of them.

That said the plastic is very nice, crisply moulded, soft but not too soft, and as I found nice to work with. No flash, no burring and thoughtfully laid out on the sprues.

Construction starts with the seats and cockpit.

Before construction I had to remove detail from seats and cockpit panels.

Some of the panels are thin plastic and I find the easiest way is to attach them to lolly sticks with double sided tape. They can be held easily as I sand the detail off.

20250301_121314208_iOS 1.jpg

Here are the seats and cockpit pretty much ready. The fit of all parts is excellent. The lighting is catching on the parts in a way that suggests detail is still moulded in, it isn't. I have removed sufficient for the Quinta set. I will prime then spray the base colours before gluing the Quinta set into place.


Below a test fit of the seats, mainly to make sure that the canopy prop is at the right angle.


20250301_141252231_iOS.jpg

I will build a few more subs before batch spraying.
 
Back with a 1/32 plane and the best 3D decals. 👍 Looking forward to this. Strange though about the masks. I've never seen tinted transparencies before.
 
SAME HERE an Barry i dint know you had finished the Tornado so i will have a look see hope this kit is good for you sir
chrisb
 
Thread owner
I have been working on a few subassemblies including the 'spine' as you can see below it is in two pieces with a join that is hard to sand without destroying some detail. It does fit perfectly into place though.
Click image for larger version  Name:	20250304_103731027_iOS 1.jpg Views:	0 Size:	386.5 KB ID:	1250356
Click image for larger version  Name:	20250304_103753370_iOS.jpg Views:	0 Size:	505.0 KB ID:	1250361
The wheel wells have a lot of parts but build up beautifully
Click image for larger version  Name:	20250304_103753370_iOS.jpg Views:	0 Size:	505.0 KB ID:	1250361
 

Attachments

  • 217.8 KB · Views: 0
  • 20250304_103731027_iOS.jpg
    20250304_103731027_iOS.jpg
    664.7 KB · Views: 1
Last edited:
Thread owner
I have been getting on with the cockpit.
The instrument panels
20250308_135228439_iOS.jpg

The ejection seats
20250306_145458149_iOS.jpg

20250308_135209738_iOS.jpg

20250308_135157929_iOS.jpg

There was a minor fit issue between the fuselage halves. I tried dry fitting time and time again, from different angles but always there was an issue in the same place. incidentally nothing inside was interfering with the fit.

you can see it below.
20250308_155419837_iOS.jpg

Here is the other side, perfect.
20250308_155423706_iOS.jpg

Clearly I will have some filling and sanding to do. Nothing major but given how well everything fit it was something of a surprise
 
Lovely detail on the panels and seats. Strange about the fuselage halves. Could it simply be that one half has warped slightly?
 
Thread owner
After gluing into place the rim of the canopy I decided to sand off a mould line.
First some sanding with a fine 1000 grade sanding sponge to remove the line.
20250309_122038761_iOS.jpg

After that I used 2500 grit sander then a 4000 grit polisher. Below is how it looks now
20250309_133229639_iOS.jpg
As you can see its far from perfect so I will continue to do some polishing with the 4000 polisher for a few minutes at the start of each session until I am happy with it. I prefer to do such jobs a bit at a time to break up the tedium.
 
Thread owner
A couple of pictures of the cockpit with the instrument panels dry fitted
20250311_152911859_iOS.jpg
20250311_152904473_iOS.jpg
Regardless of the instructions i am thinking that I might hand paint the cockpit surround black as it seems more appropriate.

I then went on to attach a lot of lumps and bumps and there are a lot of them.

20250311_154437933_iOS.jpg

20250311_105520713_iOS.jpg

20250311_153042731_iOS.jpg
 
Back
Top