Theme editor

Scale Model Shop

Ian M's 1/32 scale Bf 109G-6

Status
Not open for further replies.
Thread owner
Looks like you've got the Monica bug Ian! You're racing through this one

LOL I thought I was taking my time. There are actually few parts in what I have done. I recall building a 1/32 where there were more parts in the cock-pit than there are in the whole of this kit.....But then I might just be exaggerating a little. I have been know though to build a 1/48 aircraft in four days start to finish. :/


General question re 109g-6. would the early versions been in Africa/Italy. Most of the profiles I have found are all green and grey. (I fancy a bit of sand for this one (and an easier camouflage :P  )


Thanks Ian, Things are slowly coming back to me.
 
:/


General question re 109g-6. would the early versions been in Africa/Italy. Most of the profiles I have found are all green and grey. (I fancy a bit of sand for this one (and an easier camouflage :P  )


Thanks Ian, Things are slowly coming back to me.

The first G-6s started to reach front line units in February 1943, shortly before the final surrender of Axis forces in North Africa. They were certainly present elsewhere in the MTO, Italy etc. The tropicalised version featured a tropical intake filter and various other minor adaptations, but they were not factory finished in the RLM 79 (sand) scheme, which suggests they were not intended to go to Africa at a time of imminent defeat there. I'm struggling to remember an image of an early G-6, tropical or otherwise, in anything but a 74/75/76 scheme, subject to local alteration of course.


Cheers


Steve
 
Thread owner
They were certainly present elsewhere in the MTO, Italy etc.

Thanks Steve. Looks like I'm going to have to bite the bullet and get a mottle down then.


It was mentioned in the destructions that the early of the two versions in the kit was painted the same in Italy, Just with the Theatre markings the White Italy campagne So white Under wing tips, White fuselage band and white spinner...? If it helps you Steve the 'werknummer' was 160 717 flown by Hptm. Karl Rammelt of the JG51. You dont happen to be able to confirm the MTO white bits could You Steve? Also a picture of that tropical filter would be nice, maybe I can scratch one up...
 
Very nice start Ian. I like it ;)


PS: wow!! I cannot remember the last time that I see you building a model.......maybe were at seventy's......  :) :)   :)  
 
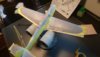
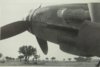
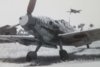
As for the markings, opinions seem to vary! Everyone agrees that there was a white theatre band.


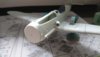
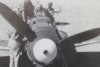
The white spinner would in fact be a partially white spinner, just the front part, similar to the other JG 51 aircraft in the pictures above. This is a good bet, but not certain.


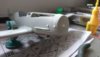
White wing tips? Some of II./JG 51's G-6s in Italy did have them, but some did not. It's about a 50/50 call.


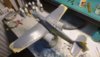
Some profiles show a white or yellow rudder with victory markings. I'm not sure where that comes from as, again, it is not visible in images I have seen. I have a book of rudders (I know, I know) and Rammelt's is not in there. It is so prevalent in profiles and decal sheets that I wonder if there is some good evidence for it which I don't have.


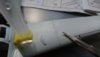
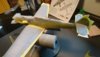
I can't see evidence either way for the undercowling to be anything but RLM 76. If it was anything else it would have been RLM 04, but I can't see a demarcation in the photo.


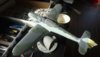
I know this is all a bit vague! I would definitely do the theatre band and white front to the spinner. I would compromise on the wing tips and do the undersides white. I would leave the lower cowling RLM 76 and I really don't know about the rudder. IF I decided to colour it and apply the abschussbalken, I would do it white rather than yellow. Most of this is just educated guess work and others might have different opinions :)


Cheers


Steve
 
Thread owner
IF I decided to colour it and apply the abschussbalken

Apply the what?!? lol


Many thanks Steve. Your knowledge is gold. That which you have described is pretty much in line with what revell wrote in the painting guide so I will go with that...


Got a few bits stuck together this AM and am now waiting for the tailplanes to set up. I have also ordered a sheet of swastika from Hannants. It is a pity that political niceness gets in the way of history. I mean they could put the two part ones on the sheet. What really makes me giggle is that you cant buy a kit with the marking in, but you can buy a whole sheet full of the damn things! Sorry. I will behave.
 
Thread owner
PS: wow!! I cannot remember the last time that I see you building a model.......maybe were at seventy's

Cheeky bugger. LOL How's that railway layout going.... :P
 
Thread owner
So to keep Polux happy, I have been slaving away at the bench...... Not. LOL To be honest it was to darn hot to carry on working in the garden so I came in and hid in the man cave! 
Here is an update of the gluing together of "Gubbins"View attachment 262109


Primer is on some of the sub-assemblies.


'View attachment 262110


The flappy things are on. Almost..


View attachment 262111


The bottom is an OK fit but will need a smudge of filler at the front, behind the oil doo-dar.View attachment 262113


A thing I am not to chuffed about is the top of the wing being in two parts. That canyon of a gap is the smallest I cloud get it, the other side is not much better. Excuse the glue paw prints! A quick scrub with a glass fiber pencil will soon see them off (I hope).


View attachment 262112
The cowling side covers needed a helping hand to hold them in While the glue dried. It would have been nice if Revell marked in the destruction's that you need to drill holes for the locating tabs of the machine gun bulges!!! The Exhaust stubs will go in after painting. I have checked, they can be put in through the top. 


The flaps and control surfaces are also fitted, I just forgot to take the photo...


Tune in tomorrow for another thrilling episode..............
 

Attachments

  • DSC_0262.JPG
    DSC_0262.JPG
    2.8 KB · Views: 0
  • DSC_0263.JPG
    DSC_0263.JPG
    2.1 KB · Views: 0
  • DSC_0264.JPG
    DSC_0264.JPG
    2.1 KB · Views: 0
  • DSC_0265.JPG
    DSC_0265.JPG
    2 KB · Views: 0
  • DSC_0266.JPG
    DSC_0266.JPG
    1.8 KB · Views: 0
Smashing through this one Ian. Looking good so far mate. Shame about the wing gap. Seems a bit odd having the top of the wing in 2 pieces. Is it so the cannon bulges can be different for different versions or they just felt like it? 
 
Thread owner
That would be My guess Kresten. They do, if I recall have two different boxing's of a Bf 109. Maybe there will be more.
 
Hi Ian,


I watch the progress with a pleasure. I read that the "front office" is going to be closed, but are you planning to open something else?


Regards,


Peter
 
Thread owner
Hi Peter. This is going to be a simple build without add-ons. I have done a few obvious bits here and there, Rubber seal on the MG bulges, drilled out the intakes, The exhaust stack is not getting drilled out as you can hardly see it any way. 


Here's where I am at right now...


View attachment 262167


Well that was fun. 


View attachment 262168


All the photographs I have seen so far the join between the two halves of the MG bulge has a big rubber seal...Stretched sprue to the rescue.View attachment 262169


View attachment 262170


Here you can just about see where the air intakes have been opened up (and the prop-shaft where it snapped off) 


View attachment 262171


I also sorted those very wide 'panel lines' where the two half's of the wing joins.Now I just got to scribe a new more delicate panel line. More like the others on the kit and not one you can sail a barge through!! 


A few more bits are lined up for a trip to the paint booth soon...
 

Attachments

  • DSC_0272.JPG
    DSC_0272.JPG
    1.7 KB · Views: 0
  • DSC_0271.JPG
    DSC_0271.JPG
    2.3 KB · Views: 0
  • DSC_0270.JPG
    DSC_0270.JPG
    2 KB · Views: 0
  • DSC_0269.JPG
    DSC_0269.JPG
    2 KB · Views: 0
  • DSC_0268.JPG
    DSC_0268.JPG
    1.8 KB · Views: 0
lol !! Thanks for keep me happy Ian :P


By the way, the general work on that model looks very fine. Please, keep the pics coming!!!  ;)   
 
Thread owner
So I primed it yesterday, with Alclad primer, Dont know if I had the mix wrong or the air pressure (or both) but it was more like sand paper than a nice smooth base. Sanded it flat with a sanding sponge and washed it down with IPA. Hence the funky patterns in the primer! 
Sprayed the White for the Rudder bottoms of the wing tips, and the spinner, the back plate will be resprayed in Black green after a quick rub down. (I got runs in the paint  :$  Out of practice or what).
Once the white has hardened off, its onward with the light blue for the undersides and up the sides of the fuselage.....Lets hope it goes a bit better tomorrow!View attachment 262303


Sorry about the colour balance...talk about 50 shades of grey!


View attachment 262304


A good shot of the funky primer...it is actually smooth though and that is what matters....
 

Attachments

  • DSC_0290.JPG
    DSC_0290.JPG
    2.7 KB · Views: 0
  • DSC_0291.JPG
    DSC_0291.JPG
    2.3 KB · Views: 0
Looking very good so far Ian, your building at a very good rate too, great job with the canopy masking as that is one part I really struggle with. 
 
Thread owner
Right then. 


Got the undersides and sides painted RLM 76 yesterday and masked up to day to start the RLM 74/75 splinter....Maybe it would have been an idea to take a photo befor I masked up but then you can all have a surprise later. As I had a bit of time, I sprayed the Grey for the camouflage... Tomorrow the green....View attachment 262403


View attachment 262404


View attachment 262405


Looks like this went down OK. ..


I chose to do the wiggly masking for the demarcation between sides and top so I can, hopefully, just feather it in when I do the mottle on the sides. (which I am really not looking forwards to!


So photos:
 

Attachments

  • DSC_0292.JPG
    DSC_0292.JPG
    2.4 KB · Views: 0
  • DSC_0293.JPG
    DSC_0293.JPG
    2.4 KB · Views: 0
  • DSC_0294.JPG
    DSC_0294.JPG
    2.6 KB · Views: 0
Just a thought Ian - if you did white-tac snakes as the demarcation line, firing the a/b vertically down on it you will get a less 'solid' line and without the risk of building up a ridge.  This would make it easier to feather into the side mottling when you do it.  When doing mottle, just take your time, thin paint and very low air pressure... practise first!
 
Thread owner
I will try to remember that for the next one Barry. :/


So been busy yesterday and this morning...
Masked off the camouflage, painted it and took the masking off almost before the paint dried....dry but soft...a quick run down the edges with a mk I finger and not ridges....The wavy demarkation sort of worked but a quick blast with the airbrush should soon sort that out.....He said optimistically.lolView attachment 262642View attachment 262643View attachment 262644


Next the "fun" part that darn dapple on the sides!
 

Attachments

  • DSC_0298.JPG
    DSC_0298.JPG
    2.3 KB · Views: 0
  • DSC_0299.JPG
    DSC_0299.JPG
    2.4 KB · Views: 0
  • DSC_0300.JPG
    DSC_0300.JPG
    2.5 KB · Views: 0
Status
Not open for further replies.
Back
Top