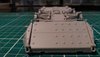
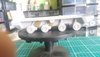
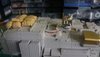
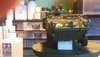
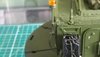
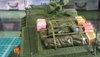
Hi all it's been ages since I managed to get some bench time but I have started on this tonight. I have done most of the running gear and lower chassis. Just the p.e to add.

You are using an out of date browser. It may not display this or other websites correctly.
You should upgrade or use an alternative browser.
You should upgrade or use an alternative browser.
Trumpeter 1/35 M1133 Stryker MEV
- Thread starter col68
- Start date
- Status
- Not open for further replies.


1/3
Your off to a great start.
Hi Steve. There has not been any problems with the parts fitting just some flash on some parts. The only issues I have come across is the thickness of the sprue gates which result in a lot of cleaning up and the instructions leave a lot to be desired.Hi Colin
Not seen your work before but everything looks clean and well built. Any issues with the fitting so far?
Steve
Unfortunately there's no interior parts and the hatches have some really deep ejector pin marks that would need sorting.Hi Colin
Looks to be a well detailed kit. Does it have an interior so you could display it as shown on the box art? As Steve says all very neat.
Jim
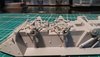
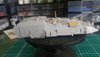
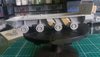
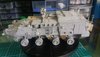
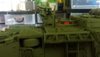
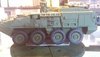
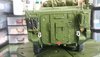
Hi all here's the latest pictures of the Stryker. The hull is almost completed just the tow bar and bush guards and weapons station to add.
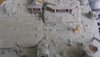
Next up join the two parts together and add the anti slip coating. View attachment 307565
Next up join the two parts together and add the anti slip coating. View attachment 307565
Attachments
-
 20180707_155012.jpg2.5 KB · Views: 0
 -
 20180707_154844.jpg2.4 KB · Views: 0
 -
 20180707_155204.jpg1.9 KB · Views: 0
 -
 20180707_155115.jpg2.3 KB · Views: 0
 -
 20180707_155043.jpg2.3 KB · Views: 0
 -
 20180707_155059.jpg2.6 KB · Views: 0
 -
 20180707_155147.jpg2.1 KB · Views: 0
 -
 20180707_155108.jpg2.4 KB · Views: 0
 -
 20180707_155023.jpg2.4 KB · Views: 0
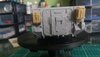
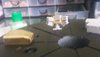
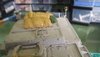
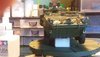
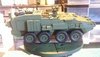
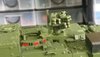
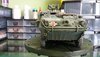
Hi guys here's the latest update on my build. I used vms hull tex to create the anti slip coating on the hull and added some stowage.ready for a coat of primer
Attachments
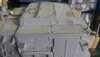
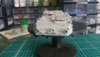
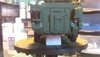
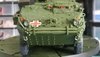
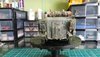
Hi all. The Stryker has been primed and a base coat of tamiya XF-69 NATO green.
Attachments
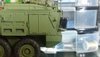
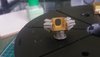
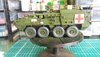
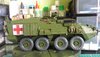
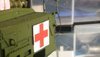
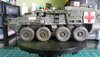
Hi all hers the latest photographs of my current build. The decals were an absolute nightmare to fit and some of them are so small they are to see.
Attachments
-
 20180713_170037.jpg3 KB · Views: 0
 -
 20180713_170121.jpg2.6 KB · Views: 0
 -
 20180713_170106.jpg3 KB · Views: 0
 -
 20180713_170205.jpg2.8 KB · Views: 0
 -
 20180713_170352.jpg2.4 KB · Views: 0
 -
 20180713_170409.jpg2.4 KB · Views: 0
 -
 20180713_170053.jpg2.7 KB · Views: 0
 -
 20180713_170324.jpg2.3 KB · Views: 0
 -
 20180713_170257.jpg2.7 KB · Views: 0
 -
 20180713_170219.jpg2.6 KB · Views: 0
1/3
Colin
Very nicely done.
Very nicely done.
Thanks paulColin
Very nicely done.
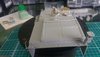
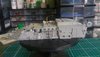
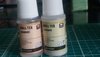
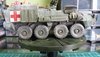
Hi guys. Here's the latest pictures of the Stryker, I used humbrol sand and dust washes to dirty it up which took almost a week to dry properly then after sealing it was highlighted with some artist acrylic buff.
Attachments

- Status
- Not open for further replies.
Legal Notice
scalemodelling.co.uk is a privately operated online discussion forum. All content posted by members reflects their own views and opinions and does not necessarily represent those of the forum owners or administrators. While reasonable efforts are made to moderate content, no responsibility is accepted for user-generated material. By using this site, you agree to comply with UK law and the forum rules.