Theme editor

Scale Model Shop

First diorama advice

  • Thread starter Thread starter Guest
  • Start date Start date
Status
Not open for further replies.
G

Guest

Guest
Thread owner
Hi all

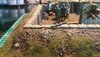
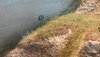
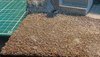
I have almost finished my sdkfz 7/1 (German halftrack with an anti aircraft gun) in winter camo and I'm looking to build a diorama for it (simple mud/snow terrain)

Ive tried making dioramas in the past and all of them failed so if anybody could help we with the building of this diorama then that would be amazing!

Many thanks

Ryan
 
Thread owner
If all you’re looking for is a simple bit of groundwork, use some wall filler (of a kind that you can clean up or thin with water) and spread it on the base with a spatula-type tool, then before it sets, use a damp brush or something to smooth it all out a bit.

If you want muddy terrain, you’ll also want to add tracks from the vehicle in it; to do that, lay some cling film over the groundwork and press the vehicle into it so that its tracks and wheels make impressions along the path the vehicle is supposed to have driven. (That’s much easier if you haven’t put the tracks and wheels onto the model yet, by the way.) Leave the groundwork to dry and only then remove the cling film, else you’ll probably pull a lot of the filler up with it. You can also use wheels and/or tracks from other models to add more variety, for example to give the impression a tank has also driven through the area. Just be sure to take some that are plausible for the time and place — you don’t really want to use, say, Chieftain MBT tracks for a diorama set in 1942, for example :)

There are tons of ways to make snow, and which one to use also depends on whether you want it thick or just a few patches, so we may need some more info on that front before making any actual recommendations.
 
Thread owner
Ryan.
Jakko has covered it well.
I would add don't attempt anything to big for your first one, keep it simple. Research the snow part on U tube, that will give you plenty of ideas and tips.
As Jakko says give us some more info .:thumb2:
John.
 
Thread owner
If all you’re looking for is a simple bit of groundwork, use some wall filler (of a kind that you can clean up or thin with water) and spread it on the base with a spatula-type tool, then before it sets, use a damp brush or something to smooth it all out a bit.

If you want muddy terrain, you’ll also want to add tracks from the vehicle in it; to do that, lay some cling film over the groundwork and press the vehicle into it so that its tracks and wheels make impressions along the path the vehicle is supposed to have driven. (That’s much easier if you haven’t put the tracks and wheels onto the model yet, by the way.) Leave the groundwork to dry and only then remove the cling film, else you’ll probably pull a lot of the filler up with it. You can also use wheels and/or tracks from other models to add more variety, for example to give the impression a tank has also driven through the area. Just be sure to take some that are plausible for the time and place — you don’t really want to use, say, Chieftain MBT tracks for a diorama set in 1942, for example :smiling3:

There are tons of ways to make snow, and which one to use also depends on whether you want it thick or just a few patches, so we may need some more info on that front before making any actual recommendations.

Thank you for the reply
Ive ordered a plinth so it should be here soon ready for me to begin work. Do you have any dioramas which you used wall filler on to show me so i can see the ground texture it has?
Many thanks
Ryan
 
Hi Ryan not sure if these pictures will help, I use a similar method that Jacko described but I use mod roc plaster bandage draped over polystyrene then I rub household filler on top to form my groundwork. Once it's dry I give it a heavy coat of mod podge or diluted pva glue.
Then I sprinkle it with sand and railway modellers scatter and once dry another coat of mod podge before painting.
 

Attachments

  • 20180819_165837.jpg
    20180819_165837.jpg
    3 KB · Views: 0
  • 20180819_170338.jpg
    20180819_170338.jpg
    2.3 KB · Views: 0
  • 20180819_170301.jpg
    20180819_170301.jpg
    2.6 KB · Views: 0
  • 20180819_165815.jpg
    20180819_165815.jpg
    3 KB · Views: 0
  • 20180819_170711.jpg
    20180819_170711.jpg
    3.1 KB · Views: 0
  • 20180819_170701.jpg
    20180819_170701.jpg
    2.9 KB · Views: 0
  • 20180819_165815.jpg
    20180819_165815.jpg
    3 KB · Views: 0
  • 20180819_170642.jpg
    20180819_170642.jpg
    2.9 KB · Views: 0
  • 20180819_165829.jpg
    20180819_165829.jpg
    2.7 KB · Views: 0
  • 20180819_165851.jpg
    20180819_165851.jpg
    2.8 KB · Views: 0
  • 20180819_170255.jpg
    20180819_170255.jpg
    2.1 KB · Views: 0
Thread owner
Hi Ryan

This may be of use because it was very simple to do:

View attachment 311958

I first bought a cheap frame from Wilkinsons, then spread a layer of Polyfilla onto the backing board. I roughened it by dabbing with a bit on newspaper, then allowed it to dry. The next stage was to cover it all with a layer of PVA glue then sprinkle it with a selection of grit and small stones from the garden.

Once that was dry, I painted it by giving it an all over coat of black then dry-brushing the colours on using increasingly lighter layers to bring out the texture. The grass tufts were then added by gluing them on in clumps to try and get a natural spread, and then finally the branches were added from garden debris.

Hope that helps.
 
I use premixed taping compound over paint sealed wood or foamboard shapes, then sifted dirt to represent soil and various sizes/shades of ground foam, moss, & ground tobacco for ground covers. PaulE
 
Thread owner
Do you have any dioramas which you used wall filler on to show me so i can see the ground texture it has?
None that I’m willing to share pictures of :) It’s been about 15 years since I last built a diorama, but as I recall, I used to create good texture by just stippling it with a large paintbrush (the kind you paint window and doorframes with). and/or by using premixed filler, which tends to be a bit grainy. If you’re going to add thick snow, though, ground texture is irrelevant in all areas that will be covered in it.

BTW, as a practical tip: tape off the areas/sides of the base you want to leave bare, to avoid spilling or smudging them.
 
I have used various decorating fillers, including diy shops 'own brand' and found little difference between them. One thing i always do is to add some brown water colour paint (the cheapest kids type) when mixing the powder so that the mixture is brown not white. This way if in future a small stone of something is knocked off you are not left with bright white showing.

Cat litter is a good source of small stones and rocks.

If I use real sand I tend to sieve it to get the really small bits - old bits of womens tights are goot for this. Although you may get the odd look if you do thins on the beach!
 
Look at Dios Under Construction-BW ISAF Lager in 1/87.
 
Status
Not open for further replies.
Back
Top