Theme editor

Scale Model Shop

LVTP 7

  • Thread starter Thread starter Guest
  • Start date Start date
Status
Not open for further replies.
G

Guest

Guest
Thread owner
Hi mates!

This is another project I finished a while ago.
Actually is a restoration project since the first time I built this model I was 15 or 16 years old.


Originally is a model from Academy and it looked as awful as you see: I lost nearly all the wheels due to a pair of naughty nephews


Most of the handles where lost too, and there where gaps, misalignments and stains of glue...


And the colour... oh my god... I think I painted it with a paint pulverizer and not an airbrush.
On top of that, the vehicle itself, the LVTP 7 is one of the ugliest vehicles I've ever seen. It just looks like a huge box with tracks!

So here we have the perfect victim for a restoration project, don't you think?

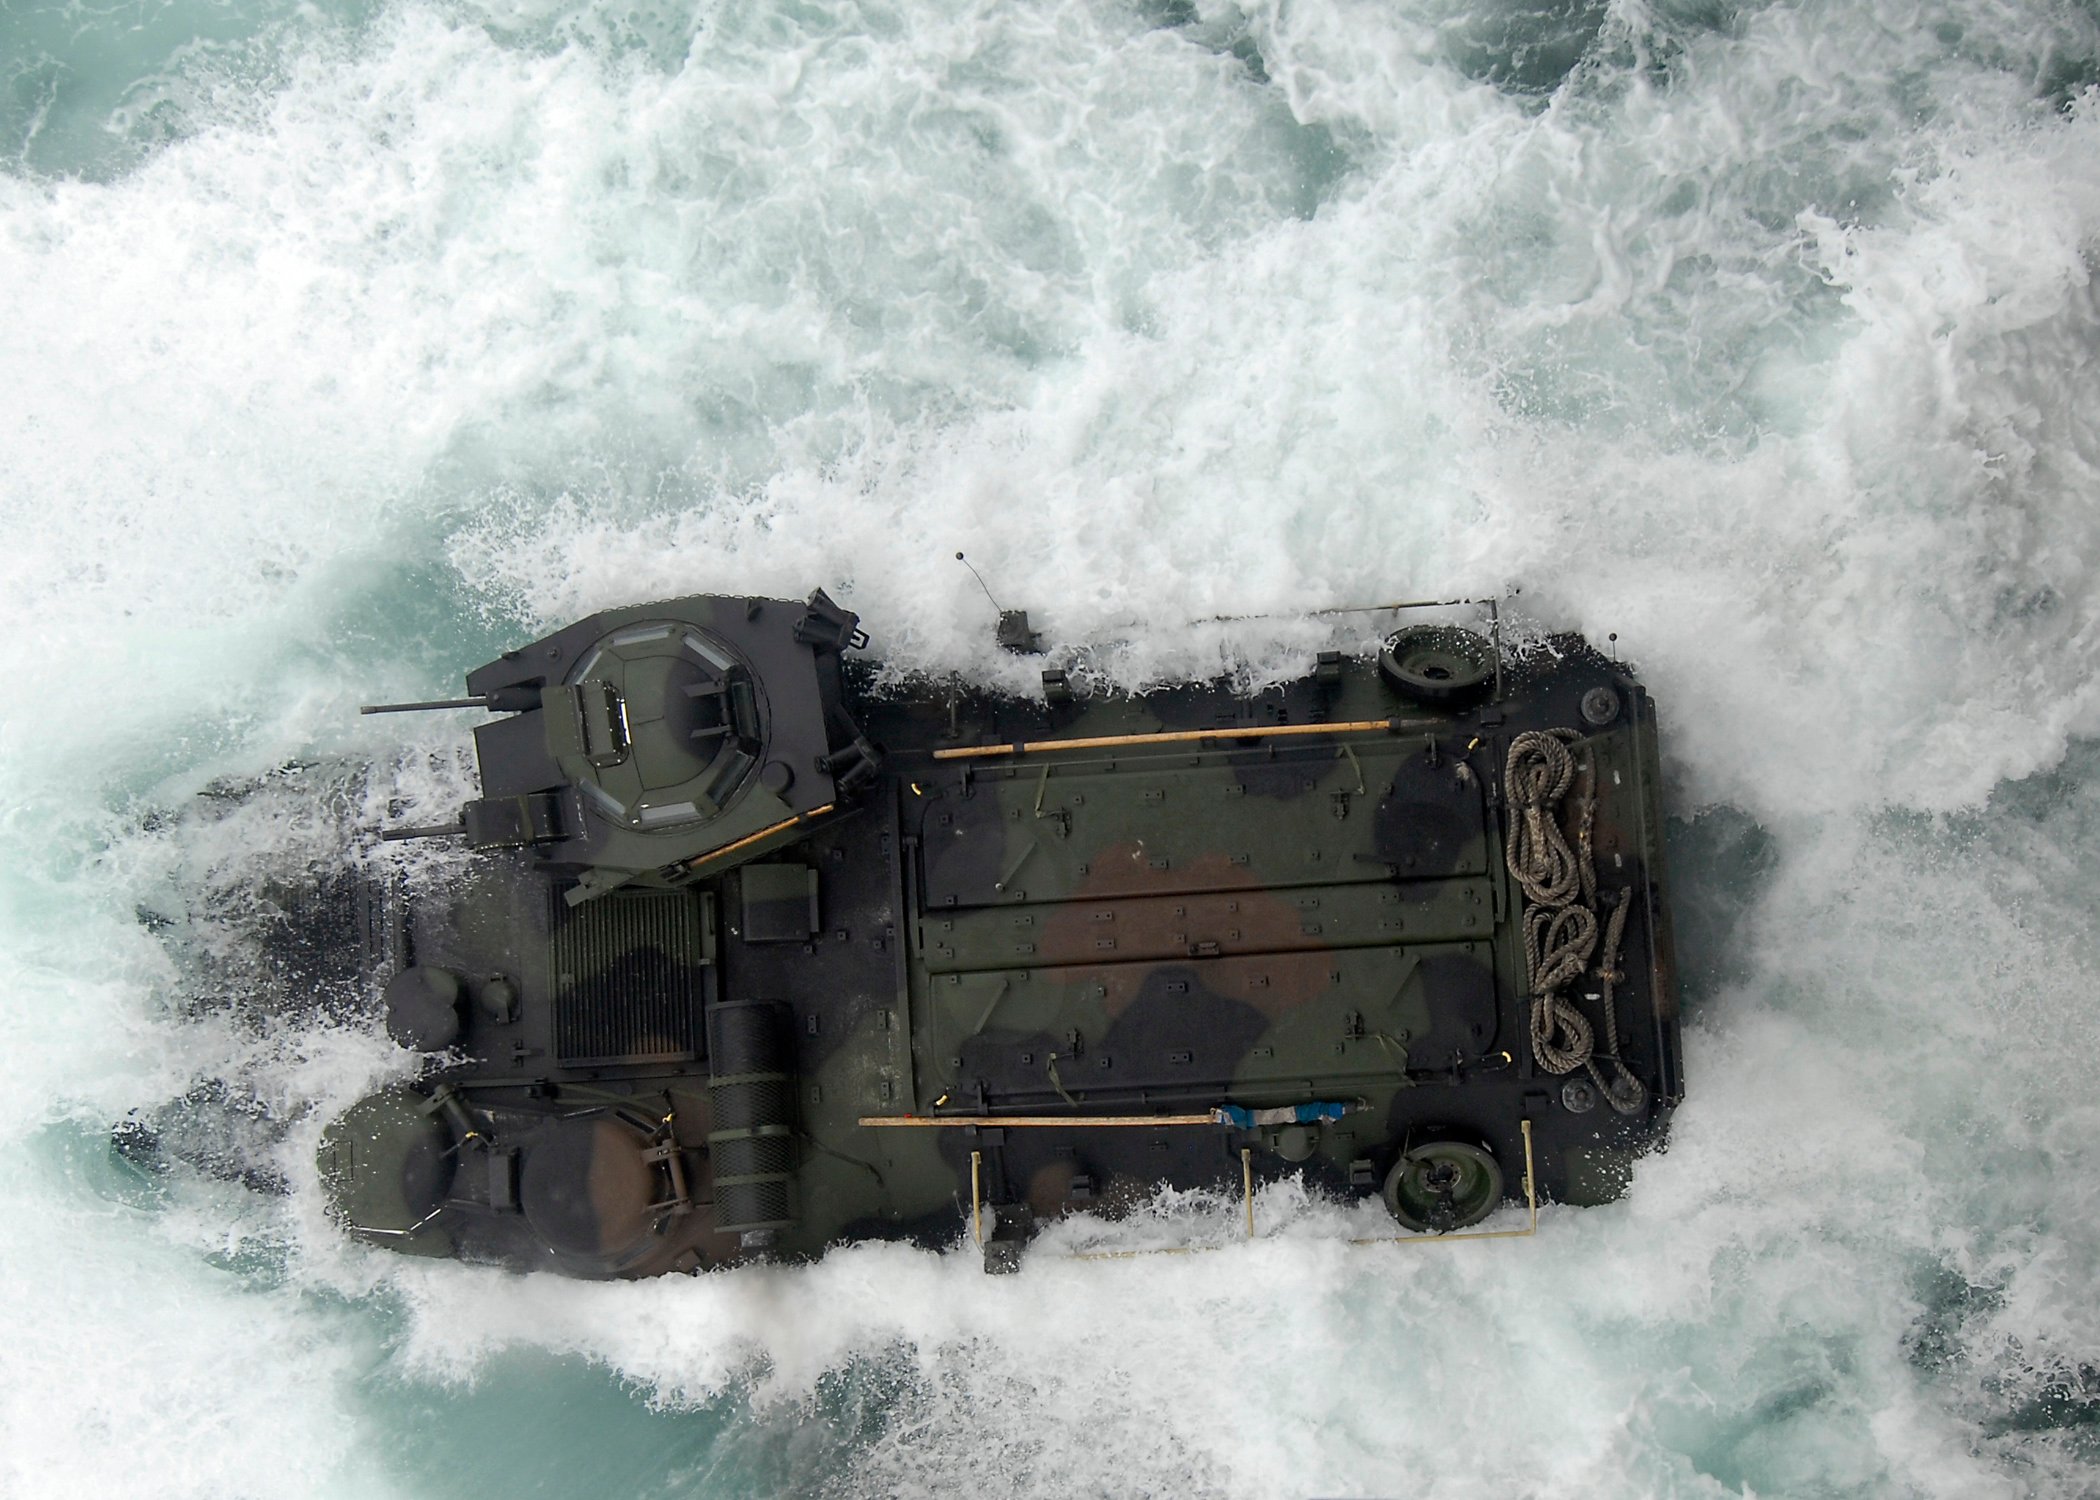
Thinking in a way of making this thing look a little bit more attractive, I seek some pictures in the internet and found this one:


Figures, water, wet effects... why not??

First of all, I tried to sand all the glue stains:


I used steel wire to make all the steps and handles:


Then I used some putty and sand paper to correct all the misalignments:


Now the exciting part... the water-line. I used tape to mark the line where to cut:


Then I drilled along the line:


Then I cut through the holes with a cutting disc, and there you have, the floating monster!


A little bit more of putty and sanding:


And that's it, ready for the paintjob!

Hope you like it!
 
Morning,

It’s a funny looking beastie for sure. Looks like a fun project...will have to keep an eye out for updates!
 
Thread owner
Nice repair job, though it would have probably been easier all around to just buy a Hobby Boss LVTP kit :)
 
Thread owner
Nice repair job, though it would have probably been easier all around to just buy a Hobby Boss LVTP kit :smiling3:

Yeah, you're absolutely right, but I wanted to try new techniques and some crazy stuff, and I was afraid to ruin a brand new kit
 
Thread owner
Well guys, let's continue with the make up for the monster...

I airbrushed the clear brown:


Then I airbrushed a much lighter brown in key angles, looking for that "modulation" effect I've seen in some magazines:


I used a regular brush for details like the handles, bars, etc:


Then I applied blue-tack to make the green spots:


I also airbrushed and painted with a clearer olive drab details such as the hatch, bars and anti-slip relief:


I completed the camouflage pattern with the black and bone lines painted with brush:


After that, I applied some decals and protected everything with a semi-gloss varnish:


I made some chipping effects in the parts where I imagined the crew would step more frequently:


I also applied a dark brown wash to unify all the tones:


And that's all for the paintjob
Next step: weathering and wet effects

Regards!
 
Thread owner
Hi guys!

I'll continue. I made some rust marks in the previously chipped areas:


I painted the cannon, the canvas and made some dust effects on the turret. I also used an old games-workshop trick to paint the periscopes:


I also applied dust effects over the flat surface of the vehicle:


To imitate the wet effects, first I removed the dust effect with thinner, and then I applied ultra glossy varnish:


I tried to focus in the areas where I imagine the water will run, like angles and panel lines:


On the sides I decided to try new things. I made some vertical marks with dust pigments dilluted in water:


I removed the excess with tinner, trying to imitate the marks left by the washed off dirt:


I also painted the pioneer tools:


Again I used ultra glossy varnish to imitate fresh water on the sides:

I used an old toothbrush to imitate splashes, specially around the back of the vehicle, close to the turbines exhaust:


Finally, I used a crackle effect medium with some varnish in the frontal area which is supposed to hit the waves trying to imitate the foam and water marks, but it didn't turn out so well:


And this is how it looks after all:


Next step, the deep blue sea!

Regards
 
Looking a lot better than the original offering. Looking forward to the rest of the build.
 
Thread owner
I'll continue. I made some rust marks in the previously chipped areas:
Just a little note that most of the LVTP-7 is made of aluminium :) Maybe those front mudguards are steel, I don’t know, but I would severely restrain from adding rust to this vehicle if I were you.

I also used an old games-workshop trick to paint the periscopes:
What trick is that?

I also applied dust effects over the flat surface of the vehicle:
It must have been swimming in calm water :)

AAV_7_Amphibious_Assault_Vehicule_Armored_Personnel_carrier_United_States_US_American_Marines_Corps_640_015.jpg
 
Thread owner
Just a little note that most of the LVTP-7 is made of aluminium :smiling3: Maybe those front mudguards are steel, I don’t know, but I would severely restrain from adding rust to this vehicle if I were you.

Hi Jakko
Honestly, I didn't know that the LVTP-7 is made of aluminium. Anyway I considered this built as a test for techniques I have never tried in a model, such as the use of varnish to imitate water splash, but thank you for your information.
 
Thread owner
What trick is that?

Well, it's an old but easy trick to imitate gems and lenses:
First you paint the main lens with a flat uniform colour:

Then you paint some lighter bits on the lower part of the gem:

And finally you paint some points of white:


Looks great, but in a fantasy model, that's why I decided to go for a darker green and glossy varnish for the periscopes as you'll see in future posts
 
Thread owner
It must have been swimming in calm water :smiling3:

AAV_7_Amphibious_Assault_Vehicule_Armored_Personnel_carrier_United_States_US_American_Marines_Corps_640_015.jpg

Yes, indeed, because I didn't was so sure of how to replicate all that foam and rough water, and actually I'm not so convinced with the final result of the technique I used but as I told you before, I just considered this built as a test model and now I know what I will not use in the future to imitate rough water.

Anyway, here I show you how I made the sea:
I took a cheap photograph frame and put some blue plasticine on the wood plate:


I moulded it to imitate waves and the wake of the vehicle moving through the water:

With some marbles of diferent sizes I tried to imitate the bubbles and water coming out from the nozzles of the vehicle:


I used white glue to harden the plasticine, then I cut the edges with a sharp knife:

Afterwards I painted it with different tones of blue:


And white around the sides of the vehicle and nozzles:

Next step, some nice coats of glossy varnish:


And finally, I used some foam from cushion stuffing to imitate the foam (believe me, it doesn't work so well)
 
Thread owner
Well, it's an old but easy trick to imitate gems and lenses:
Ah, yes, that one, GW seems to have been rather fond of it, especially for eldar models.

The sea looks very good, pretty convincing waves and the foam isn’t really as bad as you think it is either :)
 
Thread owner
Just caught up with you on your 'practice' build, and I am impressed. You tube and our own ship builders should be able to point you further into the area of representing the ocean or water at least. But to my eyes it is looking the business and I look forward to your next model when you put your practice into production. Great tutorial on how you build up the waves.
Cheers, Mike.
 
Thread owner
Thank you for your kind comments!

Let's finish the model with the help of some fellas.
This is how I paint my figures: I shot a first primer with black and then a second shot of clear gray from above the figure, to show all the lighting areas:


Then I use dilluted sand to paint the uniform:

Then some brown and green to make the camo:

I complete the camo with grey and sand tiger stripes:


Afterwards, a dark brown wash to mark the shadows:

And finally, military green for the vest and the flesh and helmet:


Same process for the second guy in the scene:


As you can see, I painted the interior of the hatches in a light clean green as a strong contrast, and I changed the periscopes green:


Some antennaes made from stretched sprue and that's it! just two fellas having a nice conversation on board of this monster during some military exercises!


I'll leave more pictures in the finished military vehicles forum

Kind Regards!!
 
Status
Not open for further replies.
Back
Top