Theme editor

Scale Model Shop

1/32 Trumpeter JU-87D Stuka

BarryW

SMF Supporters
Joined
Jul 23, 2011
Messages
6,145
Reaction score
457
Points
83
Age
70
1/3
Thread owner
I am planning to do my first winter camo scheme on this one.
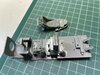
Here is the box:
63B20A90-AB8B-41D4-B953-3BB27DE30A2B.jpeg

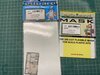
Unfortunately most of the aftermarket is designed for the Hasegawa ‘D’ kit. Naturally I won’t touch the Trumpeter decals so I will use these masks for the markings.
C913388D-B24A-4473-9065-9B255C4E1EE9.jpeg
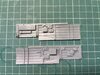
The set contains canopy masks and, unless I can find a set for the Trumpy, I will have to make do with them. While in theory they should fit we all know they won’t!

Not all the codes for the winter scheme on the box are in the mask set and I am yet to decide how to approach that. I have a few options.

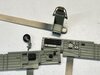
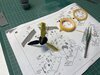
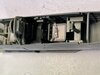
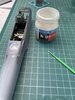
Here is the bench all cleaned up ready.
D9413F4F-D611-4B92-BBC3-7DD68B520DE1.jpeg

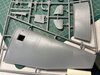
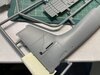
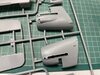
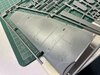
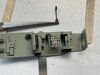
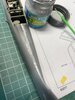
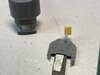
I will post some sprue shots when I get the chance. I will also decide on what I am doing about seatbelts, there is a ‘steel’ Eduard set for the Hassy that I might get.
 
Hi Barry
Another one to look forward to. For such an iconic aircraft I don't remember seeing many models of it.
Jim
 
Thread owner

Attachments

  • F3605769-DA65-461F-9C70-74C92708CC00.jpeg
    F3605769-DA65-461F-9C70-74C92708CC00.jpeg
    4.2 KB · Views: 0
  • 50840E57-ECEC-4540-A87F-746A8203EA11.jpeg
    50840E57-ECEC-4540-A87F-746A8203EA11.jpeg
    3.6 KB · Views: 0
  • 6493A9E7-CDAC-4B23-9DB3-B72963FFC865.jpeg
    6493A9E7-CDAC-4B23-9DB3-B72963FFC865.jpeg
    3.9 KB · Views: 0
  • B92B30C7-DE9A-4BFF-A8FD-6A42B2DD7859.jpeg
    B92B30C7-DE9A-4BFF-A8FD-6A42B2DD7859.jpeg
    3.8 KB · Views: 0
  • 37A45C4D-2181-4C47-AA26-14918272A7CD.jpeg
    37A45C4D-2181-4C47-AA26-14918272A7CD.jpeg
    2.7 KB · Views: 0
  • 205219E9-ED76-47EB-9DB8-108C0C9EDCA4.jpeg
    205219E9-ED76-47EB-9DB8-108C0C9EDCA4.jpeg
    2.5 KB · Views: 0
  • A7A4E928-4F67-4C4A-8EE9-72E2D181E9A5.jpeg
    A7A4E928-4F67-4C4A-8EE9-72E2D181E9A5.jpeg
    2.8 KB · Views: 0
Thread owner
The engine is nicely detailed and builds up really nicely. It is not engineered to be displayed though as it fits neatly and perfectly inside the front fuselage section.

View attachment 417791

View attachment 417795

The two sides fit around the engine very well indeed.

View attachment 417792

Some other subs.

View attachment 417793

And onto the interior of the pit.

Seat subs, cement drying.

View attachment 417794

Side walls with various boxes etc attached.

View attachment 417796

So far, very good indeed.
 

Attachments

  • 05B4A54A-1005-407E-ADE2-3617A4C538AA.jpeg
    05B4A54A-1005-407E-ADE2-3617A4C538AA.jpeg
    3.2 KB · Views: 0
  • A1A855CD-4017-4B89-A6F4-FD6D4530E6CD.jpeg
    A1A855CD-4017-4B89-A6F4-FD6D4530E6CD.jpeg
    2.9 KB · Views: 0
  • BD38E7B0-8A2B-47DF-BD62-E7FF6DAC5370.jpeg
    BD38E7B0-8A2B-47DF-BD62-E7FF6DAC5370.jpeg
    3 KB · Views: 0
  • 074D6081-4F5B-491F-861E-F671F699A893.jpeg
    074D6081-4F5B-491F-861E-F671F699A893.jpeg
    2.6 KB · Views: 0
  • DBAFEF1D-3D37-4948-A298-BF73576951B5.jpeg
    DBAFEF1D-3D37-4948-A298-BF73576951B5.jpeg
    2.3 KB · Views: 0
  • 6890B6AC-0055-47FC-A8C6-EF689A9F716E.jpeg
    6890B6AC-0055-47FC-A8C6-EF689A9F716E.jpeg
    2.6 KB · Views: 0
Why on earth is that engine there if you can’t open any panels on the nose?
 
True, that’s always an option, but it’s odd they would include it if it’s not going to be visible at all — especially given your comments about other kits that manufacturers often only give open hatches for things like this.
 
Thread owner
True, that’s always an option, but it’s odd they would include it if it’s not going to be visible at all — especially given your comments about other kits that manufacturers often only give open hatches for things like this.
There is a trend with Far East companies to include full internal details. I have no problem with that personally as long as they make sure you get a good fit with closed panels. The extreme example of this being Zoukie Mura’s trade mark engine pistons molded in, in the correct relative positions. These are never displayed of course.
 
Thread owner
Cockpit subs are ready to paint. I will black base then spray RLM02.

Unusually I decided to cement the tail wheel sub before painting. I will mask the tyre. The join will need filling and sanding.

View attachment 417952View attachment 417953
 

Attachments

  • 6C892F6F-5A30-47D5-9CE6-6DAE94AEBD63.jpeg
    6C892F6F-5A30-47D5-9CE6-6DAE94AEBD63.jpeg
    4.1 KB · Views: 0
  • 77A0C75C-B49C-4596-B58A-589EDA3C6ED0.jpeg
    77A0C75C-B49C-4596-B58A-589EDA3C6ED0.jpeg
    3.8 KB · Views: 0
Thread owner
First I black primed the interior and then sprayed RLM02. Trumpy, as usual, do t provide much by way of detail painting instructions so a bit of Googling and creativity for that. Careful not to overdo this.

View attachment 418033

View attachment 418034

I will spray those with a semi-matt before weathering.

I have started masking the prop having painted it with black primer.

View attachment 418035

And, then these arrived...
Seatbelts and some masks, while not being for the ‘D’ I think they might fit better than the Hasegawa ones.

View attachment 418032
 

Attachments

  • 4F7632D5-0B5E-4B6D-AA14-C0C4C5C19D7E.jpeg
    4F7632D5-0B5E-4B6D-AA14-C0C4C5C19D7E.jpeg
    3.4 KB · Views: 0
  • 34F5A013-D1B3-45EF-B5F1-EB220D824BBC.jpeg
    34F5A013-D1B3-45EF-B5F1-EB220D824BBC.jpeg
    3 KB · Views: 0
  • 5C7839B9-7034-443E-94C6-A094E05AB28D.jpeg
    5C7839B9-7034-443E-94C6-A094E05AB28D.jpeg
    3 KB · Views: 0
  • 84B30A43-39A0-4EE4-853C-1F6B21031C98.jpeg
    84B30A43-39A0-4EE4-853C-1F6B21031C98.jpeg
    3.8 KB · Views: 0
Thread owner

Attachments

  • FF12FFDE-B3A8-4D2E-88C9-814FBE518213.jpeg
    FF12FFDE-B3A8-4D2E-88C9-814FBE518213.jpeg
    3.3 KB · Views: 0
  • C978B7B6-8CD5-4107-A407-FA6B4D7E66D9.jpeg
    C978B7B6-8CD5-4107-A407-FA6B4D7E66D9.jpeg
    2.8 KB · Views: 0
  • 50D511F7-D627-42AF-A1D8-11A0D406CF11.jpeg
    50D511F7-D627-42AF-A1D8-11A0D406CF11.jpeg
    2.7 KB · Views: 0
  • 791D63DE-AB95-4CEC-B84A-D14CD99EC51B.jpeg
    791D63DE-AB95-4CEC-B84A-D14CD99EC51B.jpeg
    2.5 KB · Views: 0
  • F5F93833-3F39-48B8-AC10-25FA834AB825.jpeg
    F5F93833-3F39-48B8-AC10-25FA834AB825.jpeg
    3 KB · Views: 0
Thread owner
By the way. I received the seatbelts after painting and assembling the seat. The instructions for them includes the drilling of holes in the armour plate to insert the top of the shoulder belts into. This was not practical at this stage so I cut the belts at the top to shorted them and glued them into place where the ends would enter the hole. Not ideal but it worked.
 
Thread owner
Fit is excellent but the seams need treating.

First step, an application of Mr Surfacer 500 with a micro brush. I may need to do a second application.
View attachment 418205

I have prepared the i.p. for priming. I have not found an a.m. panel and looking at the supplied decal it is very poor, even if I could rely on it not to splinter into a hundred pieces. I will have to revert to just paint.

View attachment 418206
 

Attachments

  • 7EE10CBE-754C-4F66-8F5A-3FAAFE2718A6.jpeg
    7EE10CBE-754C-4F66-8F5A-3FAAFE2718A6.jpeg
    3.6 KB · Views: 0
  • C21D48E1-0A41-4149-BA7B-26AB748A0431.jpeg
    C21D48E1-0A41-4149-BA7B-26AB748A0431.jpeg
    2.7 KB · Views: 0
Hi Barry
Looking very nice so far. Shame that the Trumpeter decals are so poor and that no am decals are available. I am sure your painting skills will be more than ok.
Jim
 
You could punch the dials out of the Trumpeter decal sheet and either apply them as decals, or glue them to the instrument panel including their backing paper?
 
Thread owner
Thanks for this. It prompted me to check my spares box and I found decals I can cut up and use. The Trumpy ones are unusable just from the ‘print’.

I have sanded the seams. They now just need a little Mr Dissolved Putty in places when some vestige of a seam is left. This is my secret weapon against ghost seams! I may need an ‘outing’ in spots again after priming.
View attachment 418411
 

Attachments

  • 949E5202-82E6-41FE-97DD-DAAD2F256497.jpeg
    949E5202-82E6-41FE-97DD-DAAD2F256497.jpeg
    3.5 KB · Views: 0
Thanks for this. It prompted me to check my spares box and I found decals I can cut up and use. The Trumpy ones are unusable just from the ‘print’.

I have sanded the seams. They now just need a little Mr Dissolved Putty in places when some vestige of a seam is left. This is my secret weapon against ghost seams! I may need an ‘outing’ in spots again after priming.
I’ve got a 1:48 scale in my stash to build so your build notes will come in very handy..
 
Thread owner
The i.p. has turned out OK, not perfect but acceptable.

View attachment 418530

I had a problem with the sight, the transparent bit broke and it was impossible to do an invisible join. Hopefully it won’t show up with the windscreen in place.
 

Attachments

  • 4ABFE747-5C57-4D15-9E7B-1016C457C623.jpeg
    4ABFE747-5C57-4D15-9E7B-1016C457C623.jpeg
    4.2 KB · Views: 0
Back
Top