Theme editor

Scale Model Shop

1/72 Hasegawa Pz. Kpfw VI Tiger I ausf.E

Status
Not open for further replies.

flyjoe180

Active member
SMF Supporters
Joined
Jan 18, 2012
Messages
13,315
Reaction score
1,112
Points
113
Location
Earth
1/3
Thread owner
Aaron's awesome Tiger build recently motivated me to give this armour lark a go. I bought this kit it on a whim ages ago. I have no particular interest in tanks or armour, this will be my first tank, and apart from a Bedford fuel truck last year, my second model of a subject that doesn't fly. So here we go, the only way to learn to swim is to jump in.


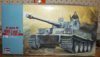
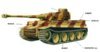
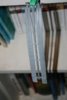
The kit box. It's a very old mould old I found out later, but I like the look of it. Tracks are going to be interesting. They appear to be made from a rubbery compound which requires melting of the ends to connect them up.


View attachment 100554
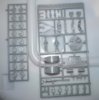
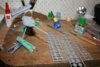
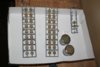
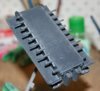


Contents:


View attachment 100555


View attachment 100556


View attachment 213577

View attachment 213578

View attachment 213579
 

Attachments

  • IMG_2892.JPG
    IMG_2892.JPG
    2.3 KB · Views: 0
  • IMG_2898.JPG
    IMG_2898.JPG
    2.8 KB · Views: 0
  • IMG_2897.JPG
    IMG_2897.JPG
    2.4 KB · Views: 0
Thread owner
Straight in, if I wait I'll lose motivation. So off with the gun. It required filling, cleaning up and drilling. The muzzle (flash suppressors?) on either side was asymmetric, so corrected that (at least I hope it was supposed to be corrected).


View attachment 100557


The main turret went together in minutes, no hassles here. It will require just a little bit of tidying up around the edges.


View attachment 100558


Same with the main hull:


View attachment 100559


Couldn't resist a look with the turret on:


View attachment 100560


View attachment 213580

View attachment 213581

View attachment 213582

View attachment 213583
 

Attachments

  • IMG_2905.JPG
    IMG_2905.JPG
    2.3 KB · Views: 0
  • IMG_2902.JPG
    IMG_2902.JPG
    1.8 KB · Views: 0
  • IMG_2900.JPG
    IMG_2900.JPG
    2.1 KB · Views: 0
  • IMG_2899.JPG
    IMG_2899.JPG
    1.5 KB · Views: 0
Thread owner
This is all so refreshing from aeroplanes. Turret tidied up around the edges and hatches fitted. The crew that came with the kit were naff and I really can't be bothered painting them for this one. I also can't be arsed with the authenticity of internal colours for the hatches. Seems there is as much debate about that as there is for German aircraft. They can be turned into a crew for something else later:


View attachment 100561


Accessories fitted to the hull:


View attachment 100562


View attachment 100563


The machine gun was a solid rod sticking out so I drilled it out:


View attachment 100564


Everything is primed:


View attachment 100565


I'm enjoying this so much I can't stop! My only concern is those tracks though.

View attachment 213584

View attachment 213585

View attachment 213586

View attachment 213587

View attachment 213588
 

Attachments

  • IMG_2921.JPG
    IMG_2921.JPG
    2.9 KB · Views: 0
  • IMG_2915.JPG
    IMG_2915.JPG
    2.3 KB · Views: 0
  • IMG_2913.JPG
    IMG_2913.JPG
    2 KB · Views: 0
  • IMG_2912.JPG
    IMG_2912.JPG
    2.3 KB · Views: 0
  • IMG_2910.JPG
    IMG_2910.JPG
    2.1 KB · Views: 0
Thread owner
Tracks primed:


View attachment 100566


Tracks painted gun metal:


View attachment 100567


Once dry I'll apply a rust wash,dirty them up and then dry brush with some gun metal over the tops of the tracks.


I applied a dark grey to the tops and a very dark grey to the undersides and under the side skirts. I'm hoping this will change the tone of the main colour to represent some shadowing, but not holding my breath on that as I haven't had a lot of success with aeroplanes and preshading:


View attachment 100568


I found out the wheels are a slightly different colour. I'm using this as my guide for a scheme as the kit ones are either too plain or too complicated for my first tank:


View attachment 100569


You can see in that picture that the wheels are lighter shade than the Panzer Yellow base colour. I tried Humbrol 84 (Ochre) but this was too green-looking. And it looks like baby puke. So I played with mixes and cam up with 2 parts Humbrol 84 (Ochre) and 1 part Sand Yellow (Humbrol 93). Close enough for this guy.


View attachment 100570


View attachment 100571


I'm enjoying this a lot. Any advice/comments are welcome.

View attachment 213589

View attachment 213590

View attachment 213591

View attachment 213592

View attachment 213593

View attachment 213594
 

Attachments

  • IMG_2960.JPG
    IMG_2960.JPG
    2.5 KB · Views: 0
  • 50543.jpg
    50543.jpg
    2 KB · Views: 0
  • IMG_2955.JPG
    IMG_2955.JPG
    3.1 KB · Views: 0
  • IMG_2954.JPG
    IMG_2954.JPG
    1.6 KB · Views: 0
  • IMG_2920.JPG
    IMG_2920.JPG
    2.2 KB · Views: 0
  • IMG_2962.JPG
    IMG_2962.JPG
    1.5 KB · Views: 0
Thread owner
Thank Monica. Don;t expect miracles but I am enjoying it and that's what is most important to me. Felt I was going a bit stale with the usual victims.
 
Fricken awesome mate, looks like things are ticking away nicely. How many decal options are there?
 
that wheel color is a good match, ;)


me being lazy and would of used sand and added dust to get away with it,lol,:rolleyes:
 
Thread owner
Cheers mate. I didn't take a photo of the decals but here is a link to the schemes. No info given on units etc, http://www.model-making.eu/products/Tiger-I-172697.html


The decals are okay, crosses are slightly out of register so will have to do something about that. The sheet has a row of numbers so I can make up whatever I like. The yellow and brown scheme looks cool.
 
Thread owner
Thanks Monica. The colour looks more yellow/brown in the picture than it is in real life. It will definitely look different to the sand yellow colour I'll use as a base.
 
Looking good Joe, out the starting blocks & off you go, coming along nicely.


John
 
Sweet, I agree the dark yellow and brown scheme will look good. Your pics reminded me that I own Humbol paints lol.
 
Looking good there Joe! For an old kit, the hasegawa builds up well.


As for the tracks, don't go mad with therusty look - German track had a black anti-rust coating.
 
Thread owner
\ said:
As for the tracks, don't go mad with therusty look - German track had a black anti-rust coating.
Patrick or Aaron, do you think a dark grey or light black wash with a light rust wash over the top do the trick? I'm about to paint the tank and will do some more on the tracks while it dries. Or is it advisable to apply the wash after they are fitted. There is going to be some touch ups required afterwards because of the heat method of linking the track ends but I can probably hide that on the bottom.
 
This armour building is addictive Joe watch out It is looking good by he way
 
Will subscribe to this as I had no interest in history or the old war machines but since getting into models again I find myself looking less at the jets I loved and more at the ww2 tanks and a few of the neones Armour units.


Your experience here will maybe help me later o_O


Good luck mate
 
Status
Not open for further replies.
Back
Top