Theme editor

Scale Model Shop

2nd Squad, Armoured recon. check it out ...

Status
Not open for further replies.

Gern

Well-known member
Joined
May 17, 2009
Messages
9,320
Reaction score
235
Points
63
1/3
Thread owner
Hi guys. Here's why I've not posted anything on my Tiger build for the last couple of weeks.

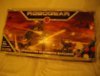
I've always wanted to do something with a Sci Fi theme and Dweller's (You've not posted your name) recent posts convinced me to look into it. I checked out the Warhammer stuff and read a couple of books. Unfortunately I couldn't get interested in the background and the kits are very expensive - although they are nicely detailed. I thought I'd try out the Robogear stuff from Airfix and got hold of their starter set off ebay for about £15.

This set was originally designed for war gaming and consequently there are a LOT of issues for serious modellers. What the heck - beggars can't be choosers and I don't see a lot of choice out there so I have to live with that. Anyway ....

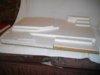
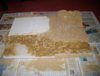
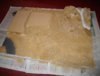
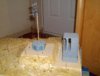
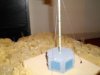
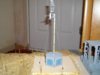
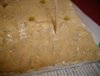
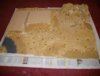
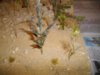
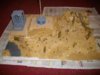
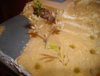
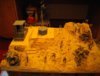
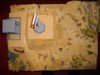
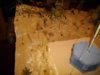
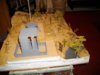
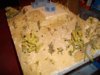
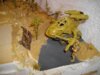
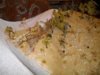
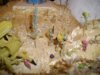
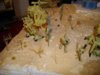
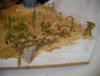
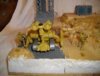
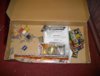
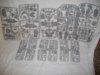
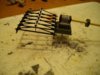
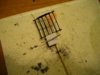
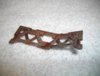
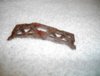
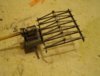
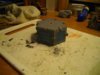
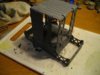
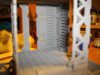
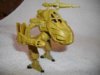
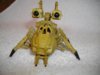
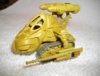
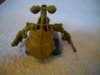
In the box there is a LOT of plastic. There are 20 figures, 8 machines, a load of assorted panels which can be clipped together to create structures, paints & brushes, and a whole lot of game-related stuff with cards, rules, and missiles for the firing weapons (I TOLD you it was designed for games). I selected just eight figures, three machines (there are four different types including a rather ridiculous flying thing which I felt was unuseable) and spent an afternoon creating a couple of structures - can't really call them buildings as you'll see.

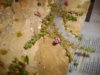
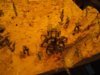
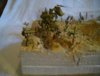
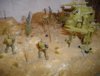
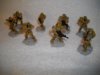
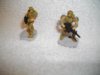
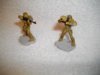
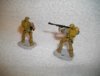
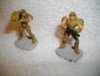
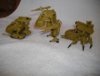
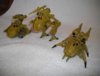
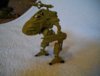
The biggest majority of Sci Fi figures always seem to be painted in an exciting variety of metallic colours - some of which are superbly done. However, most armies nowadays at least make some effort to keep their guys and equipment a bit safer by trying to get it to blend into the background - I see no reason why that trend shouldn't continue in the future. I've also tried to tone down some of the weaponry, which is again typical of what you see in most Sci Fi kits - huge, impractical and OTT.

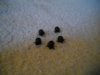
I've done lots of pics so I'm going to do several posts. I'll start with what's left in the box after I've taken all I want and the figures which are finished. Please let me know what you think.

Gern

View attachment 66328

View attachment 66329

View attachment 66330

View attachment 66331

View attachment 66332

View attachment 66333

View attachment 66334

View attachment 66335

View attachment 179354

View attachment 179355

View attachment 179356

View attachment 179357

View attachment 179358

View attachment 179359

View attachment 179360

View attachment 179361
 

Attachments

  • Game bits.jpg
    Game bits.jpg
    2.3 KB · Views: 0
  • The squad.jpg
    The squad.jpg
    2 KB · Views: 0
  • Figures 4.jpg
    Figures 4.jpg
    1.9 KB · Views: 0
  • Figures 3.jpg
    Figures 3.jpg
    1.8 KB · Views: 0
  • Figures 2.jpg
    Figures 2.jpg
    1.9 KB · Views: 0
  • Figures 1.jpg
    Figures 1.jpg
    2.2 KB · Views: 0
  • Unused sprues.jpg
    Unused sprues.jpg
    2.4 KB · Views: 0
  • Box.jpg
    Box.jpg
    2.6 KB · Views: 0
Thread owner
OK. Now for the structures.

I made two different types but I wasn't satisfied as I couldn't see any purpose to either of them - two temporary buildings stuck out in the middle of the wilds? Then I had a bit of a brainwave ...

I'll have the scanner mounted on top of a pole coming out of the base with guy wires to secure it.

I'd got a spare piece of scaffolding so I thought I'd include it as one that had been damaged and abandoned.

Gern

PS Scott (Noble) might well recognise the unlikely source of most of the bits of my scanner.

View attachment 66340

View attachment 66341

View attachment 66342

View attachment 66343

View attachment 66344

View attachment 66345

View attachment 66346

View attachment 66347

View attachment 66348

View attachment 179366

View attachment 179367

View attachment 179368

View attachment 179369

View attachment 179370

View attachment 179371

View attachment 179372

View attachment 179373

View attachment 179374
 

Attachments

  • Scanner 2.jpg
    Scanner 2.jpg
    2.7 KB · Views: 0
  • Scanner 1.jpg
    Scanner 1.jpg
    2.2 KB · Views: 0
  • Rusted Girder 2.jpg
    Rusted Girder 2.jpg
    2.2 KB · Views: 0
  • Rusted Girder 1.jpg
    Rusted Girder 1.jpg
    2.1 KB · Views: 0
  • Finished scanner 2.jpg
    Finished scanner 2.jpg
    2.4 KB · Views: 0
  • Finished scanner 1.jpg
    Finished scanner 1.jpg
    2.3 KB · Views: 0
  • Scanner base 1.jpg
    Scanner base 1.jpg
    2.5 KB · Views: 0
  • Structure 1.jpg
    Structure 1.jpg
    2.8 KB · Views: 0
  • Structure 2.jpg
    Structure 2.jpg
    3 KB · Views: 0
Everyday love more the Sci-fi models, now I know why!!

Looks very good mate!

Polux
 
Thread owner
Now the machines.

I picked one of each of the three ground machines and a selection of the different weapons provided. I played around with them a little to try and eliminate some of the more excessive stuff. Detail in the cockpits was very sparse so I raided my spares box and cobbled together some control panels.

Gern

PS Just noticed some bits of touching up to do.

View attachment 66349

View attachment 66350

View attachment 66351

View attachment 66352

View attachment 66353

View attachment 66354

View attachment 66355

View attachment 66356

View attachment 66357

View attachment 66358

View attachment 66359

View attachment 66360

View attachment 179375

View attachment 179376

View attachment 179377

View attachment 179378

View attachment 179379

View attachment 179380

View attachment 179381

View attachment 179382

View attachment 179383

View attachment 179384

View attachment 179385

View attachment 179386
 

Attachments

  • Machine group 2.jpg
    Machine group 2.jpg
    2.1 KB · Views: 0
  • Machine group 1.jpg
    Machine group 1.jpg
    2.2 KB · Views: 0
  • Finished Werewolf 2.jpg
    Finished Werewolf 2.jpg
    2.3 KB · Views: 0
  • Finished Werewolf 1.jpg
    Finished Werewolf 1.jpg
    2.1 KB · Views: 0
  • Finished Spider 2.jpg
    Finished Spider 2.jpg
    2.2 KB · Views: 0
  • Finished Spider 1.jpg
    Finished Spider 1.jpg
    2.4 KB · Views: 0
  • Finished Hurricane 2.jpg
    Finished Hurricane 2.jpg
    2.6 KB · Views: 0
  • Finished Hurricane 1.jpg
    Finished Hurricane 1.jpg
    2.1 KB · Views: 0
  • Cockpit scratch.jpg
    Cockpit scratch.jpg
    1.7 KB · Views: 0
  • Cockpit 3.jpg
    Cockpit 3.jpg
    2.4 KB · Views: 0
  • Cockpit 2.jpg
    Cockpit 2.jpg
    2.6 KB · Views: 0
  • Cockpit 1.jpg
    Cockpit 1.jpg
    2.6 KB · Views: 0
Thread owner
And finally, the groundwork.

I'll be using the grass plants from Fredericus Rex (Green Line) which are expensive but good. I'll also be using some old paint brush bristles and I've scratched some small plants from some small beads. I'll be getting more stuff this weekend but I'll wait until it arrives before posting.

The base is 600mm x 450mm (24" x 18" in old money). I've used oddments of polystyrene to create basic contours, plaster to make the ground and fish tank gravel and budgie grit for the actual surface. The placement pic shows roughly how the structures will appear and where the figures and machines will go.

The stream was filled with clear bathroom sealant but I managed to spill grit all over it which wouldn't brush off. I've removed the sealant and re-coated the stream bed with PVA. Once that's set, I'll build up the water with more clear sealant.

The road surface (bottom left) is just some fine grit emery paper, and the 'concrete' stands for the structures is fine grit sandpaper.

Gern

View attachment 66391

View attachment 66392

View attachment 66393

View attachment 66394

View attachment 66395

View attachment 66396

View attachment 66397

View attachment 66398

View attachment 179417

View attachment 179418

View attachment 179419

View attachment 179420

View attachment 179421

View attachment 179422

View attachment 179423

View attachment 179424
 

Attachments

  • Plants 1.jpg
    Plants 1.jpg
    2.3 KB · Views: 0
  • Stream 2.jpg
    Stream 2.jpg
    2.2 KB · Views: 0
  • Placement sample.jpg
    Placement sample.jpg
    2.4 KB · Views: 0
  • Ground layout 1.jpg
    Ground layout 1.jpg
    2 KB · Views: 0
  • Ground 1.jpg
    Ground 1.jpg
    2.3 KB · Views: 0
  • Grass plants.jpg
    Grass plants.jpg
    2.1 KB · Views: 0
  • Final ground layout.jpg
    Final ground layout.jpg
    2.2 KB · Views: 0
  • Berry plants.jpg
    Berry plants.jpg
    1.8 KB · Views: 0
\ said:
And finally, the groundwork.I'll be using the grass plants from Fredericus Rex (Green Line) which are expensive but good. I'll also be using some old paint brush bristles and I've scratched some small plants from some small beads. I'll be getting more stuff this weekend but I'll wait until it arrives before posting.

The base is 600mm x 450mm (24" x 18" in old money). I've used oddments of polystyrene to create basic contours, plaster to make the ground and fish tank gravel and budgie grit for the actual surface. The placement pic shows roughly how the structures will appear and where the figures and machines will go.

The stream was filled with clear bathroom sealant but I managed to spill grit all over it which wouldn't brush off. I've removed the sealant and re-coated the stream bed with PVA. Once that's set, I'll build up the water with more clear sealant.

The road surface (bottom left) is just some fine grit emery paper, and the 'concrete' stands for the structures is fine grit sandpaper.

Gern
Looks good so far can't wait to see it finished .

Scott
 
Thread owner
\ said:
Look like rail gun parts but could be wrong.Scott
You got it. I don't know who designed the sprues for the Dora, but you'll find there are LOADS of extras on duplicated sprues. I seem to remember there being about 30 doors - when you only need about 4!

Gern
 
Thread owner
More progress on the groundworks.

The tall grasses are small clumps of bristles broken away from an old paintbrush. Small hole in the surface and a dab of PVA for each.

The smaller clumps of grass are the Green Line bits - again, just a dab of PVA on the base and press them down.

The buildings are now fixed in place. The guy wires for the scanner mast are made from EZ line painted silver. I added a wire for the power using aluminium wire fixed in place with masking tape.

I was planning to get some more vegetation on Sunday but had a rare night out on Saturday and didn't sober up in time to go get them! Probably fix them tomorrow along with the stream then all I gotta do is place the figures and machines.

Gern

View attachment 66524

View attachment 66525

View attachment 66526

View attachment 66527

View attachment 66528

View attachment 179550

View attachment 179551

View attachment 179552

View attachment 179553

View attachment 179554
 

Attachments

  • Fixed structures.jpg
    Fixed structures.jpg
    2.1 KB · Views: 0
  • Fixed scanner 2.jpg
    Fixed scanner 2.jpg
    2.1 KB · Views: 0
  • Fixed scanner 1.jpg
    Fixed scanner 1.jpg
    2.2 KB · Views: 0
  • Bristle grass 2.jpg
    Bristle grass 2.jpg
    2.1 KB · Views: 0
  • Bristle grass 1.jpg
    Bristle grass 1.jpg
    2.3 KB · Views: 0
Thread owner

Attachments

  • Finished ground 4.jpg
    Finished ground 4.jpg
    2.4 KB · Views: 0
  • Finished ground 3.jpg
    Finished ground 3.jpg
    2.7 KB · Views: 0
  • Finished ground 2.jpg
    Finished ground 2.jpg
    2.4 KB · Views: 0
  • Finished ground 1.jpg
    Finished ground 1.jpg
    2.5 KB · Views: 0
  • Finished ground 5.jpg
    Finished ground 5.jpg
    2.4 KB · Views: 0
  • Finished ground 6.jpg
    Finished ground 6.jpg
    2.6 KB · Views: 0
That's ma boy....dio's for nowt!

This is looking good Dave, I'll be waiting to see the finished article.

Ron
 
Thread owner
That's it. I'm calling this one done. (I can't believe I've actually finished summat!).

I've really enjoyed this build despite, or maybe because of, the limitations of the kit. If I'd opted to do this sort of thing using WWII GIs and a couple of half tracks from Tamiya instead of the Robogear stuff, I'd have had to spend a lot more time trying to get everything more accurate - to match the quality of the kits.

Still, I've enjoyed it and learned a few things about doing dios as I've gone along so next time it'll be better. More skilled 'scratchers' could use these figures as a starting point to create a really good Sci Fi dio. The figures are scaled at 1/48 which means there are accessories, scenery etc. readily available.

Gern

PS I'm well pleased with the way the camo pattern I dreamt up works.

View attachment 66582

View attachment 66583

View attachment 66584

View attachment 66585

View attachment 66586

View attachment 66587

View attachment 179608

View attachment 179609

View attachment 179610

View attachment 179611

View attachment 179612

View attachment 179613
 

Attachments

  • Done 1.jpg
    Done 1.jpg
    2.7 KB · Views: 0
  • Done 6.jpg
    Done 6.jpg
    2.6 KB · Views: 0
  • Done 5.jpg
    Done 5.jpg
    2.9 KB · Views: 0
  • Done 4.jpg
    Done 4.jpg
    2.4 KB · Views: 0
  • Done 3.jpg
    Done 3.jpg
    2.7 KB · Views: 0
  • Done 2.jpg
    Done 2.jpg
    2.9 KB · Views: 0
Thread owner

Attachments

  • Done 15.jpg
    Done 15.jpg
    2.7 KB · Views: 0
  • Done 14.jpg
    Done 14.jpg
    2.4 KB · Views: 0
  • Done 13.jpg
    Done 13.jpg
    2.6 KB · Views: 0
  • Done 12.jpg
    Done 12.jpg
    3 KB · Views: 0
  • Done 11.jpg
    Done 11.jpg
    2.7 KB · Views: 0
  • Done 10.jpg
    Done 10.jpg
    2.9 KB · Views: 0
  • Done 9.jpg
    Done 9.jpg
    2.4 KB · Views: 0
  • Done 8.jpg
    Done 8.jpg
    2.6 KB · Views: 0
  • Done 7.jpg
    Done 7.jpg
    2.7 KB · Views: 0
Terrific little dio! Love the camouflage on the figures and the vegetation.

Cheers

Polux
 
Thread owner
Thanks guys. Finishing this has given me an appetite for another one, but I'd better finish my Tiger first else it'll cost me a fortune in Eccles cakes for Ron at Cosford next year!

Polux - As you can see the vegetation is some real plants I found on a piece of waste ground. They're sprayed with matt varnish but I don't know how long that will keep them looking like this. Be interesting to see what they look like when they're dead and starting to decay. I'll try to remember to post some pics when that happens.

Gern
 
Status
Not open for further replies.
Back
Top