Theme editor

Scale Model Shop

Alice Paper Fold Hindenburg

Status
Not open for further replies.

Bigfoot57

Active member
Joined
Jun 24, 2015
Messages
1,181
Reaction score
305
Points
83
Age
68
1/3
Thread owner
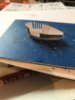
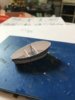
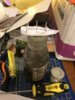
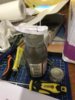
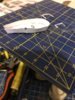
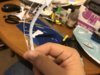
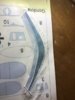
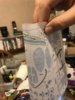
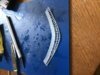
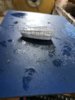
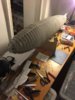
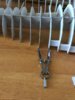
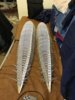
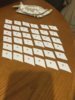
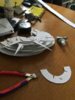
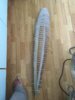
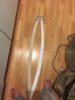
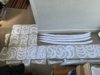
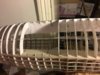
Hello everybody with my Aston Martin build stalled whilst waiting for longer bolts to arrive I have embarked on a totally diffrent type of model I've put this into the aircraft under construction thread as I can't come up with anything better to use for this build
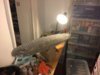
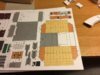
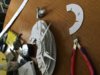
Anyway here's where I am with this one which has been ongoing for several months now the last picture also shows the Launch Umbilical Tower which is also under construction and is the next project to be finished this year hopefully
 

Attachments

  • IMG_5039.JPG
    IMG_5039.JPG
    3 KB · Views: 0
  • IMG_5038.JPG
    IMG_5038.JPG
    2.6 KB · Views: 0
  • IMG_5037.JPG
    IMG_5037.JPG
    2.9 KB · Views: 0
  • IMG_5036.JPG
    IMG_5036.JPG
    2.9 KB · Views: 0
  • IMG_5035.JPG
    IMG_5035.JPG
    2.9 KB · Views: 0
  • IMG_5034.JPG
    IMG_5034.JPG
    2.3 KB · Views: 0
  • IMG_5033.JPG
    IMG_5033.JPG
    2.3 KB · Views: 0
  • IMG_5031.JPG
    IMG_5031.JPG
    2.5 KB · Views: 0
  • IMG_5040.JPG
    IMG_5040.JPG
    2.5 KB · Views: 0
  • IMG_5041.JPG
    IMG_5041.JPG
    3 KB · Views: 0
  • IMG_5045.JPG
    IMG_5045.JPG
    2.6 KB · Views: 0
  • IMG_5044.JPG
    IMG_5044.JPG
    2.8 KB · Views: 0
  • IMG_5043.JPG
    IMG_5043.JPG
    2.7 KB · Views: 0
  • IMG_5042.JPG
    IMG_5042.JPG
    2.9 KB · Views: 0
  • IMG_2373.JPG
    IMG_2373.JPG
    3 KB · Views: 0
Thread owner
Latest update decided to remove coloured windows and replace with see through two pictures before and after


Regards

Colin
 

Attachments

  • IMG_5064.JPG
    IMG_5064.JPG
    2.2 KB · Views: 0
  • IMG_5063.JPG
    IMG_5063.JPG
    2 KB · Views: 0
Thread owner
Latest update all coloured card windows now removed and replaced by clear frames just the gondola glazing to tackle now

Regards

Colin
 

Attachments

  • IMG_5072.JPG
    IMG_5072.JPG
    2.4 KB · Views: 0
  • IMG_5071.JPG
    IMG_5071.JPG
    2.6 KB · Views: 0
Thread owner
Thanks Monica I'm toying with idea of lighting it as now almost all the glassware is now clear and I did pre-drill all the celing lights through so a couple of led type stick on's should provide enough light for it look quite efective along with other lights inside to illuminate the other side and cabin windows
Add a couple of navigation beacons and the huge I think it was 5 million candle power spotlight underneath the hull for illuminating the scenary at night and hopefully it won't exactly duplicate the real Hindenburg by bursting into flames

Regards
Colin
 
The Hindenburg always has fascinated me ( not just because of her ending ) suspicious as it was but her gracefulness and spender.
I've seen a few models of airships and it amazes me in the grandaur of the builds
This is taking such a step towards the same.
This is really looking good Colin.

Very impressive

Kind regards

Robert
 
Thread owner
Latest update roughly made up the gondola sides so I can see where to replace the printed windows with plasastrut and then fill in the resulting windows with microsol clear to form new windows thats the plan and after nearly 2 hours of cursing and swearing we have arrived at this point now waiting for the glue to set before gluing on top ring supporting frame
Can somebody explain this one side of the structure glued fine no problems yet the other side was completely the opposite it seemed no matter how much glue you put on it nothing was going to stick without a fight yet it's the same material

Regards
Colin
 

Attachments

  • IMG_5092.JPG
    IMG_5092.JPG
    1.9 KB · Views: 0
  • IMG_5091.JPG
    IMG_5091.JPG
    2.5 KB · Views: 0
  • IMG_5090.JPG
    IMG_5090.JPG
    2.5 KB · Views: 0
  • IMG_5083.JPG
    IMG_5083.JPG
    1.9 KB · Views: 0
Thread owner
Update 19:56 03/03/2017
Now started gluing the top window frame into place as you can see the side that refuses to stick one of the uprights has fell off yet again oh well onwards

Regards
Colin
 

Attachments

  • IMG_5094.JPG
    IMG_5094.JPG
    1.8 KB · Views: 0
Thread owner
Update 22:11 04/03/2017
Gondola now complete very rough at the moment still full of glue and filler all needs cleaning off when completely dry and hardened will hopefully look far better when sanded and painted
 

Attachments

  • IMG_5102.JPG
    IMG_5102.JPG
    1.6 KB · Views: 0
  • IMG_5101.JPG
    IMG_5101.JPG
    1.6 KB · Views: 0
  • IMG_5100.JPG
    IMG_5100.JPG
    1.7 KB · Views: 0
Thread owner
After 5 attempts at producing a accurate looking gondola I'm now on version 5 which hopefully won't fall to pieces when cut and folded into a flowing curve 1st 4 pictures show the 4 dead ends the last 3 shows my current status basically I have glued down on top of the part all the ribs and then encased it in plastic glue in effect attemping to weld the parts together so that when all the background paper is cut away you should be left with a skeleton frame work the last picture shows the 1st section cut out it will need sanding smooth and cleaning up but it's looking hopefull will post more pictures of final outcome

Regards

Colin
 

Attachments

  • IMG_5202.JPG
    IMG_5202.JPG
    3.2 KB · Views: 0
  • IMG_5201.JPG
    IMG_5201.JPG
    3.1 KB · Views: 0
  • IMG_5200.JPG
    IMG_5200.JPG
    3.3 KB · Views: 0
  • IMG_5203.JPG
    IMG_5203.JPG
    3.3 KB · Views: 0
  • IMG_5204.JPG
    IMG_5204.JPG
    2.2 KB · Views: 0
  • IMG_5206.JPG
    IMG_5206.JPG
    2.4 KB · Views: 0
  • IMG_5205.JPG
    IMG_5205.JPG
    2.3 KB · Views: 0
Thread owner
Hello everybody have now completed the rough cut of all gondolas windows now need to wait for glue to cure before filing windows square and remove the last remants of paper
The idea worked beautifully maybe some you can utilise it on some of your own builds you just need patience and a very sharp blade and steady hand

Regards
Colin
 

Attachments

  • IMG_5220.JPG
    IMG_5220.JPG
    2.5 KB · Views: 0
Thread owner
Ok final test the curve test will it hold together yes it did as can be seen from attached photo's so next job will to be to sand it smooth and then attach it to the bottom floor of the gondola

Regards

Colin
 

Attachments

  • IMG_5226.JPG
    IMG_5226.JPG
    3 KB · Views: 0
  • IMG_5225.JPG
    IMG_5225.JPG
    3.1 KB · Views: 0
Thread owner
Small update still cutting away surpless paper around the struts of the gondola taken about 20 hours with a scalpel head torch and patience see picture showing to the right remaining bits to be trimmed
It may not look perfect but it's a damn site better than before should have the windows glued onto the base by the weekend ready for detailing inside the gondola
 

Attachments

  • IMG_5242.JPG
    IMG_5242.JPG
    2.6 KB · Views: 0
Thread owner
Gondola windows now free of the paper now ready for gluing onto base
 

Attachments

  • IMG_5248.JPG
    IMG_5248.JPG
    2.7 KB · Views: 0
Thread owner
Gondola stage 2 version 6 now ready for internal details
 

Attachments

  • IMG_5250.JPG
    IMG_5250.JPG
    2.4 KB · Views: 0
  • IMG_5252.JPG
    IMG_5252.JPG
    3.2 KB · Views: 0
Status
Not open for further replies.
Back
Top