Theme editor

Scale Model Shop

Chris' Trumpeter / Anami Ye-2 & Ye-4 Modifikatsiya

Steve-the-Duck

Active member
SMF Supporters
Joined
Jul 3, 2020
Messages
2,086
Reaction score
592
Points
113
First Name
Chris
Location
Medway Towns
1/3
Thread owner
AAARGH!

It was right there, right in front of me the whole time! In the photos and on the plans. And I didn't blinkin' notice until I came to planning the next mini-MiG, the Ye-50 Interceptor prototype with the added rocket engine. 'lengthened forward fuselage putting cockpit ahead of LE.' Meaning the leading edge of the Ye-2 and Ye-4, aligns with the cockpit. So what I built has the wings too far back. And the wing roots are on the models!

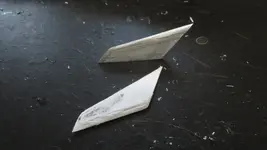
Out with the razor saw
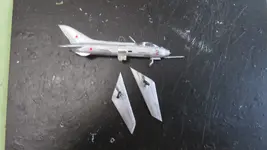
IMG_3943.webp
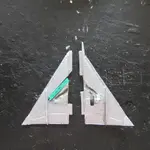
So, I've cut the wings off with the aim of mounting them further forward. I'll also have to alter the wheel bays to line up with the fuselage. And eliminate the mini bulge abpve the wing on one side, which only appears on later marks because the fuselage is slightly narrower
Not insurmountable

But fudge it!
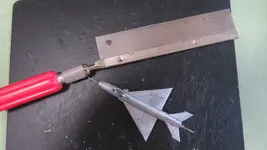
IMG_3944.webp
And you're next for surgery, buddy

At least I only have to worry about this for two more, the Ye-2A and Ye-5. The Ye-6 and others, including the service versions, have the wings in the 'right' place

Look at the blinkin' pictures you fool!
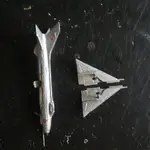
 
Thread owner
And as an aside, I discovered the Area 88 models are made by Anami. They do a rather nice Buccaneer too, though those few still available are a bit too pricey...
 
Thread owner
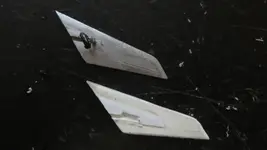
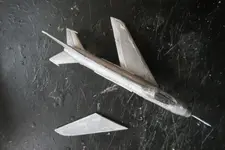
Well this is a mini bonus. The wings just pulled straight off. Did I forget to glue them?
IMG_3945.webp
All these need is, one again, re-profiling the wheel bays, and the removal of the LE root extension

Interesting, like the later -21s have a piece where the tailplanes were mounted higher still on the fuselage, the also have the old wing position showing, even on the final variants like the Bis.
 
Thread owner
Good grief! And nobody would have noticed either.
Yeah, and nobody did, especially me, even when I sat the models on the fudging photos!
Read the fudging description, ya durn fool!
 
Thread owner
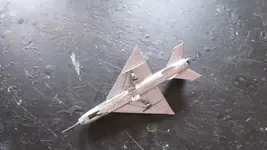
Well, this is progressing
IMG_3946.webp
To move the wheel bays back requires sawing and packing, plus modifying the tabs, and the slots in the fuselage. The right wheel wobbled, and then came off completely with just a little tug

And then you can see the comparison of just how far forward the wings need to be

But it all works out in the end (though the light shines through in a few places, not an insurmountable fix
IMG_3949.webp
Pretty much all I have to do is put the wheels back on
IMG_3947.webp
 
Thread owner
However, doing the same job for the Ye-2 is much more difficult
IMG_3948.webp
The wing just broke while cutting because of course it did, I've still got another MiG-19, but I'm not about to cannibalise that as Attack don't produce the kit anymore (and eBay prices are bloody stupid!)

So, back to scratching some wings. It worked with the Aldershot after all
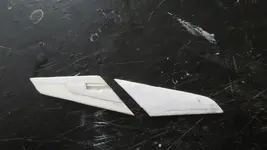
/IMG_3950.webp
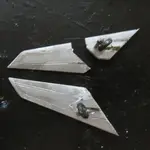
Top in both pics is the unmodified port wing
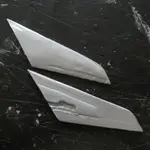
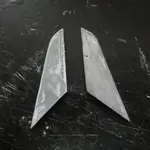
The scratched wing is 20 30 thou sandwich with a 10 thou skin, and a lot of careful sanding thereafter to get a thin trailing edge. I may go with a multi-layer 10 thou build if this doesn't go quite to my satisfaction. Still, I only need two more pairs of swept wings after this, for the Ye-2A and the Ye-50
IMG_3951.webp
There are no underside plans or photos to show the wheel bays, but I can't help feeling they're very far back on the wings, when the wheel position in the photos seems more central. And yes, I am looking at the photos very carefully now. The Ye-2A side elevation I do have implies the main leg aligns with the back of the wheel bay. Without further info, and before I go any further, I'm inclined to make the wheel bay more perpendicular to the fuselage, rather than parallel to the trailing edge
So many books, so many photos, so many plan sketches, and never quite the detail I need

That happens a lot
Though, as an aside, I did recently discover, by reading the right book (namely Puttnams Martlesham Heath guide), what harnesses should be on my Silver Wings 'planes
So, that was nice
 
Thread owner
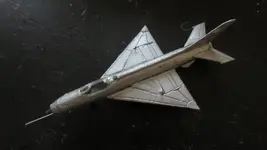
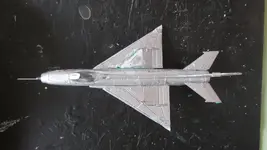
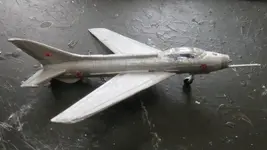
So, the Ye-4 has the undercarriage back on, without too much trouble
IMG_3952.webp

A bit more work and it's completed, and without any last minute hitches. But, as it's two together here, completed pics will go when the Ye-2 meets it's end
However that happens!

IMG_3960.webp

IMG_3962.webp
Both wings are built, and a coat of Tamiya Bare Metal silver (cutting out a primer coat), show the spots still to be filled then sanded. Finally, I'll be scribing on the panel lines

And then we have the fun of re-attaching the undercarriage, without that breaking!
 
Last edited:
Thread owner
Has my modification build exceeded the original builds?

So wings completed and scribed anew
IMG_3972.webpIMG_3973.webp
Just to align them, and so there's not a simple butt joint, brass rod connects both wings. Only one piece as there was nowhere for a rear one to go
IMG_3974.webp
And both wings back on
Just a little filling, some careful masking andf re-spraying the wings, and it'll be u/c re-attachment time

The good thing about this modification from the first attempt is the new wings are a perfect pattern for the planned Ye-2 and Ye-50 upcoming
 
Back
Top