Theme editor

Scale Model Shop

Dave Ward's 1/48 Fw 190D-9 & D-10

Status
Not open for further replies.

Dave Ward

New member
Joined
Apr 27, 2018
Messages
10,549
Reaction score
43
Points
0
1/3
Thread owner
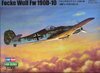
Whilst fitting the tracks on my Trumpeter SU-152, I thought about what was next on the bench, and the GB tribute to Kurt Tank. I will be building this:-
View attachment 327201
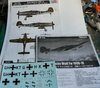
As a slight comparison, I will also be building this:- ( romantic box art! )
View attachment 327202
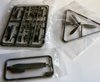
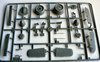
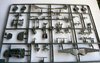
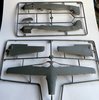
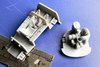
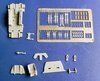
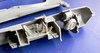
The D-10 was only a prototype, but essentially the same airframe as the D-9. The HobbyBoss model has a lot less parts, - I picked it up for considerably less than half the price of the Eduard model.
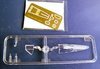
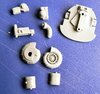
Since the Eduard is a Profipack - it'll be built OOB, and the HB will only have the addition of seat belts. I'm not going to build them together, and at the moment not sure which will be first, but I'll be starting shortly.............
Dave
 

Attachments

  • eduard fw190d.jpg
    eduard fw190d.jpg
    2.6 KB · Views: 0
  • hb fw 190d.jpg
    hb fw 190d.jpg
    2.8 KB · Views: 0
Thread owner
Pete,
a few years ago, I would have gone for the 1/72 version, but now I'm more comfortable with 1/48.
Looking at the sprues, I'm surprised to find them a bit greasy - almost oily. I've never come across this on an Eduard kit before - I'll be getting the Fairy Liquid, and the scrubbing brush out, before I tackle it.
Dave
 
I've not seen that on an Eduard kit Dave. Then again, I've only built 4!

Pete
 
Thread owner
I've decided on the HobbyBoss D-10 first - it looks a pretty simple build ( unlike the Eduard D-9) . View attachment 327269
Nice to see the Swastikas ( albeit in 2 pieces )View attachment 327272View attachment 327273View attachment 327274
You have the option of open or closed cowling gills - and apparently you can correctly see the rear of the engine through the wheel wells - not seen in the Eduard, or Tamiya offerings!
View attachment 327270View attachment 327271
The usual HobbyBoss crystal clear canopy. A pity, that the small PE fret doesn't have seat belts...........................
Dave
 

Attachments

  • instr etc.jpg
    instr etc.jpg
    3.8 KB · Views: 0
  • minor bits.jpg
    minor bits.jpg
    2.9 KB · Views: 0
  • pe canopy.jpg
    pe canopy.jpg
    2.7 KB · Views: 0
  • sprue 01.jpg
    sprue 01.jpg
    3.4 KB · Views: 0
  • sprue 02.jpg
    sprue 02.jpg
    3.3 KB · Views: 0
  • sprue 03.jpg
    sprue 03.jpg
    3.9 KB · Views: 0
Thread owner
Whilst I am waiting for my basecoat to dry on the SU-152, I decided to begin the HB D-10
HobbyBoss supply decals for the instrument panels, but I remembered that the Eduard Profipack D-9 has coloured photoetch, so the Eduard decals are surplus. I thought that they should be better than the HB................................ View attachment 327572
Eduard on left, HB on right. I'm going to use the HB panel decals, and the Eduard side panel decals ( there aren't any in the HB )
Cockpit bits & Eduard Luftwaffe Seat Belt set
View attachment 327570
Rear Engine bitsView attachment 327573
Both assemblies completed
View attachment 327569Both parts dry fitted to the fuselage halves.............
View attachment 327571
I'm not convinced that you will see the back of the engine clearly through the wheelwells, so it'll only get a basic paint job.
Dave
 

Attachments

  • rear engine bit.jpg
    rear engine bit.jpg
    3.7 KB · Views: 0
  • assembled.jpg
    assembled.jpg
    3 KB · Views: 0
  • cockpit bit.jpg
    cockpit bit.jpg
    3.4 KB · Views: 0
  • dry fit cockpit.jpg
    dry fit cockpit.jpg
    2.6 KB · Views: 0
  • instrument decal.jpg
    instrument decal.jpg
    1.5 KB · Views: 0
Thread owner
Cockpit complete & fuselage is joined........View attachment 327874
Cowling is just dry fitted, and fit looks good.
The wings have the wheel wells added & detail frames & gun barrels addedView attachment 327875
Flaps & ailerons added - again good fit.
Next, I'll join the wings and fuselage - hoping for no nasty gaps..........
Dave
 

Attachments

  • wings.jpg
    wings.jpg
    1.5 KB · Views: 0
  • fuselage 01.jpg
    fuselage 01.jpg
    1.4 KB · Views: 0
Thread owner
Hopefully, a minor pause in benchtime. I had a slight accident yesterday, and today, I've a stiff and aching right hand and arm, and a nasty bruise on my back, which is causing me grief when I move. Stupid overbalance, slip and fall. No alcohol involved! - at first I thought I hadn't done anything, but as the day wore on, I got stiffer & stiffer.
Have to hit the Ibuprofen, and have an early night.............................
Dave
 
Thread owner
Underside given a coat of RLM 76rlm 76.jpg
Upper wing & stabilisers given a coat of RLM 82rlm 82.jpg
I'll move onto the 0.2mm nozzle airbrush for the rest of the camouflage & mottling
Dave
 
Thread owner
RLM 81 Camo on wings ( difficult to see ), and the first pass of the mottle....................mottle first pass.jpg
It'll take several applications of RLM 76, 81 & 82 before I'm satisfied
Dave
 
Thread owner
Finished the mottle, I think - I'll give it an overspray of gloss varnish, before moving on to panel washes - not long to go now....................finish mottle.jpg
Dave
 
Thread owner
Decals applied - well, some of them! I had trouble with the dashed lines for the wing walkways - I couldn't get them to sit straight, and with the pulling & prodding thay fell apart. - so no dashed decals on the wings!P1050799.JPG
The D-10 was only a prototype, so I reasoned that it wouldn't have the full range of standard stencils, anyway.................
Dave
 
Thread owner
Time for a panel wash
the ingredients - soft pastels, water & washing up liquidP1050800.JPG

Pastel scraped with a scalpel to give a fine dust
P1050802.JPG
A few drops of washing up liquid , then water. The WUL removes surface tension & allows a good mix. I'm afraid the exact amounts are a bit of trial, and error - better too little water than too much.
The underside of the D-10 is washed with the mixture ( you can follow the panel lines, but I'd don't usually do that ).P1050804.JPG

Allow to dry.......................
This panel wash is a bit delicate - you remove it with a slightly damp paper tissue, or dampened cotton budsP1050807.JPG
This is not as durable as commercial washes, so you have to seal it in with a varnish coat before any weathering. I have done the upper surfaces, but it doesn't show up against dark surfaces
Dave
 
Thread owner
I'm sorry to say that the D-10 crashed & burned!
I overdid a weathering coat, and trying to remove it, caused paint to lift & extensive bubbling. To really recover it, I'd have to strip all the paint off, and I'm not spending any more time on this. So, it's landfill, I.m afraid.
I do have the Eduard D-9 on standby, so hopefully I will get something completed for this GB!!!!!!
Dave
 
Status
Not open for further replies.
Back
Top