Theme editor

Scale Model Shop

Dragon T-34/76 1941 mod. (prod. no. 6205)

Status
Not open for further replies.

Gauge1TrainsDK

New member
Joined
Mar 1, 2017
Messages
407
Reaction score
0
Points
0
1/3
Thread owner
Hey everyone!

I noticed the GB description allowed for several builds, and since I am just itching to build a Russian tank in 1:35 (my first, and only my second Dragon kit - something which I can tell I am going to have a real thing for!), I thought I'd get right on it.

No sprue pictures by me this time, since the vendor I bought it from delivered a set in which several parts had come lose from the sprues. Suffice to say that the parts look absolutely clean, crisp, and pronounced in their detail. I have seen absolutely zero flash, and only the tiniest of mold lines on round parts of the suspension system. Kits like that are an absolute dream to build, and I hear very good things about Tamiya in that regard, too. This is what modelling is about, for me: Building, not cleaning. I'll clean my house, that should do it! :rolleyes:

Sprue pics from another copy of the kit, from a review found via the Scalemates.com model kit database: http://www.panzer-modell.de/ausgepackt/archiv/dragon/6205.htm

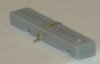
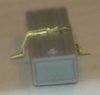
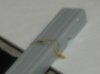
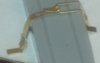
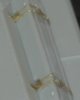
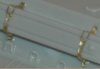
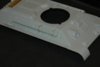
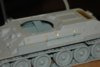
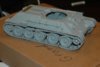
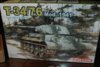
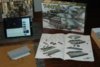
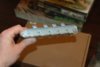
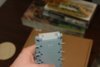
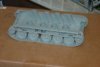
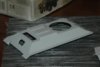
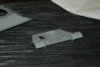
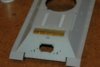
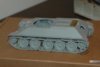
Below are a few pictures to show the box, and what I've done so far. The individual track links are glued together, but kept in two parts for ease of painting. Next, I will be dealing with the photoetch, something which is a first for me, and I am very excited about it :)

Happy building!

View attachment 280760 View attachment 280761 View attachment 280762 View attachment 280763 View attachment 280764 View attachment 280765 View attachment 280766 View attachment 280767
 

Attachments

  • DSC_0009.JPG
    DSC_0009.JPG
    2.9 KB · Views: 0
  • DSC_0001.JPG
    DSC_0001.JPG
    2.7 KB · Views: 0
  • DSC_0002.JPG
    DSC_0002.JPG
    2.1 KB · Views: 0
  • DSC_0004.JPG
    DSC_0004.JPG
    2.1 KB · Views: 0
  • DSC_0005.JPG
    DSC_0005.JPG
    1.9 KB · Views: 0
  • DSC_0006.JPG
    DSC_0006.JPG
    1.9 KB · Views: 0
  • DSC_0007.JPG
    DSC_0007.JPG
    2.1 KB · Views: 0
  • DSC_0008.JPG
    DSC_0008.JPG
    1.8 KB · Views: 0
This will be an enjoyable build! The Dragon T-34 kits are excellent, I built the 1944 version a few years ago & really enjoyed it.

Looking forward to seeing more.
 
Have to agree with Patrick, I also built the T-34 from Dragon again, a few years ago, and it was a nice kit to do.

Good start.
 
Thread owner
Photo-etch went okay, I think, but I can understand why some people choose to skip this, as even this simple a task as gluing crossbars to the mesh was a lot more fiddly than I had first assumed.

It does look very cool, though, and I think this was worth the effort.

I am not scared off just yet, and the next assembly of this sort is leather belts holding down some sort of boxes on the sides of the tank. And instructions for that are definitely not clear to me! o_O

More to follow...

View attachment 281017 View attachment 281018 View attachment 281019 View attachment 281020 View attachment 281021
 

Attachments

  • Capture.JPG
    Capture.JPG
    1.3 KB · Views: 0
  • Capture2.JPG
    Capture2.JPG
    1.7 KB · Views: 0
  • DSC_0012.JPG
    DSC_0012.JPG
    2 KB · Views: 0
  • DSC_0017.JPG
    DSC_0017.JPG
    2 KB · Views: 0
  • DSC_0018.JPG
    DSC_0018.JPG
    1.9 KB · Views: 0
this is looking very good,Christian,I have never done the T34,in the Dragon kit,
do like the detail,that grill looks great,I do like it a lot,:)
 
Thread owner
just seeing that,grill,some times,I get to thing,I should real,start,
to buy after market parts,as it dose change the whole look,
and marks such a difference ;)

Just to be safe, I should clarify that this photo-etch came with the kit.

I think a lot of Tamiya and other kits come with PE included nowadays, and my impression is that will be cheaper than buying after market.

Review photos of kits will definitely help with gaining knowledge as to which kits to go for, if you want to try PE.
 
ah yes do understand that,as 95% of my kits come from swap meets,
so in a lot of cases , the best kits go first,or depending on how much cash I,
have ,I buy to suit,;)
 
Thread owner
ah yes do understand that,as 95% of my kits come from swap meets,
so in a lot of cases , the best kits go first,or depending on how much cash I,
have ,I buy to suit,;)

Ah! Then after market is probably the best solution ;)
 
Thread owner
HELP NEEDED FROM SMARTER MODELLERS!

I am trying to assemble the PE versions of the belts going around some boxes, and I just don't feel that I get it quite right.:( 
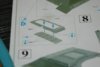
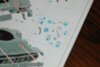
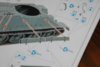
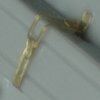
The instructions aren't very helpful to meo_O, but I will post a picture of the instruction part, then what I've managed to bend and assemble.:eek: If anyone could please help me understand how I am supposed to do this right, that would really be appreciated.

Thank you everyone who reads this :oops:

View attachment 281443 View attachment 281444 View attachment 281445 View attachment 281446 View attachment 281447 View attachment 281448
 

Attachments

  • Capture5.JPG
    Capture5.JPG
    1.1 KB · Views: 0
  • Capture6.JPG
    Capture6.JPG
    1.5 KB · Views: 0
  • DSC_0007 (2).JPG
    DSC_0007 (2).JPG
    2.2 KB · Views: 0
  • DSC_0008 (2).JPG
    DSC_0008 (2).JPG
    2.3 KB · Views: 0
  • Capture4.JPG
    Capture4.JPG
    1.4 KB · Views: 0
  • Capture3.JPG
    Capture3.JPG
    1.3 KB · Views: 0
Thread owner
Okay, so for lack of better options, I tried continuing down the path I found, even though I don't think it's entirely correct.

I think it looks okay, though, I am just wondering where the buckle or other holder for the strap went.

Sorry for the unclear pictures, but I am not a good photographer.

Happy building.

View attachment 281611 View attachment 281612 View attachment 281613
 

Attachments

  • Capture7.JPG
    Capture7.JPG
    1.3 KB · Views: 0
  • Capture8.JPG
    Capture8.JPG
    1.6 KB · Views: 0
  • DSC_0016 (2).JPG
    DSC_0016 (2).JPG
    1.6 KB · Views: 0
Thread owner
Some more small progress - the body is ready for painting, as are the loose parts to be sprayed in different colours, etc. Next, and last, part: the turret! :D

I have to say that the pleasure of building these kits grow on me - this is only my second one, but the high quality of each individual piece, combined with the level of detail, makes it an awesome and absorbing build, worth every minute of it. I can only look forward to improve my weathering skills, especially when it comes to dirtying things with acrylic Vallejo washes.

View attachment 281655 View attachment 281658 View attachment 281659
 

Attachments

  • DSC_0001 (4).JPG
    DSC_0001 (4).JPG
    2.1 KB · Views: 0
  • DSC_0002 (4).JPG
    DSC_0002 (4).JPG
    2 KB · Views: 0
  • DSC_0003 (3).JPG
    DSC_0003 (3).JPG
    2.1 KB · Views: 0
  • DSC_0002 (4).JPG
    DSC_0002 (4).JPG
    2 KB · Views: 0
  • DSC_0003 (3).JPG
    DSC_0003 (3).JPG
    2.1 KB · Views: 0
Status
Not open for further replies.
Back
Top