Theme editor

Scale Model Shop

Gern's Lancaster

Status
Not open for further replies.

Gern

Well-known member
Joined
May 17, 2009
Messages
9,320
Reaction score
235
Points
63
1/3
Thread owner
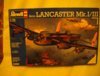
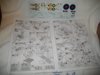
Here we are folks. My pics for the start of this GB.

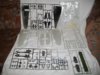
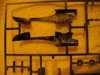
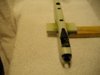
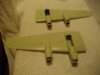
I bought this second hand and you can see whoever owned it tried to spray it. I'm guessing the poor result of that was due to mould release oil on the sprues. I can't think of anything else that would cause the sort of spray pattern you can see inside the nacelles.

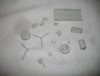
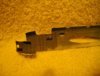
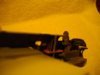
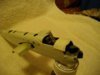
As my version will be mainly white I decided to clean the paint from the parts. I did the loose bits first using my trusty brake fluid, but while I was cleaning them up afterwards, the b****y sink monster struck! During the washing process, even though the plug was left in the sink for the whole time, one of the parts disappeared! Oh poo!

So now I've got to try and cobble together a replacement control column. Fortunately I have the column from the Tamiya Lanc that I can use as a pattern so it shouldn't be too difficult.

Gern

View attachment 36001

View attachment 36002

View attachment 36003

View attachment 36004

View attachment 36005

View attachment 36006

View attachment 149027

View attachment 149028

View attachment 149029

View attachment 149030

View attachment 149031

View attachment 149032
 

Attachments

  • Box.jpg
    Box.jpg
    3.1 KB · Views: 0
  • Sprues 2.jpg
    Sprues 2.jpg
    2.8 KB · Views: 0
  • Sprues 1.jpg
    Sprues 1.jpg
    2.3 KB · Views: 0
  • Poor spraying.jpg
    Poor spraying.jpg
    3.3 KB · Views: 0
  • Loose bits.jpg
    Loose bits.jpg
    1.5 KB · Views: 0
  • Instructions.jpg
    Instructions.jpg
    2.3 KB · Views: 0
Looking forward to this one Dave,sorry to hear the sink monster got ya
 
Tough loosing the column Dave, but good to see you are joining in on this G.B. It will be a refreshing change to see a Lanc. in something other than cammo.

Nice too to see you are still modelling on your comfy sofa!!lol

Cheers,

Ron
 
Don't you just hate it when you lose your column Dave? Sorry mate:grinball1:. Good looking kit thought, can't wait for the build.

Have fun, John
 
Thread owner
\ said:
Don't you just hate it when you lose your column Dave? Sorry mate:grinball1:. Good looking kit thought, can't wait for the build.Have fun, John
It's a good job it wasn't my joystick! :lol

Gern
 
Nice kit Dave, looking forward to see this progress. Bad news about the lost part but im sure you will make a replacement that will be just as good.

Cheers

Andy
 
Sorry if you've already seen it, just thought you may find it useful

http://downloads.hyperscale.com/guides/lancaster_guide.pdf
 
I hope you have fun building this kit ! Building up the under-carriage is a joke and very fiddly

The kit I built I changed just about everything on it and wonder were Revell went wrong....:-[
 
Thread owner
\ said:
Sorry if you've already seen it, just thought you may find it useful http://downloads.hyperscale.com/guides/lancaster_guide.pdf
Hi Andy,

That was the one I saw which gave me the inspiration for the build. There's another one in similar colours by a guy called Ted Taylor which will also help.

Gern
 
Thread owner
\ said:
I hope you have fun building this kit ! Building up the under-carriage is a joke and very fiddly The kit I built I changed just about everything on it and wonder were Revell went wrong....:-[
Thanks Ian. I have looked at the u/c and you're right - it's going to be very fiddly!

I don't know enough about Lancs to know whether Revell got all the details right or not. Strangely, both Brett Green and Ted Taylor seem to think the kit is a reasonable representation and don't mention any errors apart from the dihedral. All I can say is that it looks like one to my untrained eye. Besides which, I haven't got the skills to do any serious changes to the kit so I'm going to have to live with any inaccuracies!

I've added the extra windows as shown in Brett's build as that was fairly straightforward, and I've cobbled together a replacement column which I think is close enough, but I won't be trying to fix the dihedral despite his excellent guide.

I'm doing the interior colours today so hopefully there'll be some pics later.

Gern
 
Thread owner
Pics at last.

Managed to get the rest of the bits washed without losing any - I did a 'Brian' on them!

No problems with the build so far. I found an old control wheel in my spares box and along with a scrap of 20 thou card put together a replacement column. It's not strictly accurate but it's close enough for me!

Although Revell provide decals for the seat belts (and the yellow spot for some reason) I painted the moulded on straps and the spot. The view through the canopy is so limited, I thought I'd save the decals for something else.

My next bit is more difficult. While washing the parts I found what I think is why the previous owner had difficulty with his painting. I thought it was due to mould release oil on the plastic - now I'm sure it was. On the surface of one of the tailplanes, there is a swirly mark moulded into the plastic. I think it was due to a dirty great blob of release oil on the mould. The result is that the surface is full of lumps and bumps which will need to be smoothed out. Looks like I'm going to be spending time filling and sanding, then re-scribing. I wanted to show a picture but my photography skills are non-existent so I couldn't get a close up.

Anyway, here's pictures of my progress so far.

Any comments welcome.

Gern

View attachment 36134

View attachment 36135

View attachment 36136

View attachment 36137

View attachment 149160

View attachment 149161

View attachment 149162

View attachment 149163
 

Attachments

  • Interior 3.jpg
    Interior 3.jpg
    2.3 KB · Views: 0
  • Interior 2.jpg
    Interior 2.jpg
    2 KB · Views: 0
  • Interior 1.jpg
    Interior 1.jpg
    2.2 KB · Views: 0
  • Front.jpg
    Front.jpg
    2.3 KB · Views: 0
Heres my MKI i built a while back and when i first got the kit i was excited to get the kit

but after going through the kit my smile went to the centre of the earth and set about

changing just about everything, to a point i wanted to contact Revell about their kit

and who developed it, needless to say i got no reply from them !!

- The Airfix Tribute Forum - :: New Revell Lancaster build, with plenty of modifications

Don't forget you'll need the large nose blister on it too.

Cheers.

Ian.
 
Thread owner
Hi folks. Some more progress.

Got the fuse halves together. As you can see, I was thinking so hard about making sure I'd got all the windows in that I naturally forgot all about the supporting spar for the tailplanes! Fortunately you can't see the internal details now the fuse halves are together so a simple fix with some plasticard will do.

Apart from the internal sides of the wheel wells, everything has fitted together extremely well. They were slightly too deep so I had to shave them flush with the wing surface when they'd dried. Took me all of 5 minutes!

The real surprise is how well the nacelles fit. They're all fixed to the wing and, except for where the two back halves of the u/c nacelles fit together, there's no filling needed at all. I don't think I cleaned the rear gear well bulkheads properly so I had to spend another 5 minutes doing that!

Got some bits of clean up to do around the windows I added then I'll be putting the rest of the clear bits on. Masking that canopy is going to be tricky but I have some ideas on that. I'll let you know.

Gern

View attachment 36376

View attachment 36377

View attachment 36378

View attachment 149402

View attachment 149403

View attachment 149404
 

Attachments

  • Side fuselage.jpg
    Side fuselage.jpg
    1.8 KB · Views: 0
  • Front Fuselage.jpg
    Front Fuselage.jpg
    1.8 KB · Views: 0
  • Wings.jpg
    Wings.jpg
    1.9 KB · Views: 0
Hi Dave, coming together very nicely, especially those wings, got to admire your guts for taking on someones failed attempt, knowing you and your patience, it will be a 5 Star. Cheers Derek
 
Thread owner
\ said:
Hi Dave, coming together very nicely, especially those wings, got to admire your guts for taking on someones failed attempt, knowing you and your patience, it will be a 5 Star. Cheers Derek
Thanks for the vote of confidence Derek, but I don't think I'm up to those dizzy heights yet! Just doing as well as I can.

Gern
 
Status
Not open for further replies.
Back
Top