Theme editor

Scale Model Shop

Gern's Sherman

Status
Not open for further replies.

Gern

Well-known member
Joined
May 17, 2009
Messages
9,320
Reaction score
235
Points
63
1/3
Thread owner
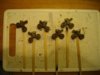
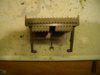
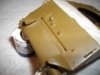
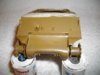
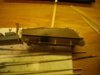
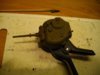
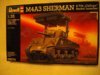
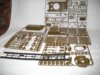
Just as a break from painting the figures for my D-day build, I thought I'd have a go at this one. i've had a good look at the parts and it all looks straightforward and I can do 95% of it before digging out my paints.

View attachment 77570

View attachment 77571

View attachment 77572


Gern

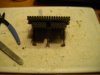
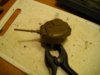
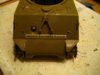
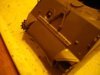
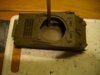
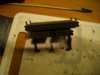
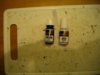
PS Don't expect anything special with this! I don't think I'll be adding any sort of base as it's only there to give me a break from the small stuff I'm doing!

View attachment 190593

View attachment 190594

View attachment 190595
 

Attachments

  • Box.JPG
    Box.JPG
    2.9 KB · Views: 0
  • Instructions.JPG
    Instructions.JPG
    1.9 KB · Views: 0
  • Sprues.JPG
    Sprues.JPG
    3 KB · Views: 0
Thread owner
I joined the tracks using this:

View attachment 77573


It's a two-part glue. You coat both surfaces with the primer and leave to dry - a matter of seconds as it's some sort of solvent and you can see it evaporating. This apparently affects the surface of the polythene and allows the CA glue to grip properly. A drop of CA on one surface and hold them together for a few seconds and the joint is done. It's worked really well and created a very strong joint.

I bought this some time ago when I was doing a few 1/72 figures made of soft plastic and said I'd let you know when I tried it.

http://www.ebay.co.uk/itm/1-x-CLEAR-ADHESIVE-GLUE-GEL-FOR-PP-Polypropylene-PE-Polyethylene-PTFE-Silicone-/281227720573?pt=UK_Crafts_Cardmaking_Scrapbooking_Glue_Tape_EH&hash=item417a7a777d

Gern

View attachment 190596
 

Attachments

  • Polyethylene Glue.JPG
    Polyethylene Glue.JPG
    2 KB · Views: 0
Yeah!! The Calliope one!!

Excellent choice ;)

I'm glad you take part on this SIG, Gern. With or without base.... :) :) :)
 
Thread owner
Got the wheelie bits ready for painting. This is a fairly old kit so there's flash and mould seams to be dealt with but nothing a few swipes with a sanding stick didn't sort - OK the tyres took a lot of swipes! I did have to remove a couple of the locating pins between the outer halves of the bogies as they didn't line up correctly. Once the pins were gone though, I got everything lined up OK.

View attachment 77578


Gern

View attachment 190601
 

Attachments

  • Wheels1.JPG
    Wheels1.JPG
    2.4 KB · Views: 0
looking good never seen that glue before hope it works well..and like the wheelie things like the way your going to spray them nice idea
 
Thread owner
Some more progress. No problems with the turret except the carpet monster ate one of the grab handles. Easy enough to make a new one from some wire. I removed the locating pins from the back of the rocket assemblies so I could file the surface flat ready for the firing mechanisms. That way, they'll hopefully fit flush and look like one continuous length of tube for each rocket.

View attachment 77599

View attachment 77600

View attachment 77601

View attachment 77602


Gern

View attachment 190622

View attachment 190623

View attachment 190624

View attachment 190625
 

Attachments

  • Rocket1.JPG
    Rocket1.JPG
    2.1 KB · Views: 0
  • Rocket2.JPG
    Rocket2.JPG
    2.4 KB · Views: 0
  • Turret1.JPG
    Turret1.JPG
    2.6 KB · Views: 0
  • Turret2.JPG
    Turret2.JPG
    2.2 KB · Views: 0
Wow!! you are going so fast with this one Gern :)

Looking very good so far.

Polux
 
Nice start Dave and thanks for the link about the glue, cheers tony
 
Thread owner
Thanks for the feedback folks. All going smoothly with just a few bits of clean up to do at the front of the rocket tubes (every time I blow away any sanding dust off them, I get the chorus from Zorba the Greek!). I got the turret and wheels primed with Halfords Grey - then Polux had to comment

about how fast it was going! :(

There's a problem with the fit of the hull. Have a look at the pics and you'll see there's a massive gap at the front end. I think I can fix it by putting in some wedges between the glacis plate and the hull sides. Fortunately I managed to break the glue joints there so I've got hopes.

View attachment 77659

View attachment 77660


View attachment 77656

View attachment 77657

View attachment 77658


Gern

View attachment 190679

View attachment 190680

View attachment 190681

View attachment 190682

View attachment 190683
 

Attachments

  • Turret3.JPG
    Turret3.JPG
    2 KB · Views: 0
  • Wheels2.JPG
    Wheels2.JPG
    2.2 KB · Views: 0
  • Hull front3.JPG
    Hull front3.JPG
    1.8 KB · Views: 0
  • Hull front2.JPG
    Hull front2.JPG
    2.7 KB · Views: 0
  • Hull front1.JPG
    Hull front1.JPG
    2.4 KB · Views: 0
looking good Dave, coming along nice ,

you going to refit the hall or just fill it ? hope it turns out ok for you
 
Thread owner
I've done all the building apart from the ancillary bits like tools etc which will need painting beforehand. Got the hull and rocket assembly masked and ready for priming.

For those who may not have seen this, paint and glue don't mix very well. That's why I've masked off some of the parts - it gives me clean bits of plastic ready for glueing.

View attachment 77685

View attachment 77686


Gern

View attachment 190708

View attachment 190709
 

Attachments

  • masking1.JPG
    masking1.JPG
    2.7 KB · Views: 0
  • masking2.JPG
    masking2.JPG
    2.5 KB · Views: 0
\ said:
then Polux had to commentabout how fast it was going! :(

Gern
Errrhhh....I said with my best intention...sorry if I said something out of place :oops:
 
Thread owner
No worries Polux - just my weird sense of humour. It's just that every time someone says things are OK - that's just when things start going wrong for me! ;)

Gern
 
Hi Gern,

looking good so far,

good idea with the masking tape for clean glue spots. I used to sand or scratch the paint away with the scalpel.

taking this one home ;)

Cheers Richi
 
Coming along nicely mate. A menacing looking tank with all those rockets.
 
Thread owner

Attachments

  • Paint1.JPG
    Paint1.JPG
    2.5 KB · Views: 0
  • Paint2.JPG
    Paint2.JPG
    2.3 KB · Views: 0
  • Paint3.JPG
    Paint3.JPG
    2.4 KB · Views: 0
  • Paint4.JPG
    Paint4.JPG
    2.5 KB · Views: 0
Status
Not open for further replies.
Back
Top