
You are using an out of date browser. It may not display this or other websites correctly.
You should upgrade or use an alternative browser.
You should upgrade or use an alternative browser.
Meng 1/35 Bradley M2A3
- Thread starter Mr Bowcat
- Start date
- Status
- Not open for further replies.
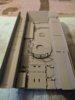
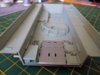
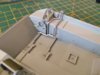
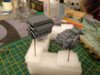
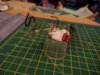
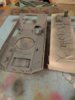
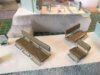
Got some primer down last night so hopefully will get the interior colour on later today.
I tried the stynylrez primer for the first time (got the 3 pack from John) and I have to say so far I am impressed. It went down very well, nice even surface.")
View attachment 282355 View attachment 282356 View attachment 282357
I tried the stynylrez primer for the first time (got the 3 pack from John) and I have to say so far I am impressed. It went down very well, nice even surface.
View attachment 282355 View attachment 282356 View attachment 282357
Attachments

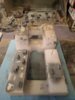
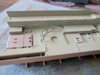
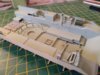
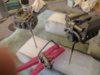
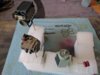
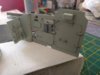
Interior painted (including 64 brass bolt heads  ) and seats primed.
View attachment 282370 View attachment 282364 View attachment 282365 View attachment 282366 View attachment 282367 View attachment 282368
) and seats primed. View attachment 282370 View attachment 282364 View attachment 282365 View attachment 282366 View attachment 282367 View attachment 282368
Attachments
-
 tmp_18427-IMG_20170603_1518351843968367.jpg2.3 KB · Views: 0
 -
 tmp_18427-IMG_20170603_150131675365841.jpg3.2 KB · Views: 0
 -
 tmp_18427-IMG_20170603_1500331984033452.jpg2.7 KB · Views: 0
 -
 tmp_18427-IMG_20170603_1500171193570449.jpg2.8 KB · Views: 0
 -
 tmp_18427-IMG_20170603_150007371810472.jpg2.7 KB · Views: 0
 -
 tmp_18427-IMG_20170603_1459151276047917.jpg2.7 KB · Views: 0
G
Guest
Guest
That stynylrez primer is good stuff Bob! You're making this one look easy great work so far.
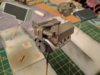
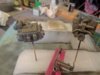
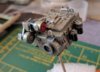
great work so far.Got some more done today. Fitted some of the internal parts, got the seats painted and put together and built the engine, transmission and air box.
View attachment 282442 View attachment 282443 View attachment 282444 View attachment 282445 View attachment 282446 View attachment 282447 View attachment 282448 View attachment 282449
View attachment 282442 View attachment 282443 View attachment 282444 View attachment 282445 View attachment 282446 View attachment 282447 View attachment 282448 View attachment 282449
Attachments
-
 tmp_26397-IMG_20170604_1701112117954821.jpg2.5 KB · Views: 0
 -
 tmp_26397-IMG_20170604_17010277757145.jpg3 KB · Views: 0
 -
 tmp_26397-IMG_20170604_2310381835641450.jpg2.7 KB · Views: 0
 -
 tmp_26397-IMG_20170604_231150784240488.jpg3 KB · Views: 0
 -
 tmp_26397-IMG_20170604_231114365632656.jpg3 KB · Views: 0
 -
 tmp_26397-IMG_20170604_1647011389267602.jpg3 KB · Views: 0
 -
 tmp_26397-IMG_20170604_230815770185845.jpg3.5 KB · Views: 0
 -
 tmp_26397-IMG_20170604_230750720750193.jpg3.3 KB · Views: 0
G
Guest
Guest
I really like those new models and their interiors....are a challenge and a dream together")


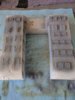
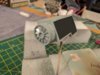
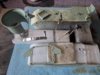
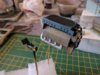
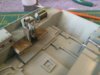
Did a little bit of weathering on the interior, this will have more added when other bits have been fitted. I also got the engine, transmission and air box painted up.
View attachment 282573 View attachment 282574 View attachment 282575 View attachment 282576 View attachment 282577 View attachment 282578 View attachment 282579 View attachment 282580
View attachment 282573 View attachment 282574 View attachment 282575 View attachment 282576 View attachment 282577 View attachment 282578 View attachment 282579 View attachment 282580
Attachments
-
 tmp_27036-IMG_20170607_213628363509998.jpg2.9 KB · Views: 0
 -
 tmp_27036-IMG_20170607_2135351888556010.jpg2.9 KB · Views: 0
 -
 tmp_27036-IMG_20170607_213516161370104.jpg2.8 KB · Views: 0
 -
 tmp_27036-IMG_20170607_2134312000695130.jpg2.7 KB · Views: 0
 -
 tmp_27036-IMG_20170607_192148635839024.jpg2.8 KB · Views: 0
 -
 tmp_27036-IMG_20170607_1921341893588173.jpg2.7 KB · Views: 0
 -
 tmp_27036-IMG_20170607_2007261017617421.jpg2 KB · Views: 0
 -
 tmp_27036-IMG_20170607_2001241710032758.jpg2.6 KB · Views: 0
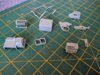
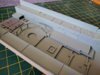
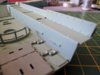
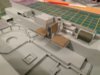
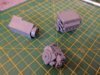
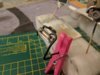
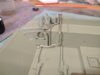
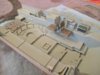
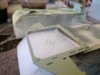
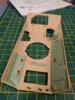
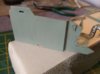
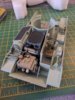
Got some more paint down today, these are the last parts for the lower hull interior.
View attachment 282776 View attachment 282777 View attachment 282778 View attachment 282779 View attachment 282780
I also painted the inside edge of the rear panel in the exterior colour so I didn't have to try and hand brush it later.
View attachment 282781 View attachment 282782
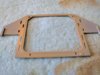
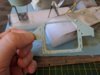
And I also built the upper hull interior and got it and it's parts primed.
View attachment 282784 View attachment 282785
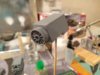
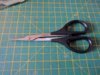
Best of all I found these old scissors in my workshop. They are for cutting lexan body shells (left over from my RC days) and are awesome for cutting sprues.
View attachment 282782
View attachment 282776 View attachment 282777 View attachment 282778 View attachment 282779 View attachment 282780
I also painted the inside edge of the rear panel in the exterior colour so I didn't have to try and hand brush it later.
View attachment 282781 View attachment 282782
And I also built the upper hull interior and got it and it's parts primed.
View attachment 282784 View attachment 282785
Best of all I found these old scissors in my workshop. They are for cutting lexan body shells (left over from my RC days) and are awesome for cutting sprues.
View attachment 282782
Attachments
-
 tmp_32637-IMG_20170610_1633131342951150.jpg2.6 KB · Views: 0
 -
 tmp_32637-IMG_20170610_1408051854097155.jpg2.5 KB · Views: 0
 -
 tmp_32637-IMG_20170610_1407031955032402.jpg2.4 KB · Views: 0
 -
 tmp_32637-IMG_20170610_1406451327898279.jpg2.6 KB · Views: 0
 -
 tmp_32637-IMG_20170610_2059381752465431.jpg3.1 KB · Views: 0
 -
 tmp_32637-IMG_20170610_1631461414334999.jpg2.6 KB · Views: 0
 -
 tmp_32637-IMG_20170610_1630431546355603.jpg2.7 KB · Views: 0
 -
 tmp_32637-IMG_20170610_1202141430341852.jpg2.8 KB · Views: 0
 -
 tmp_32637-IMG_20170610_210017184678177.jpg3.2 KB · Views: 0
 -
 tmp_32637-IMG_20170610_2127501605767112.jpg2.5 KB · Views: 0
Great looking work you have done, it really does build into a fantastic model.
I like the fact that all the hatches work so none of your hard work on the interior is lost. I built the same kit last year, there may still be a build log on here some place
Looking forward to seeing it progress.
Adrian
I like the fact that all the hatches work so none of your hard work on the interior is lost. I built the same kit last year, there may still be a build log on here some place
Looking forward to seeing it progress.
Adrian
G
Guest
Guest
You are nailing it...
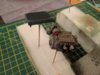
Haven't been at the bench for a couple of days, mainly because the pain killers I'm on make it hard to think, let alone employ fine motor skills.
I eased in to it today by dry fitting most of the interior, then taking it all out again for matte coating.
I'd already done some weathering, but will add to it when all the parts are glued in.
View attachment 283186 View attachment 283187 View attachment 283188 View attachment 283189 View attachment 283190 View attachment 283191 View attachment 283192
Attachments
G
Guest
Guest
This really is coming along a treat Bob, looking forward to the next update
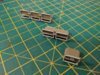
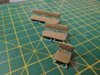
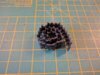
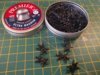
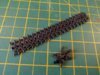
Actually, I did do a bit more today, but it was boring. Tracks!
I got 40 links done, so that's a quarter of them out the way.
View attachment 283193 View attachment 283194 View attachment 283195
I got 40 links done, so that's a quarter of them out the way.
View attachment 283193 View attachment 283194 View attachment 283195
Attachments
- Status
- Not open for further replies.
Legal Notice
scalemodelling.co.uk is a privately operated online discussion forum. All content posted by members reflects their own views and opinions and does not necessarily represent those of the forum owners or administrators. While reasonable efforts are made to moderate content, no responsibility is accepted for user-generated material. By using this site, you agree to comply with UK law and the forum rules.