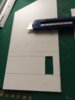
Theme editor

Scale Model Shop

My first ever building ( scratch built )

Status
Not open for further replies.
\ said:
I hate to say this Monica but I just read your post as I was putting plaster on my thumb ( surprised myself on how deep a No 10a scalpel will in bed in your thumb( ouch ( yes I did swear a little )
Robert
oh ouch,


well I have not done much over the last week,from having done the same thing,and two fingers are still a little numb.


plus doing cleaning around the hose,


was taking the cover off the blade to clean paint of the window,and it poped off then sliced my hand open,and I tell


you I,did swear a lot lol.:confused:
 
I learnt a long time ago that these sharp things we use can bite back. I have a one inch scar on my right thumb after being a numpty while taking off some mould seams off a figure. Yes it bled a lot and yes I swore a lot also.
 
Scalpels are designed to cut flesh and they do it so well lol. Trouble is, the blades are so fragile and snap so easily. Might be better with a scribing tool or Stanley knife for the heavy stuff.
 
Thread owner
\ said:
Scalpels are designed to cut flesh and they do it so well lol. Trouble is, the blades are so fragile and snap so easily. Might be better with a scribing tool or Stanley knife for the heavy stuff.
Oh I love the Stanley ( not) now I'm not saying I'm careless as I'm not but don't know if you know in the standardStanley you get a hooked blade for cutting carpet ( well few years ago went through the carpet as you do cutting away and straight into my knee ( nice scar there now.....


We should do a damage thread!! The dangers in Modelling!!


:rolleyes::rolleyes::rolleyes::rolleyes::rolleyes: :D :D:D:D:D
 
\ said:
Oh I love the Stanley ( not) now I'm not saying I'm careless as I'm not but don't know if you know in the standardStanley you get a hooked blade for cutting carpet ( well few years ago went through the carpet as you do cutting away and straight into my knee ( nice scar there now.....
We should do a damage thread!! The dangers in Modelling!!


:rolleyes::rolleyes::rolleyes::rolleyes::rolleyes: :D :D:D:D:D
Nice claret coloured trousers and carpet then.
 
Have you thought of taking up knitting Robert? Oh, hang on pointed needles :D
 
\ said:
Have you thought of taking up knitting Robert? Oh, hang on pointed needles :D
sounds as though he might get himself tied up or get the needle trying knot to
 
\ said:
well I've decided after watching Ralph's build to build my own building for my ""out of gas out of time"
I'm going to build a simple 2 storey townhouse which will have some damage to the roof walls and floors.


It's going to be my first ever scratch building but with Ralph's advice and help I think it could work


I'm using 2mm plastic card ( got 6 sheets in a deal) and I got Tamiya brickwork transfer.


I've used the 9mm to 1ft scale which should be 1/35.scale


I have ref pics to work from


Comments welcome


View attachment 147604 View attachment 147605 View attachment 147606
Good luck Robert I hope it all goes to plan and I will be watching the progress as the build comes together.


Always wanted to see a scratch build from the start
 
\ said:
I hate to say this Monica but I just read your post as I was putting plaster on my thumb ( surprised myself on how deep a No 10a scalpel will in bed in your thumb( ouch ( yes I did swear a little )
Robert
Your sacrifice to the Gods of Modelling Robert. You have to do this to become a fully fledged member of our congregation!
 
Thread owner
\ said:
Scalpels are designed to cut flesh and they do it so well lol. Trouble is, the blades are so fragile and snap so easily. Might be better with a scribing tool or Stanley knife for the heavy stuff.
Now who would have tho ught a stanly could do the job in half the time ( not me that's who ) but it works a treat and no more broken scalpels ( buggers are so fragile with a bit of pressure )


Thanks graham for the tip


Regards


Robert
 
Just a thought. If you used your knife gently to create a scored line, couldn't you use that as a guide for a razor saw to finish the cut?
 
Thread owner
\ said:
Just a thought. If you used your knife gently to create a scored line, couldn't you use that as a guide for a razor saw to finish the cut?
I did consider that move as well Dave ( drill a few pilot holes then use the saw but I've seem to have found solution with the stanly and g cramps to stop the plastic moving ( 10 minutes each window ) should be finished before lunch


Robert


L
 
Thread owner
Well got me my last four/ five Windows cut out ( took me half the time but still nursing a throbbing thumb.


Next step I'll look at addressing the brickwork pattern ) Tamiya pre painted then I might attempt dry fitting the two pieces before I start on the wall partitions.Ill start making some tiles from the 2mm pieces cut out from the windows.


I have to build also framing for the Windows and ledges ( I'll be using 2mm plastic card and also wooden rods but I'll post pics of these once complete


Pics


Comments welcome


View attachment 247688

View attachment 247689

View attachment 247690

View attachment 247691
 

Attachments

  • image.jpeg
    image.jpeg
    2 KB · Views: 0
  • image.jpeg
    image.jpeg
    2.6 KB · Views: 0
  • image.jpeg
    image.jpeg
    2.7 KB · Views: 0
  • image.jpeg
    image.jpeg
    2.4 KB · Views: 0
Great start Robert. Looking mighty fine....


I've removed your repeat post for you, and your last one too. I hope that's o.k.?


Cheers,


Ron
 
Thread owner
Step 3


Think I'm on this stage now ( following Ralph's in depth guide)


I bought some very realistic brickwork paper from Tamiya ( diorama sheet paper) ( ebay from Hong Kong ) brickwork and this is very realistic looking and even has the cement looking in between the brickwork!


I used PVA glue spread out thinly on the building sides and placed the sheet on top.


I'll cut the Windows and doors out later once dry.


Because it's craft paper going down on wet glue I have used a couple of heavy ref books to keep them from bubblin and keep flat while they dry.


Pics


Comments welcome


Regards


Robert


View attachment 247692

View attachment 247693

View attachment 247694

View attachment 247695

View attachment 247696

View attachment 247697
 

Attachments

  • image.jpeg
    image.jpeg
    2.7 KB · Views: 0
  • image.jpeg
    image.jpeg
    2.3 KB · Views: 0
  • image.jpeg
    image.jpeg
    1.7 KB · Views: 0
  • image.jpeg
    image.jpeg
    2.4 KB · Views: 0
  • image.jpeg
    image.jpeg
    2.3 KB · Views: 0
  • image.jpeg
    image.jpeg
    3 KB · Views: 0
You are definitely getting into the swing of things Robert.


I'm enjoying watching this.
 
Thread owner
Well the books are stacked and I'll leave to dry overnite so I started on the difficult stages I think will be later and that's roof tiles. Stil using the same measurements for 1/35 I divided some strips of 2mm card and divided up then used Stanley to score and rook about an hour and now I got approx 200 tiles but I may need more but the measurements are on paper. Couple of shots but I filled a ramekin dish full


Next I'm going to start on the window frames and ledges.


I'll be making these out of coffee stirrers and wooden skewers


If you can't scratch build from scrap or what you pick up on your travels what can you do ( it's recycling in my book)


Pics


View attachment 247709

View attachment 247710
 

Attachments

  • image.jpeg
    image.jpeg
    1.8 KB · Views: 0
  • image.jpeg
    image.jpeg
    2.8 KB · Views: 0
Thread owner
I'm hoping not Ralph as the cats already had a sniff and nearly knocked the buggers over.


Later I'm going to start in the walls internal then start on the floor boards.


Regards


Robert
 
Status
Not open for further replies.
Back
Top