Don't forget Ron for top quality you need to pay top dollar\ said:Sorry Ian, yes I am...just as soon as I can get hold of one for sensible money, bearing in mind the quality!
")


Don't forget Ron for top quality you need to pay top dollar\ said:Sorry Ian, yes I am...just as soon as I can get hold of one for sensible money, bearing in mind the quality!
")
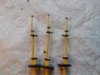
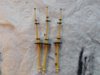
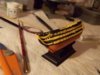
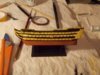
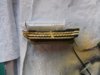
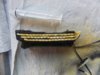
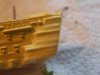
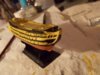
No problems at all Steve\ said:Mike, I paint the biggest raised yellow lines at the front/bow bit and at the arse end/back/stern/whatever you call it. I don't attempt the little window frames. I then tidy up by running the darker paint into the recessed areas. I used a fine brush or toothpick for various areas.The black (or dark brown in my case) will easily cover yellow.I dry brushed the little window frames, just to lighten them up a little, same with the steps on the side of the ship.
It is still a work in progress and I wasn't going to update my thread until I got back next weekend, but in the interests of clarity I'm happy to show how it looks at the moment.
I'm sure Ian won't mind a slight and temporary hijack of his thread in the interest of sharing
Cheers
Steve
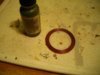
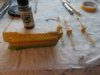
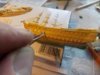
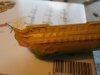
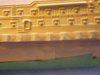
I did it with strips of regular Tamiya masking tape. I used a 6mm roll (I think) but cut 2-2.5mm strips of it. I found it difficult to get it to stick cleanly due to the various moldings that pass for detail on the kit, so I sprayed at right angles to the masking and hoped for the best before making some touch ups.\ said:Any chance you can photo the masking itself? Having seen the 0.5mm tape, I'm curious how one would get the fine lines and Steve's already past that point...
I will show some pictures For you Michael\ said:Any chance you can photo the masking itself? Having seen the 0.5mm tape, I'm curious how one would get the fine lines and Steve's already past that point...
You sir are a gentleman and a scholar!\ said:I will show some pictures For you Michael


scalemodelling.co.uk is a privately operated online discussion forum. All content posted by members reflects their own views and opinions and does not necessarily represent those of the forum owners or administrators. While reasonable efforts are made to moderate content, no responsibility is accepted for user-generated material. By using this site, you agree to comply with UK law and the forum rules.