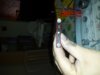
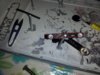
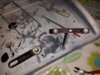
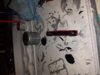
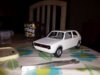
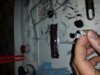
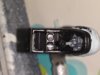
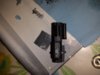
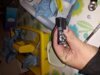
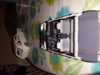
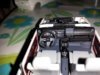
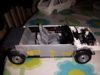
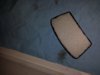
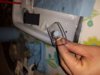
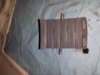
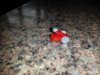
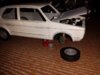
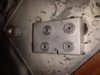
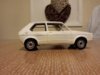
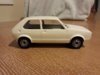
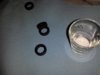
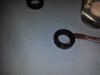
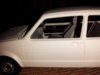
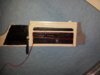
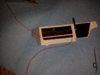
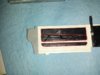
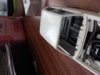
Theme editor

Scale Model Shop

Revell Golf GTI mk1 1975

Status
Not open for further replies.
Thread owner

Attachments

  • 20150110_151017.jpg
    20150110_151017.jpg
    2.8 KB · Views: 0
  • 20150110_162824.jpg
    20150110_162824.jpg
    2.6 KB · Views: 0
Thread owner
OK latest update.

Wheels airbrushed and clear coated, tyres dressed. Main coat gone down on body and bonnet, I then snapped one of the bonnet hinges as I was soft colour sanding, so now I have opted to remove hinges and have a bonnet that can be completely removed instead. (Flipping heck)

Started going on a 3000 lapping paper removing more inperfections on the way ready for topcoat and clear coat.

Think I'm going to take a break now for a while. Be back to in in a week or so.

View attachment 96471

View attachment 96472

View attachment 96473

View attachment 96474

View attachment 96475

View attachment 96476

View attachment 96477

View attachment 96478

View attachment 209494

View attachment 209495

View attachment 209496

View attachment 209497

View attachment 209498

View attachment 209499

View attachment 209500

View attachment 209501
 

Attachments

  • 20150110_190542.jpg
    20150110_190542.jpg
    2 KB · Views: 0
  • 20150110_203726.jpg
    20150110_203726.jpg
    2.2 KB · Views: 0
  • 20150110_203751.jpg
    20150110_203751.jpg
    2.4 KB · Views: 0
  • 20150110_205259.jpg
    20150110_205259.jpg
    2.2 KB · Views: 0
  • 20150110_235329.jpg
    20150110_235329.jpg
    2.3 KB · Views: 0
  • 20150110_204013.jpg
    20150110_204013.jpg
    1.8 KB · Views: 0
  • 20150110_204053.jpg
    20150110_204053.jpg
    1.8 KB · Views: 0
  • 20150110_204154.jpg
    20150110_204154.jpg
    1.7 KB · Views: 0
Nice one Mark looking good, shame about the hinge keep up the good work.

John
 
Thread owner
Well I couldn't keep myself away from the kit. I started on the door panels. I tried that humbrol masking fluid. Not all that impressed with it to be honest took two days of corrections and clean up only to start again with masking tape anyway.

Here is a test fit pic.

Also had to sort our a body fit issue about an hour of filing varying parts of the chassis in order to make it fit without having to bend the body so much it nearly snaps.

View attachment 96762

View attachment 209785
 

Attachments

  • 20150112_230649.jpg
    20150112_230649.jpg
    2.2 KB · Views: 0
Thread owner
Not too bad. I wasn't overly happy with the masking lines, it wasn't clean enough for my liking there was some small bleeding issues that I just could not seem to rectify. I think it's because I'm using a white against a black and it's very noticeable even the tiniest bleeding. My original idea was to use black thread to tidy up the lines and make it look sharp, but the wife gave me red and yellow thread also, so I wanted to add a small but of custom look to the interior. I painted pva in the lines and layed it and went over with a gloss varnis to seal it in.

Here is an update on the body work, roof have now been sanded with 3000 grit ready for clear coat. Just got the rest of the body to sand it took me 4 hours to do the roof so a lot more time yet.

Will be buying a decent airbrush at the end of the month. My cheapo humbrol one just isn't good enough for the finish I want.

View attachment 96914

View attachment 209937
 

Attachments

  • 20150115_095036.jpg
    20150115_095036.jpg
    2.6 KB · Views: 0
Thread owner
Feeling a little discouraged tonight. Been trying to get the lines correct for masking the wheel arches. Problem I'm having is the knife I'm using is so sharp that it's impossible to follow a curve on the arches consistently. Has anyone got any tips? I had to wipe off my work with thinners.
 
Thread owner
Ok so I rubbed down the wheel arches again, this time to bare plastic. Re-masked as best as I could and put on the topcoat as it was a mess with my first attempt at doing the arches.

Now ready for clear coat, I have a few small runs to sort out which I will do with finishing paper and a couple of touch ups to do with the paintbrush which I will then smooth off with finishing paper also. But I'm done with the painting of the body now.

I thought I'd start on the grille and I feel I have redeemed myself a little bit as it went perfectly. The new 05 revell brush helped a lot as I opted to paint the red stripe and not use the decal. The headlights I painted silver metallic with a spot of copper on the bulbs just to make them pop a little, the lenses got the humbrol clear varnish treatment to make them sparkle and I decided to paint the vw badge silver metallic instead of the factory black gloss again to make it pop a bit I never understood why they opted to paint this bit black on the original car myself.

The GTI decal was supposed to be put right onto the grille but there was a problem with that, the ridges on the grill would cause issues with decal cracking, and the possibility of getting a corner folded into a ridge was high and would have ruined the look of the model. So I used a non used part from one of the sprues and cut it down to a badge blank, slid the decal onto that and then sealed it with varnish and glued it to the grille instead.

When I do the gloss coat I'm going to mask the wheel arches again to get practice on getting my lines right and paint them last (not looking forward to that bit)

View attachment 97243

View attachment 97245

View attachment 97246

View attachment 97247

View attachment 97249

View attachment 97250

View attachment 97252

View attachment 97253

View attachment 97254

View attachment 97256

View attachment 210266

View attachment 210268

View attachment 210269

View attachment 210270

View attachment 210272

View attachment 210273

View attachment 210275

View attachment 210276

View attachment 210277

View attachment 210279
 

Attachments

  • 20150118_120702.jpg
    20150118_120702.jpg
    2.1 KB · Views: 0
  • 20150118_121556.jpg
    20150118_121556.jpg
    2.9 KB · Views: 0
  • 20150118_144244.jpg
    20150118_144244.jpg
    2.1 KB · Views: 0
  • 20150118_144338.jpg
    20150118_144338.jpg
    2 KB · Views: 0
  • 20150118_144433.jpg
    20150118_144433.jpg
    1.9 KB · Views: 0
  • 20150118_112822.jpg
    20150118_112822.jpg
    3.1 KB · Views: 0
  • 20150118_112221.jpg
    20150118_112221.jpg
    2.2 KB · Views: 0
  • 20150117_225227.jpg
    20150117_225227.jpg
    2.7 KB · Views: 0
  • 20150117_234603.jpg
    20150117_234603.jpg
    2.4 KB · Views: 0
  • 20150118_105049.jpg
    20150118_105049.jpg
    2.7 KB · Views: 0
Thread owner
Thanks mate. I didn't think so but looking at it again it's not too bad. I pick up my new airbrush tomorrow I'm well excited
 
Thread owner
Some more progress beginning to see the details coming together.

I opted for paintbrush on floors and and parcel shelf and roof lining to give it a texture like fabric. The seats I'm going to airbrush.

The car body still isn't as I'd like. I think I'm going to rub down a third time and go over with my much more expensive airbrush to hopefully active a flawless finish for clear coat.

View attachment 97905

View attachment 97906

View attachment 97907

View attachment 97908

View attachment 97909

View attachment 97910

View attachment 97911

View attachment 97912

View attachment 210928

View attachment 210929

View attachment 210930

View attachment 210931

View attachment 210932

View attachment 210933

View attachment 210934

View attachment 210935
 

Attachments

  • 20150123_220522.jpg
    20150123_220522.jpg
    2.7 KB · Views: 0
  • 20150123_220631.jpg
    20150123_220631.jpg
    3.1 KB · Views: 0
  • 20150123_221056.jpg
    20150123_221056.jpg
    2.7 KB · Views: 0
  • 20150123_220544.jpg
    20150123_220544.jpg
    2.8 KB · Views: 0
  • 20150123_224524.jpg
    20150123_224524.jpg
    1.6 KB · Views: 0
  • 20150123_230110.jpg
    20150123_230110.jpg
    1.7 KB · Views: 0
  • 20150123_232439.jpg
    20150123_232439.jpg
    2.5 KB · Views: 0
  • 20150123_233043.jpg
    20150123_233043.jpg
    2.2 KB · Views: 0
Status
Not open for further replies.
Back
Top