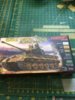
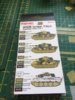
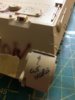
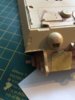
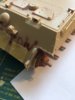
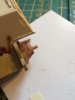
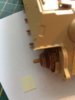
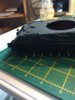
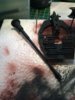
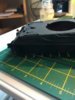
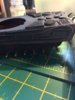
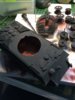
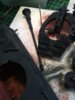
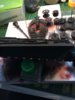
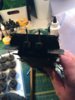
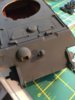
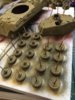
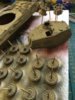
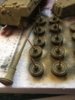
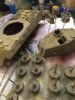
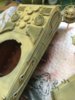
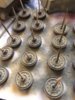
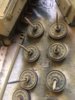
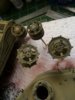
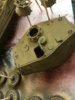
Theme editor

Scale Model Shop

Roberts 1/35 Tamiya King Tiger

Status
Not open for further replies.
Thread owner

Attachments

  • image.jpeg
    image.jpeg
    2.5 KB · Views: 0
  • image.jpeg
    image.jpeg
    2.5 KB · Views: 0
  • image.jpeg
    image.jpeg
    2.5 KB · Views: 0
  • image.jpeg
    image.jpeg
    2.1 KB · Views: 0
  • image.jpeg
    image.jpeg
    2 KB · Views: 0
Thread owner
FJust ordered me Some pigments
I know it's not top notch stuff but it's a start and I can practice.
Looked at Mig powders also others but I don't want to dive in deep end and flog the builds with stuff I don't know ( little knowledge)
I have got pastels etc but thought I could try these out on the KT at the latter stage
View attachment 279156 View attachment 279157
 

Attachments

  • image.jpeg
    image.jpeg
    3.3 KB · Views: 0
  • image.jpeg
    image.jpeg
    3.2 KB · Views: 0
Thread owner
Well I've finished the main build and while inawait my camo set from John SMS I have decided to spray Nate black on all surfaces
The build has been fun and no problems really found.
Lots of test fitting and all the wheels that need to touch the ground are correct.
The turret internals will be sprayed White after I let the nato black set
The metal barrel is a nice touch IMHO to the kit and thanks to Patrick's advice there I also found the grille set looks spot on too.
I had a wee problem with the air vent covers but got it all good in the end.View attachment 279191 View attachment 279188 View attachment 279184 View attachment 279183

View attachment 279185 View attachment 279186 View attachment 279187 View attachment 279189
 

Attachments

  • image.jpeg
    image.jpeg
    2.9 KB · Views: 0
  • image.jpeg
    image.jpeg
    2.8 KB · Views: 0
  • image.jpeg
    image.jpeg
    2.9 KB · Views: 0
  • image.jpeg
    image.jpeg
    2.8 KB · Views: 0
  • image.jpeg
    image.jpeg
    2.9 KB · Views: 0
  • image.jpeg
    image.jpeg
    3.2 KB · Views: 0
  • image.jpeg
    image.jpeg
    3.3 KB · Views: 0
  • image.jpeg
    image.jpeg
    2.9 KB · Views: 0
  • image.jpeg
    image.jpeg
    2.8 KB · Views: 0
  • image.jpeg
    image.jpeg
    2.8 KB · Views: 0
  • image.jpeg
    image.jpeg
    3 KB · Views: 0
  • image.jpeg
    image.jpeg
    2.9 KB · Views: 0
Looks good Robert, see if you can find a bit of thin wire for the headlamp cable. It makes a nice difference.
 
Thread owner
Looks good Robert, see if you can find a bit of thin wire for the headlamp cable. It makes a nice difference.

You know that was what I am doing as we speak ( I saw a You tube build I think and they used fuse wire from the rear of lamp to back of bracket I think they will make it oober better
 
Thread owner
I also need to find a replacement handle as cut from sprue and into orbit it went ( no where to be seen
 
Thread owner
What handle Robert?

For he rear quarter engine bay doors ( one side has a handle ) they are iddy widdy things and when I clipped the sprue it went ping, but I'll search my jagd panzer box and see what's in my spares.
 
You can always use wire to replace the handle. If you can't find one, I might have a spare.
 
I used some 1.0mm brass rod bent into shape round some long nosed plier's if that's any help mate.
 
Thread owner
Thanks guys for you invaluable advice. I'll be going to the shops Sunday with the Mrs and I'll pop in and pick some selections of wire up.

Regards

Robert
 
Thread owner

Attachments

  • image.jpeg
    image.jpeg
    3.3 KB · Views: 0
  • image.jpeg
    image.jpeg
    3.2 KB · Views: 0
  • image.jpeg
    image.jpeg
    2.8 KB · Views: 0
  • image.jpeg
    image.jpeg
    3.2 KB · Views: 0
  • image.jpeg
    image.jpeg
    3.1 KB · Views: 0
  • image.jpeg
    image.jpeg
    3.1 KB · Views: 0
  • image.jpeg
    image.jpeg
    3 KB · Views: 0
  • image.jpeg
    image.jpeg
    2.7 KB · Views: 0
  • image.jpeg
    image.jpeg
    2.9 KB · Views: 0
I'd leave it like that Robert. Although it's slightly patchy in places, that will help the realism once the weathering is done.

Think of it like the black basing technique on your Phantom.
 
Thread owner
I'd leave it like that Robert. Although it's slightly patchy in places, that will help the realism once the weathering is done.

Think of it like the black basing technique on your Phantom.

Thanks Patrick that was my intention as to try and get some realism in the build and painting stage.
I've watched a few black basing videos and I'm trying to perfect my tech with it.
I swirl the A/b in light circular motions so it seems to leave the odd patch here and there but I try not to get tempted to fill in the gaps so much. All that work is then wasted.
 
looking good,Robert,I do like that,method of painting,will need to look into it as well,;)
 
Thread owner

Attachments

  • image.jpeg
    image.jpeg
    2.9 KB · Views: 0
  • image.jpeg
    image.jpeg
    3.1 KB · Views: 0
  • image.jpeg
    image.jpeg
    2.9 KB · Views: 0
  • image.jpeg
    image.jpeg
    2.9 KB · Views: 0
Thread owner
I would like to know if the paints are any good when you get to try them out Robert,if you don't mind letting me know your opinion.

No problem. I'll do some test sprays to show the grades in colours and density of the paint ( I have no idea what I just said ) but I think I know what I'm( trying to say ( forget that I'm nuts )
 
Status
Not open for further replies.
Back
Top