Theme editor

Scale Model Shop

Shenanigans 7: Tamiya Protze. Ancient and Modern...

  • Thread starter Thread starter Guest
  • Start date Start date
Status
Not open for further replies.
G

Guest

Guest
Thread owner
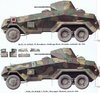
View attachment 331187

I was going to start a new 120mm figure for my next project, but I've still got the armour bug, so......

This is a more recent kit, and consequently has an awful lot more parts:

View attachment 331184View attachment 331185View attachment 331191

It's supplied as a weapons carrier, so most of the stowage is of that ilk, but I'll probably add some oil drums and other bits and pieces. I wasn't going to bother with the figures, but they're actually OK.

My original plan was to replace the figures with these two:

View attachment 331188View attachment 331190

A Sovereign engineer and a Verlinden mounted field cook - the vehicle and horse being the 'ancient and modern' of the theme. They might not now fit with the vehicle, so may end up in a vignette of their own. Here's Gert Frobe in 'The Longest Day', the inspiration for the mounted figure, and a shot of the parts:

View attachment 331189View attachment 331186

This one will take me longer than the PzKpfw II, I promise!
 
Hi Peter
Clever idea :thumb2: You have done horses before so no problems there.
Jim
 
Nice choice, have one in the stash in 1/87. They were pretty sophisticated for the thirties. Will follow along. PaulE
 
Thread owner
Jim - Quite looking forward to the horse. Should be easier than a Miniart 1/16.

Paul - Working on the suspension units I too thought how sophisticated the vehicle was (between bouts of swearing).

Scottie - Make yourself comfortable. This one will take a bit longer.

This is where I've got to:

View attachment 331209View attachment 331210

The suspension systems had quite a lot of parts but they went together easily enough. A lot of areas had annoying seams running through them (including, you guessed it, the suspension springs) but in the end I only cleaned up what I knew would be seen.

I went on to make up the wheels and realised I had no poly caps. I hadn't remembered seeing them either, so I decided to try and fit the wheels without them. No go, so I had to cut down some I had in the spares box and then make sure that everything was firmly glued into place.

The other problem I had was with the front axle. The wheels are meant to be steerable, but the strength of the whole thing relies on an extremely delicate steering rod, which I broke. I was going to glue everything solid anyway, but that proved surprisingly difficult given the lack of attachment points. However I got there, and made a new steering rod easily enough.

Next, onto the bodywork. Oh, and I found the poly caps when I was clearing things away, doh!
 
I built the first version (mm204) of this many years ago ( approx 38 ) and that was , for its time , a very nice kit.
This one looks better.
May just have to get hold of one later in the year, have to build a few of my started but not finished yet.
 
Great to see you off and running again Peter. Nice work on the seat.

I am off on my holidays now so I expect to see a whole Wehrmacht division of vehicles on my return :smiling3::smiling3::cool:
 
A great stress reliever. Mine has much fewer parts:smiling:, although I'll have to scratch the Drilling mount. You've crashed through the tough parts. Should be downhill from here. PaulE
 
Its a great little truck this one Peter and one I really enjoyed building. Great start in spite of the breakage.
 
Thread owner
Thanks for looking in chaps. It is a really nice kit and wonderfully engineered - the fit of parts is perfect.

I'm toying with the idea of doing a dunkelgrau/dunkelbraun early war camo scheme. There's a Protze in the Overloon Museum done out in it:

View attachment 331265

This PzKpfw is at Bovington:

View attachment 331266

Just a thought.
 
Thread owner
I'm in Peter, most impressed that you've managed that chassis so well. I just can't seem to get all the wheels on the ground.
John .
 
Longer than the Pz.II, really - you've already finished most of it Peter :smiling:

(1978 kit this time but in 2011 reissue guise with new figures and accessories)
 
Thread owner
Steven - Welcome aboard.

Pete - Ditto!

John - I'm using Loctite Gel for everything these days. It's very controlable, doesn't run everywhere and even gives a few second 'play'. If you do make mistakes the parts usually ping apart fairly easily.

Simon - Yes, I was looking at the sprues last night and realised that the two extra figures and equipment sprues were newer that the rest - the driver figure is terrible. Still, it shows how far Tamiya had come in the six years between the PzKpfw II and this. I remember the late 1970s as being a bit of a boom time for Tamiya - lots of great new and improved kits coming out.
 
Morning Peter

Great start, as expected, 1/2 the build completed by the time I look up your next episode.

You could always try the 3 colour camo of the interbellum for Wehrmacht vehicles, as a change of pace?

You have already built the 232 6 rad a few years ago.

All 6 wheels on the deck at once, another model building success, you are getting the hang of this building lark. LOL

There are plenty of unusual colour schemes for the German inter war vehicles before the grey/brown and Panzer Grey schemes came in.

Have a good day building

Regards

Steve H
 

Attachments

  • 232 camo.jpg
    232 camo.jpg
    4.1 KB · Views: 0
Thread owner
Hi Steve - This one is definitely slower.

Thanks for the camo reference. I did come across all sorts of weird and wonderful schemes, once I started researching it, but as I've never done one on a vehicle before I wanted something simple.

The basic build is done, less the tools and a few delicate parts:

View attachment 331286View attachment 331287View attachment 331288

This one nearly didn't make it. The bonnet sub-assembly was pretty straightforward and it settled onto the chassis very nicely. The truck bed was a bit trickier due to some slight warping of parts, but I also got that made in the end. The problems came when I tried to fit it onto the chassis and found that the chassis was also warped. The location lug would not meet the pin in one crucial area so that the whole superstructure was lopsided. The only solution was to remove some of the wheels, remove the offending locating pin and add packing to form a tightly bonded joint. Much swearing accompanied the process, but with further packing in other areas I got the whole thing aligned. Isn't this meant to be fun?

Anyway it's had it's basic coat of paint, ready for the next stage. I've attempted a dunkelgrau/dunkelbraun camo scheme, which will be considerably softened by the weathering (I hope).
 
Apparently solutions to quality issues are supposed to be part of the fun:smiling2:. PaulE
 
Status
Not open for further replies.
Back
Top