Theme editor

Scale Model Shop

Something big and German-Bf110

Status
Not open for further replies.
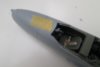
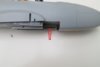
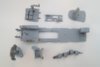
If it's anything like the dragon me262 kit I did it's gonna be a bit of a mare. As Barry said the instructions can be pretty lame too I went to reference a lot on mine.


I'm sure you'll make a good job of it, I'll be watching


Phil
 
Thread owner
I've finally got underway and have spent a few hours achieving what doesn't look like much! I've basically started on the cockpit sub-assemblies. I still haven't figured out how much I want to assemble before I start painting, certainly more than this lot.


View attachment 238526


I'm thinking of a little desert vignette for this one, at least for a few photos. I recently acquired a Luftwaffe service set at a very reasonable price:


View attachment 238527


It comes as a bag full of resin bits:


View attachment 238528


I don't have any instructions (which are just someone else's opinion of how something should be put together) and I'm not sure how much I'll use. Should be fun :)


Cheers


Steve
 

Attachments

  • IMG_1445_zpsjlgqhogo.jpg
    IMG_1445_zpsjlgqhogo.jpg
    1.7 KB · Views: 0
  • IMG_1443_zps8dpj8rtn.jpg
    IMG_1443_zps8dpj8rtn.jpg
    2.6 KB · Views: 0
  • IMG_1444_zps7p3rzqwa.jpg
    IMG_1444_zps7p3rzqwa.jpg
    1.7 KB · Views: 0
Thread owner
I have been working on this. I've decided to build the interior as in the box, despite knowing that it's not correct for my subject. I just can't be bothered to fix it. This is going to be more about making a two colour upper/lower camouflage look convincing anyway!


It's too dark to take any pictures, but I'll post some soon. My eyes have just about recovered from painting the instrument panel, no decals for it in this kit :)


Cheers


Steve
 
Thread owner
some of the internal bits painted.


View attachment 239164


I've gone with an RLM 02 interior. The Bf 110 E (one of which I am building) went into production alongside the D series in 1940. At some time during D series production the interior colour changed to the darker RLM 66. My aircraft is an early example of the E series, complete with the longer rear fuselage (to carry a life raft and survival equipment) and that's why I've gone for 02. Also it looks better in the finished model :)


Cheers


Steve
 

Attachments

  • IMG_1450_zpsiqbiussq.jpg
    IMG_1450_zpsiqbiussq.jpg
    1.6 KB · Views: 0
Thread owner
\ said:
Are you going to add seat harnesses?
Yep, in keeping with the OOB theme the the not very good photo etch ones that come with the kit. They look alright one attached. Here's the pilot's seat, all a bit clean as I've literally just done it!.


View attachment 239165


More and more kits do now include belts/harnesses, even if something like these not terribly good photo-etch ones. I do think that it's an important thing to add in any scale. A cockpit without a harness is incomplete to my eye. It's one thing I always do add if it's not in the box. I've used the RB Productions and HGW sets, both of which are very good, if a bit of a fiddle to make up. There may be others equally good but I've not tried them. :)


Cheers


Steve
 

Attachments

  • IMG_1451_zpsz82hk4ca.jpg
    IMG_1451_zpsz82hk4ca.jpg
    2.4 KB · Views: 0
Looking very good Steve, and I do like your extras. I don't think you'd need instructions just take a look at the box picture and a man of your talent should be fine
 
Thread owner
Agonisingly slow progress I'm afraid!


I'm just making this post to contradict what I have read in a couple of online build/reviews. It has been said that to build the cockpit tub as per the instructions will cause problems when the fuselage halves are joined. One reviewer even resorted to attaching the sides to the fuselage halves and then adding the cockpit bottom, which he had filed and sanded, when the halves were joined. I did a lot of dry fitting and decided the instruction method was both easier and would work. Guess what? It does!


Here's the fuselage taped together and you can see that the fit is very good indeed.


View attachment 241162


We all know that if you get something just a little bit out as you build a sub-assembly then it can have a knock on effect, causing all sorts of problems later. I've done it more than once! I believe that if you build the tub right it will fit very nicely indeed, no need for any alternative method :)


Cheers


Steve
 

Attachments

  • IMG_1462_zpstfn7czok.jpg
    IMG_1462_zpstfn7czok.jpg
    1.2 KB · Views: 0
It just goes to show what you can do if you think things over before you just stick them together. Great work so far Steve
 
\ said:
It just goes to show what you can do if you think things over before you just stick them together. Great work so far Steve
Totally agree, it helps when you get a heads up from someone else that's built it but like anything it's all in the prep work.


Looking good Steve
 
Thread owner
\ said:
It just goes to show what you can do if you think things over before you just stick them together. Great work so far Steve
Absolutely. I've said it before and I'll say it again, the most important tool in your tool box is patience. Rush and something 'unfortunate' is just about guaranteed to happen.


Having said that my almost undetectable progress has been largely due to other commitments. I'm hoping to get a few hours in during the run up to Xmas and all the seasonal madness. Small children and partially built models don't mix, so everything will be packed away over Xmas itself :)


I've also seen a promisingly large box under the tree so I might need to get a move on with the Bf 110;)


Cheers


Steve
 
Done this one before on two occasions. Be careful of the chin and the nose fit. They fit awfully and only copious amounts of filler can fix it. Good luck


Nice Job so far


John
 
\ said:
Having said that my almost undetectable progress has been largely due to other commitments.
I feel your pain Steve. Looks good though, and a reminder that even reviewers can get it wrong.
 
Thread owner
\ said:
Done this one before on two occasions. Be careful of the chin and the nose fit. They fit awfully and only copious amounts of filler can fix it. Good luck
Nice Job so far


John
Thanks for the heads up John. The nose seems to fit okay, it's the standard 'E' nose (like a C/D but with the little air intake for the cockpit ventilation/heating system). I haven't fitted the machine guns, I will just fit the barrels at the end with other dangly bits.


If by chin you mean the big bit that covers the spars for the wings and cannon bay, I haven't tried that yet, might be something to look forward to!


Taped in place:


View attachment 241183


\ said:
I feel your pain Steve. Looks good though, and a reminder that even reviewers can get it wrong.
One of them said the cannon barrels, which run under the floor of the cockpit got in the way of other parts and had to be cut off (they won't be visible anyway) but I can't see how you could fit them in such a way that they'd do that, unless you fitted the entire weapon pack incorrectly. Maybe he had a different, test, version of the kit.


You can see the barrels here:


View attachment 241184


Cheers


Steve
 

Attachments

  • IMG_1463_zps8pvvfcex.jpg
    IMG_1463_zps8pvvfcex.jpg
    1.5 KB · Views: 0
  • IMG_1464_zps9pamfqkk.jpg
    IMG_1464_zps9pamfqkk.jpg
    1.4 KB · Views: 0
Status
Not open for further replies.
Back
Top