
Inow have a model for the Group Build.
I have a Ta 152 by Pacific Coast of whom I had not heard until I saw the kit.
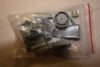
Kit made by Sword, decals by Cartograf, PE set by Eduard.
As a novice at this level, I'll only build what I get in the kit.
I have posted pictures below.
First impressions:
1 It will be a ground model as there's no pilot included.
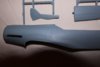
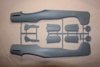
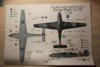
2 The panel detailling looks superb.
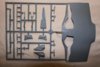
3 Oh b****r it, there are no locating tabs on the flat panels.
4 Is that mould flash, chamfered fittings for a snug fit, or something I'm missing?
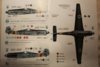
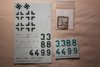
5 Really good colour charts for finishing.
6 Instructions that show sub-asemblies but no sequencing. They must mean something to an expert, but me.....?
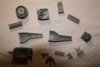
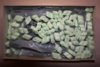
7 An awful lot of tiny bits that I can here the carpet muncher waiting for.
8 Can I panic NOW?
This build looks like 5% assembly, 10% painting and prep and 85% begging for help, sceaming infrustration and panicking equally shared.
Roll on 1st of the 4th.
I need a lie down in a darkened room.
View attachment 22418
View attachment 22419
View attachment 22420
View attachment 22421
View attachment 22422
View attachment 22423
View attachment 22424
View attachment 22425
View attachment 22426
View attachment 22427
View attachment 22428
View attachment 134944
View attachment 134945
View attachment 134946
View attachment 134947
View attachment 134948
View attachment 134949
View attachment 134950
View attachment 134951
View attachment 134952
View attachment 134953
View attachment 134954
I have a Ta 152 by Pacific Coast of whom I had not heard until I saw the kit.
Kit made by Sword, decals by Cartograf, PE set by Eduard.
As a novice at this level, I'll only build what I get in the kit.
I have posted pictures below.
First impressions:
1 It will be a ground model as there's no pilot included.
2 The panel detailling looks superb.
3 Oh b****r it, there are no locating tabs on the flat panels.
4 Is that mould flash, chamfered fittings for a snug fit, or something I'm missing?
5 Really good colour charts for finishing.
6 Instructions that show sub-asemblies but no sequencing. They must mean something to an expert, but me.....?
7 An awful lot of tiny bits that I can here the carpet muncher waiting for.
8 Can I panic NOW?
This build looks like 5% assembly, 10% painting and prep and 85% begging for help, sceaming infrustration and panicking equally shared.
Roll on 1st of the 4th.
I need a lie down in a darkened room.
View attachment 22418
View attachment 22419
View attachment 22420
View attachment 22421
View attachment 22422
View attachment 22423
View attachment 22424
View attachment 22425
View attachment 22426
View attachment 22427
View attachment 22428
View attachment 134944
View attachment 134945
View attachment 134946
View attachment 134947
View attachment 134948
View attachment 134949
View attachment 134950
View attachment 134951
View attachment 134952
View attachment 134953
View attachment 134954
Attachments
-
 Loose detail 2..jpg2 KB · Views: 0
 -
 Sprue 2..jpg1.8 KB · Views: 0
 -
 Sprue 1..jpg2.1 KB · Views: 0
 -
 Sprue 5..jpg2.4 KB · Views: 0
 -
 Loose detail 1..jpg2 KB · Views: 0
 -
 Colour chart 1..jpg2.4 KB · Views: 0
 -
 Sprue 3..jpg2.5 KB · Views: 0
 -
 Colour chart 2..jpg2.4 KB · Views: 0
 -
 Box..jpg2.5 KB · Views: 0
 -
 As delivered..jpg2.6 KB · Views: 0
 -
 Decals & Photo et&#.jpg2.2 KB · Views: 0