Well here’s my first WIP getting back into building. I’d started a couple of these way back and like all Tamiya kits, they go together like butter. I’ve got a whole slew of custom stuff planned for it. It’s a great kit to modify given the relatively detailed drivetrain and interior.
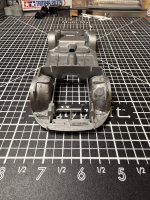
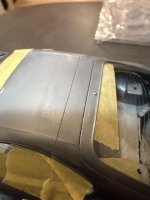
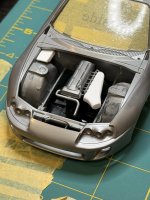
Spent some time shaving the factory bay. Got rid of the fuse blocks, charcoal canister, ABS pump, washer fluid res, etc. PS res took a chunk of the strut tower with it(was getting a little hog wild with the nippers) so did my first sprue goo repair on that. Car will be LHD so I filled the brake booster slot on RH side with styrene. Also got rid of the factory side mount intercooler in the RH bumper duct to make way for the custom charge pipe and FMIC. Still needs some clean up but the bulk removal is done.
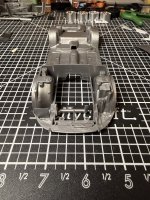
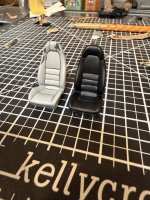
The Series 2/facelift(Late ‘96-02) Supras got some cosmetic upgrades, one of which being the headrest getting fixed to the seat back. Used some Tamiya standard putty to do this on one seat, might try some two part putty on the other to see if I like it better.
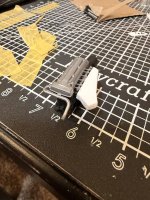
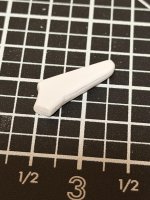
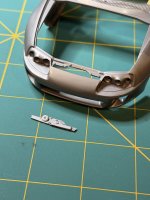
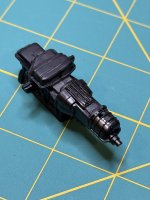
Next up I started a custom forward-facing intake plenum. There’s tons of 3d printable options for this, but being I don’t have a 3d printer much less the facilities to have one at the moment, I made this one from sheet styrene, Tamiya orange cement, and a little putty. It’s a bit chunky looking still, left myself plenty of extra material to widdle it down to the exact shape I’m after.
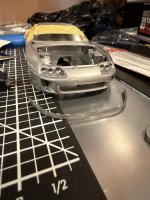
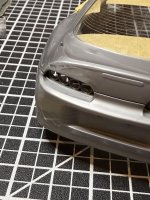
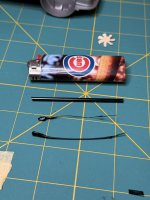
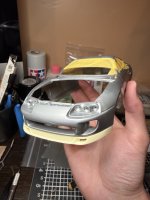
Finally getting started on the body, probably the most tedious part and something I’ve always struggled to be content with. This is an excellent kit, but it’s now been in production over 30 years and there’s definitely some areas that leave a bit to be desired. I shaved the accent lines that run both sides of the roof as these are not there on the targa cars. Also did the rough scribe for the rear targa break. Waiting on some proper fine line tape to show up to guide the front as it has some actual curvature to it. Still undecided if I want to make the roof actually removable or just have the lines there visually. Also spent some time carefully scribing off the front lip splitter. I probably could have done this much quicker with the snips but I wanted it to be very tidy and play it safe.
That’s about all for now. I’ll update the thread as things progress. I’m new on a couple forums so bear with me while I learn the format. Appreciate any and all insight!
Spent some time shaving the factory bay. Got rid of the fuse blocks, charcoal canister, ABS pump, washer fluid res, etc. PS res took a chunk of the strut tower with it(was getting a little hog wild with the nippers) so did my first sprue goo repair on that. Car will be LHD so I filled the brake booster slot on RH side with styrene. Also got rid of the factory side mount intercooler in the RH bumper duct to make way for the custom charge pipe and FMIC. Still needs some clean up but the bulk removal is done.
The Series 2/facelift(Late ‘96-02) Supras got some cosmetic upgrades, one of which being the headrest getting fixed to the seat back. Used some Tamiya standard putty to do this on one seat, might try some two part putty on the other to see if I like it better.
Next up I started a custom forward-facing intake plenum. There’s tons of 3d printable options for this, but being I don’t have a 3d printer much less the facilities to have one at the moment, I made this one from sheet styrene, Tamiya orange cement, and a little putty. It’s a bit chunky looking still, left myself plenty of extra material to widdle it down to the exact shape I’m after.
Finally getting started on the body, probably the most tedious part and something I’ve always struggled to be content with. This is an excellent kit, but it’s now been in production over 30 years and there’s definitely some areas that leave a bit to be desired. I shaved the accent lines that run both sides of the roof as these are not there on the targa cars. Also did the rough scribe for the rear targa break. Waiting on some proper fine line tape to show up to guide the front as it has some actual curvature to it. Still undecided if I want to make the roof actually removable or just have the lines there visually. Also spent some time carefully scribing off the front lip splitter. I probably could have done this much quicker with the snips but I wanted it to be very tidy and play it safe.
That’s about all for now. I’ll update the thread as things progress. I’m new on a couple forums so bear with me while I learn the format. Appreciate any and all insight!