Theme editor

Scale Model Shop

Tamiya - 20mm Flakvierling - Sd.Kfz 7/1 1/35 Scale.

Status
Not open for further replies.
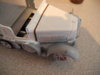
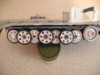
Cracking work Peter you make a rusty chassis look better than Si ( hahahaga) he'll go nuts!! ) really you have made excellent progress on this kit the metalwork has taken on a new form.


Can't wait for more


Robert
 
Hey, Peter, don't sweat the wheel painting so much. I've found that once completed and weathered and or placed in a dio that kind of minutia kinda fades into the scene and would be hardly noticeable
 
Thread owner
\ said:
Hey, Peter, don't sweat the wheel painting so much. I've found that once completed and weathered and or placed in a dio that kind of minutia kinda fades into the scene and would be hardly noticeable
Thanks Jim. I fitted them back on late last night. Serious mission that was getting them all back on in a different way to how it would nomally be built. But I got there...... and you are right on the money there. With the iterlocking wheels they look pretty good and the detail is sort of s"sucked up"........ I'll post up spme photos tonight...... Tracks and fron tires next (They are very shiny).
 
You have done more to this kit than I would have attempted but it makes me think now I should have kept yet ( hahahaga ( very good progress Peter


Can't wait to see it in a dio ( what will he do with it !!!


Very good


Robert
 
Thread owner

Attachments

  • DSCN1543.JPG
    DSCN1543.JPG
    2.6 KB · Views: 0
  • DSCN1544.JPG
    DSCN1544.JPG
    2.5 KB · Views: 0
After a bit of dry brushing the rubber to steel detail will come out by itself just use a very dry brush and a light touch;) PS get a hold of some 'eye shadow brushes' the Mrs. probably has one or two to spare, you will see immediately why I use them....................Jim:)
 
Great job so far Peter.


Nice weathering and I would keep Jim's eye shadow brushes in mind, they do make a difference.


Keep up the great work.


Cheers Richi
 
Thread owner
\ said:
After a bit of dry brushing the rubber to steel detail will come out by itself just use a very dry brush and a light touch;) PS get a hold of some 'eye shadow brushes' the Mrs. probably has one or two to spare, you will see immediately why I use them....................Jim:)
I will delve into the depths of my missus make up bag. If I get caught I'll blame you. :)
 
Thread owner
\ said:
looking good so far,do real like the underside well done, ;)
Thanks Monica...... I am really enjoying this one. I think, probably more that I have for a few kits I've built.
 
Thread owner
\ said:
Great job so far Peter.
Nice weathering and I would keep Jim's eye shadow brushes in mind, they do make a difference.


Keep up the great work.


Cheers Richi
Much thanks Richard...........I will be stealing a brush and I also need to go pick up a couple of pigments at the weekend.
 
\ said:
Much thanks Richard...........I will be stealing a brush and I also need to go pick up a couple of pigments at the weekend.
After you use up the brushes she gives you wait till YOU have to go buy some yourself:rolleyes::oops:
 
Thread owner
A little more progress ......... The bonnet is on ( I left the gaps on purpose, as I figured things up there might be a little battered, and a grey wash will highlight that) and Radiator Grill has had a couple of coats of "Smoke Brown Ink" and a dry brush of rust.


Tracks are done. Flat Metal grey, Nato black on the pads and a light dry brush of rust on the links. I know the Bosche used some kind of "Anti rust" coating or galvanising or somesuch. But it'd wear for sure so there'd be a bit of rust I reckon........ and the front tyres had had a couple of coats of Nato Black as well.


Tomorrow I'll make a start on the interior module.


View attachment 112910

View attachment 112911

View attachment 112912

View attachment 112913

View attachment 112914


View attachment 225933

View attachment 225934

View attachment 225935

View attachment 225936

View attachment 225937
 

Attachments

  • DSCN1545.JPG
    DSCN1545.JPG
    2.4 KB · Views: 0
  • DSCN1546.JPG
    DSCN1546.JPG
    2.3 KB · Views: 0
  • DSCN1547.JPG
    DSCN1547.JPG
    2 KB · Views: 0
  • DSCN1548.JPG
    DSCN1548.JPG
    2.3 KB · Views: 0
  • DSCN1549.JPG
    DSCN1549.JPG
    2.3 KB · Views: 0
Looking good so far, like the coloring on the tracks, rust tone very convincing;)
 
Thread owner
\ said:
Looking good so far, like the coloring on the tracks, rust tone very convincing;)
Thanks Jim. Tracks are on now. I had to unclip them and sort of wind them on the drive sprocket and then join them. There was no other way to get the buggers on.............. Build ing this kit with things still im place and doing it in a different order to the destructions is presenting a few challenges.:confused:
 
\ said:
I had to unclip them and sort of wind them on the drive sprocket and then join them
great progress so far.


I often leave the sprocket wheel of until i put the tracks on. sprocket in the track and then put it over the rest of the wheels and then it the sprocket in place, oh and i do that only with the vinyl ones.


waiting for the next update


Cheers Richi
 
Status
Not open for further replies.
Back
Top