I have several marking options both masks and a.m. decals. Trumpeter’s decals have always been appalling but I noticed that the kit ones are by Cartograph so I decided to go with a kit option.
I used masking tape to help position the decals. It is a really good way to do this but be careful to allow for the carrier film.
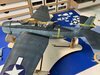
Here is some of the fuselage masking tape in position
View attachment 317768
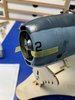
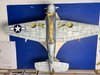
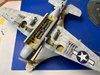
Nose number positioned
View attachment 317765
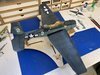
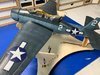
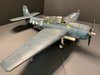
Here is the starboard side done.
View attachment 317767
The declala are OK but I still had considerable issues with them confirming the complex shapes even with the copious use of decal solution.
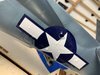
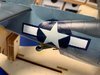
One particular problem was positioning the Port star and bars over the vent on the side of the fuselage.
View attachment 317766
I will wait for the decal solution to cure off to see if it draws the decal down to the surface. I had to cut it and even if it does draw in there will be the need for some paint. We will then see how close the decals are to MRP insignia colours.
This really confirms my thinking that masks not only give a better result they are easier than decals. I should have used them.

") I just read your review and will now probably try some if/when I come across this brand somewhere.
I just read your review and will now probably try some if/when I come across this brand somewhere.