Hi Guys,
This is my first post so please be gentle.")
I was stuck indoors with the kids over the New Year break whilst Mrs B was out working. It was too cold to go outside to the workshop (I'm a hobbyist knifemaker) so decided to load the kids in the car and head off into the fog to my local Hobbycraft and see if I could find something indoory to do. Nothing particularly took my fancy until I arrived in the model kit section.
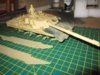
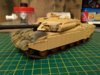
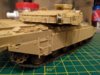
Now bear in mind I haven't built a model kit since I was a kid (I'm now 43), but after a bit of browsing and some badgering from my son, I went ahead and picked the Tamiya Challenger 1 kit along with a load of Tamiya paints, thinners, brushes etc. £90 odd later we headed home.
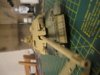
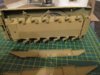
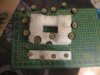
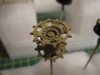
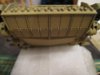
Over the course of 3 days ,interspersed with helping the kids with making various Christmas present stuff (crystal growing, 3D puzzles, science experiments) I built the kit up. My original plan (having watched a couple of YouTube vids) was to keep the upper and lower hulls seperate until painted. However, as I went with the Desert version (you can also build a NATO version which is slightly different) I had to fit the front armour, which meant attaching the hulls first. I guess I could have fitted the front armour later, but wasn't sure if I would be able to glue painted surfaces together (I'm using a poly cement).
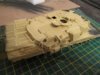
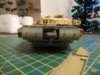
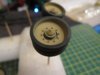
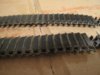
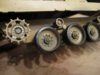
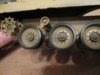
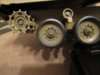
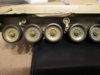
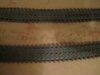
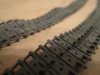
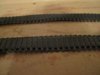
Of course this meant if I also went ahead and fitted the side armour I wouldn't be able to access the wheels and tracks. The plan was therefore to leave the side armour off for now, paint and weather the underside/bit where the wheels go, add the wheels & tracks then attach the side armour, mask off the bottom and paint the rest.
I realise at this point that I have no photo's to add, but if anyone is interested I will snap some later and add them.
I have really enjoyed the work I have done so far and will definitely try another kit when this one is done.
Cheers,
Bob
This is my first post so please be gentle.
I was stuck indoors with the kids over the New Year break whilst Mrs B was out working. It was too cold to go outside to the workshop (I'm a hobbyist knifemaker) so decided to load the kids in the car and head off into the fog to my local Hobbycraft and see if I could find something indoory to do. Nothing particularly took my fancy until I arrived in the model kit section.
Now bear in mind I haven't built a model kit since I was a kid (I'm now 43), but after a bit of browsing and some badgering from my son, I went ahead and picked the Tamiya Challenger 1 kit along with a load of Tamiya paints, thinners, brushes etc. £90 odd later we headed home.
Over the course of 3 days ,interspersed with helping the kids with making various Christmas present stuff (crystal growing, 3D puzzles, science experiments) I built the kit up. My original plan (having watched a couple of YouTube vids) was to keep the upper and lower hulls seperate until painted. However, as I went with the Desert version (you can also build a NATO version which is slightly different) I had to fit the front armour, which meant attaching the hulls first. I guess I could have fitted the front armour later, but wasn't sure if I would be able to glue painted surfaces together (I'm using a poly cement).
Of course this meant if I also went ahead and fitted the side armour I wouldn't be able to access the wheels and tracks. The plan was therefore to leave the side armour off for now, paint and weather the underside/bit where the wheels go, add the wheels & tracks then attach the side armour, mask off the bottom and paint the rest.
I realise at this point that I have no photo's to add, but if anyone is interested I will snap some later and add them.
I have really enjoyed the work I have done so far and will definitely try another kit when this one is done.
Cheers,
Bob
")