G
Guest
Guest
Wow.... Don't get many of those Richard, so thank you.Second revelation from the heavens or a double whammy with the lights...a dio and a lightbox. No star imoji's John so it's :thumb2::thumb2::thumb2::thumb2:
Cheers,
Richard
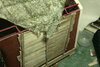
Patient # 105 .... Thank you :thumb2::smiling:Great work Dzohn. Allen, he can't, we traded our meds to the dudes in Ward 8 for some of their apple brandy to give you on visit day see'in youve been deprived lo these many years.
Patient #105
Ward 9
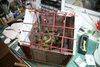
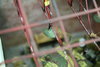
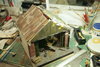
The pigeonAll it needs now is the manger with baby Jesus.
 was bad enough, now you want a nativity scene.......:smiling:Thanks Jakko.
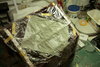
Thanks Paul...... I'm thrilled the way its come out, that yellowish light is right.Having spent many hours working under & over cars in unlit/unheated garages by trouble light, your scene is very nostalgic. Top work Dzohn. PaulE
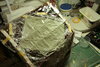
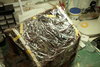
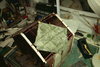
Be bold Si....indeed you are right, he has a smear of UHU on his lower back. I will rectify that today, and thanks for noticing it.:thumb2:Blimey Mr R:surprised:.....
This is turning out a proper job sir! I am seriously impressed with the lighting inside the building and the building itself is some impressive work, you should be very pleased with your effort!
My only very slight critique, if I’m may be so bold...the crewman bending over look to have a shiny bum....maybe needs a little matt varnish?:thinking::tongue-out3:
Yours
Seriously impressed
Sussex
Thanks all, lovely comments.
Right just about to get up! Yes I know its 1059.hrs. Had two rounds of toast and coffee, its a hard life being retired !
John.
Suppose someone has to do it:thumb2: