Thanks Bob, I really am.Lovely work Andrew, you must be very happy !!
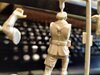
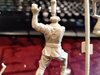
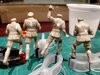
Next up figures though.......:cold-sweat: :fearful: :cold-sweat:
Thanks as always for stopping by.
Andrew

Thanks Bob, I really am.Lovely work Andrew, you must be very happy !!
Morning Andrew,
You should be very pleased with yourself on your first 1:35 build. You’ve put thought and effort into the build and it shows clearly.
A very well done from me :thumb2:
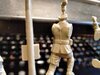
") .......never seen so many on anything this small. Have fun with these Andy......will you be posting a separate thread on painting these? :thumb2: Rick H.
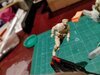
.......never seen so many on anything this small. Have fun with these Andy......will you be posting a separate thread on painting these? :thumb2: Rick H.Hi RickNo doubt, there was a tube of putty included to fill all those holes
Quite a nice crew! Tamiya haven't done their homework though. These seem to be in action poses, although the wearing of shorts in the front line was forbidden. Just imagine a sudden allied advance caught the rear area unawares and job done!! Look forward to seeing the paint go on.
P.S. The Pz 2 is very good.
John.
scalemodelling.co.uk is a privately operated online discussion forum. All content posted by members reflects their own views and opinions and does not necessarily represent those of the forum owners or administrators. While reasonable efforts are made to moderate content, no responsibility is accepted for user-generated material. By using this site, you agree to comply with UK law and the forum rules.