
- Joined
- Jan 26, 2017
- Messages
- 2,548
1/3
Cheers Scottie :thumb2:Geoff,
Looking good mate. The engine really looks the part.
Thank you Andy :thumb2:Some nice work on the fiddly stuff there Geoff,the seatbelts look pretty good from where I'm sitting :thumb2:,and as for the motor, well that's most excellent.
Good stuff mate!
The seatbelts aren’t bad but I expected a bit more body to them. I suppose they would look out of scale if they were too thick :thinking:
Cheers Doug :smiling4:Very nice. Looking forward to watching this one progress.
Thanks Tim :thumb2:Coming on nicely Geoff.
Geoff.


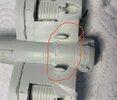


") after knocking off and losing the forward antenna. I gave up looking in the end and made a new one from a section of square stryrene rod.
after knocking off and losing the forward antenna. I gave up looking in the end and made a new one from a section of square stryrene rod.")


