

You are using an out of date browser. It may not display this or other websites correctly.
You should upgrade or use an alternative browser.
You should upgrade or use an alternative browser.
1/12 1966 Ford GT 40
- Thread starter Stefee
- Start date


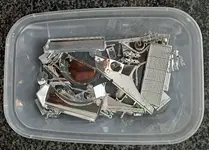
Many reviewers of this kit malign it for being too toylike. This may be due to the enormous amounts of chromed components which although we'll done are too glossy and hides or softens alot of detail.
Research shows me that the only chrome on the 1:1 were the button lamps (illuminate the numbers at night) the base of the rear lamps and rear grille surround and the upper compression rings on the pistons.
Some of the offending parts
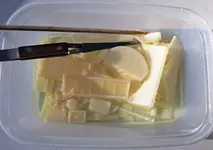
After less than 5 minutes in Tesco bleach
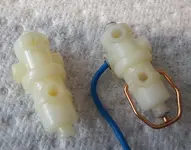
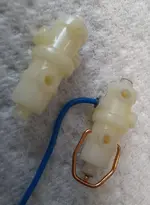
Started detailing the fuel pumps, 1 down 5 to go. Before and after.
Research shows me that the only chrome on the 1:1 were the button lamps (illuminate the numbers at night) the base of the rear lamps and rear grille surround and the upper compression rings on the pistons.
Some of the offending parts
After less than 5 minutes in Tesco bleach
Started detailing the fuel pumps, 1 down 5 to go. Before and after.

A bit more progress prepping numerous components for primer.
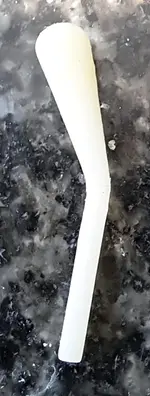
This is the gear shift lever and knob as supplied
However Ken Miles preferred a spherical knob which I tried to achieve
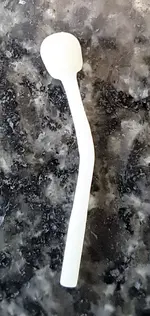
Not 100% happy so I raided the wife's sewing box and found this which I slightly modified - much better.

Also detailed the interior door panels
from this
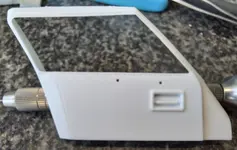
to this
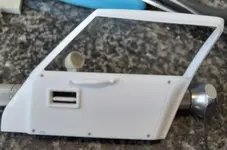
Note the rear view mirror is mounted inside the car. The mostly factual and excellent "Ford vs Ferrari" film got it wrong and mounted them on the front clamshell.
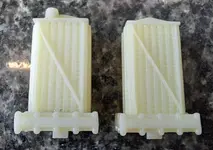
Finally a little bizarre fact, the engine and transmission oil coolers are apparently purloined from a Cessna aircraft!
Thanks for looking.
This is the gear shift lever and knob as supplied
However Ken Miles preferred a spherical knob which I tried to achieve
Not 100% happy so I raided the wife's sewing box and found this which I slightly modified - much better.
Also detailed the interior door panels
from this
to this
Note the rear view mirror is mounted inside the car. The mostly factual and excellent "Ford vs Ferrari" film got it wrong and mounted them on the front clamshell.
Finally a little bizarre fact, the engine and transmission oil coolers are apparently purloined from a Cessna aircraft!
Thanks for looking.
Caroll Shelby, who built the Ken Miles car for the 1966 LM 24h, had his workshop in a hanger at a small airfield and apparently "borrowed" various bits and bobs from the aircraft maintenance shops. I believe the blue/red hose fittings are aircraft equipment.

1/3
Just had a catch up with this one Stefan. A classic car without doubt and your doing an incredible job. Lovely work.
Sorry for the lengthy gap between updates.
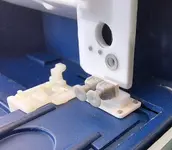
Scratch built a device fitted to the real car, possibly a brake balance adjuster.
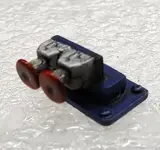
Painted and lightly weathered most of the other components, still some more painting to be done to the fuel pumps, dashboard etc.
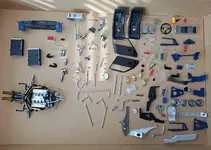
Had a lucky break today. Was about to start on the decals on the front clamshell when I realised that the red "teardrops" needed painting. Doubt that the decals would have survived the masking tape.
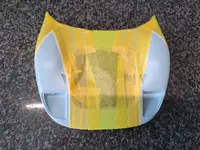
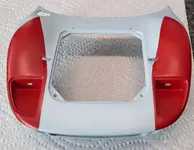
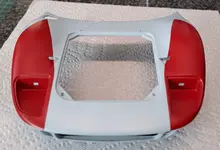
They are not perfectly symmetrical but close enough I think.
Scratch built a device fitted to the real car, possibly a brake balance adjuster.
Painted and lightly weathered most of the other components, still some more painting to be done to the fuel pumps, dashboard etc.
Had a lucky break today. Was about to start on the decals on the front clamshell when I realised that the red "teardrops" needed painting. Doubt that the decals would have survived the masking tape.
They are not perfectly symmetrical but close enough I think.
1/3
Fantastic work Stefan. The exhaust pipes on the engine are just brilliant. I think this bad boy will be a stunner when finished.

Thank you all for your kind comments.
Today was an absolute disaster.
The kit supplied decals are the biggest pile of poo I have ever encountered. More than 5 seconds in warm water and they splinter and crack, the dimensions are off and they have a "mottled" surface when applied.
I ended up removing 3 with no damage to the paint but the roof one is very stubborn and I have damaged the paint so touch ups will be required
Ordered some Cartograph replacements from Belgium, not cheap but apparently dimensionally correct and the pin stripe is blue not black as erroneously supplied in the kit.
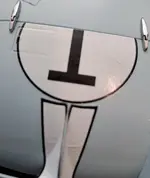
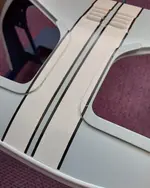
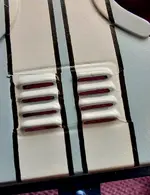
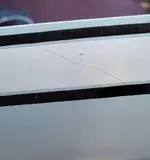
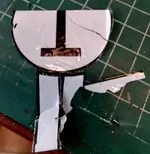
So peed off, have to wait for delivery before I can apply them and then clearcoat.
Today was an absolute disaster.
The kit supplied decals are the biggest pile of poo I have ever encountered. More than 5 seconds in warm water and they splinter and crack, the dimensions are off and they have a "mottled" surface when applied.
I ended up removing 3 with no damage to the paint but the roof one is very stubborn and I have damaged the paint so touch ups will be required
Ordered some Cartograph replacements from Belgium, not cheap but apparently dimensionally correct and the pin stripe is blue not black as erroneously supplied in the kit.
So peed off, have to wait for delivery before I can apply them and then clearcoat.

When decals are bad it's really frustrating. I think it's due to decalling coming at the end of a build. So much work messed up by what should be a straight forward job. I hope the replacements come soon. Cartography are usually very good.
1/3
Damn Stefan, that is a real shame. I am just wondering if it would be easier to use paint rather than a decal over those air intake inlets. Thats never going to be an easy task with a decal.
Must admit was thinking exactly the same. Will probably wait until the replacement decals arrive and see if I can match the colours.Damn Stefan, that is a real shame. I am just wondering if it would be easier to use paint rather than a decal over those air intake inlets. Thats never going to be an easy task with a decal.
Legal Notice
scalemodelling.co.uk is a privately operated online discussion forum. All content posted by members reflects their own views and opinions and does not necessarily represent those of the forum owners or administrators. While reasonable efforts are made to moderate content, no responsibility is accepted for user-generated material. By using this site, you agree to comply with UK law and the forum rules.