
You are using an out of date browser. It may not display this or other websites correctly.
You should upgrade or use an alternative browser.
You should upgrade or use an alternative browser.
A13 Mk.I/Cruiser Tank Mk.III
- Thread starter Neo
- Start date
Thank you! I am trying to keep calm and do my best step by step :relieved:Very impressive method for doing the screws Artyom, details & research are excellent.
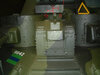
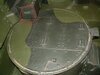
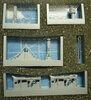
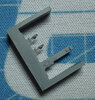
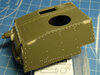
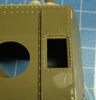
Some big problems with ammo shells box. Too narrow on a model. You may see it on the pictures. Holders with rivets are too close to each other. Pay attention that I have moved the main gun and machine gun on my model on a right. So if we want to save the proportions we should increase the box on it's length. Also we need to make the holders on both sides and on a bottom because they are one piece.
View attachment 414483
View attachment 414484
View attachment 414485
View attachment 414486
View attachment 414483
View attachment 414484
View attachment 414485
View attachment 414486
Attachments
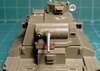
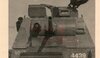
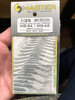
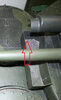
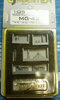
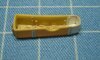
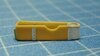
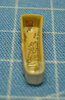
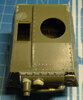
And some more information. I wondered what is this on a side of the box. Only from one side. I thought that it was a holder but it looks strange and definitely should be movable. Than I realized that this is hatch to remove ammo shells. By the way I have bought some ammo shells.
View attachment 414712
View attachment 414713
View attachment 414714
View attachment 414712
View attachment 414713
View attachment 414714
Attachments
G
Guest
Guest
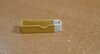
You bought an empty bag …? ") (Of course, I have to point out the cartridge cases are the wrong shape for the Vickers gun in the tank you’re modelling
(Of course, I have to point out the cartridge cases are the wrong shape for the Vickers gun in the tank you’re modelling ") )
)
But I just took a look at their web site, and wow … those are empty 7.92×57 mm casings with the open end drilled out …?!
(Of course, I have to point out the cartridge cases are the wrong shape for the Vickers gun in the tank you’re modelling )But I just took a look at their web site, and wow … those are empty 7.92×57 mm casings with the open end drilled out …?!
That was my first thought :smiling5: But they are on place. :smiling5::smiling5: Captured items of ammo.You bought an empty bag …?
But I just took a look at their web site, and wow … those are empty 7.92×57 mm casings with the open end drilled out …?!
Indeed! Magic. I have 1919 Browning and MG-42 from them. It is piece of art. Seriously.
At this scale there won't be a noticeable difference, o/l length and shoulder angle perhaps and a couple of scale mm's in neck diameter......of course , if you could read the scale headstamp then one would know for sure........ :tongue-out3:
Rick H.
Rick H.
Right you are! Unfortunately this is an only decent offer in this scale. :relieved: :smiling2:At this scale there won't be a noticeable difference, o/l length and shoulder angle perhaps and a couple of scale mm's in neck diameter......of course , if you could read the scale headstamp then one would know for sure........ :tongue-out3:
Rick H.
G
Guest
Guest
I kind of expect Artyom to add the rim to the cases so they look more like .303At this scale there won't be a noticeable difference, o/l length and shoulder angle perhaps and a couple of scale mm's in neck diameter......
Having looked at Master Model’s web site, I wouldn’t be surprised if the cases did have headstampsof course , if you could read the scale headstamp then one would know for sure........ :tongue-out3:
:smiling2:
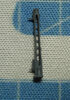
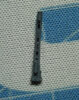
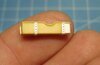
Some my photos of their MG-42. I will add it on the turret roof on A30.
View attachment 414835
View attachment 414836
View attachment 414837
View attachment 414838
View attachment 414839
View attachment 414840
View attachment 414841
Some my photos of their MG-42. I will add it on the turret roof on A30.
View attachment 414835
View attachment 414836
View attachment 414837
View attachment 414838
View attachment 414839
View attachment 414840
View attachment 414841
Attachments
G
Guest
Guest
Ridiculous
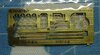
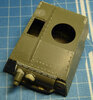
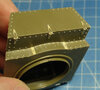
After all I did it but with some assumptions. Unfortunately MK doesn't have rivets less than 0,4mm.
View attachment 415188
View attachment 415189
View attachment 415190
View attachment 415191
View attachment 415192
View attachment 415193
View attachment 415194
View attachment 415188
View attachment 415189
View attachment 415190
View attachment 415191
View attachment 415192
View attachment 415193
View attachment 415194
Attachments

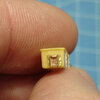
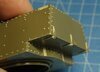
Seems to me it is a start of a long way. All those screws,rivets and nuts makes me very sad.I already have an understanding that the turret is an separate model.
View attachment 415661
View attachment 415662
View attachment 415663
View attachment 415664
View attachment 415665
View attachment 415666
View attachment 415667
View attachment 415661
View attachment 415662
View attachment 415663
View attachment 415664
View attachment 415665
View attachment 415666
View attachment 415667
Attachments
G
Guest
Guest
You very obviously have more patience for this than I would have … I could manage adding rivets with a punch and die set, but probably not drilling holes for the rivets first as well Very good job!
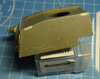
Very good job!Unfortunately it is only a half. It could be easier if Masterclub did such type of screw with this head but.... I don't like to work with PE screws. Drilling and gluing sometimes makes me mad.You very obviously have more patience for this than I would have … I could manage adding rivets with a punch and die set, but probably not drilling holes for the rivets first as well :smiling3: Very good job!
Thank you! I am really curious how it will look like overall with turret.Your attention to detail is outstanding Artyom. great work, really loving this build.
Legal Notice
scalemodelling.co.uk is a privately operated online discussion forum. All content posted by members reflects their own views and opinions and does not necessarily represent those of the forum owners or administrators. While reasonable efforts are made to moderate content, no responsibility is accepted for user-generated material. By using this site, you agree to comply with UK law and the forum rules.