Theme editor

Scale Model Shop

AFV Club, Tiger I, Panzerkampfwagen VI, 1:48

pjgtech

Peter in Kent UK
SMF Supporters
Joined
Dec 28, 2023
Messages
2,061
Reaction score
2,212
Points
113
Age
61
Location
Swale Kent UK
First Name
Peter
1/3
Thread owner
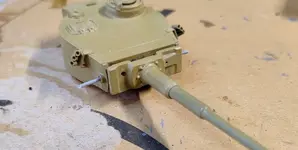
I am now on a quest to build many different sized Tigers.....I have already built a 1:144 scale mini tiger, and one of the first kits I built when I got back into the hobby was a little Airfix Tiger in 1:72, so this is the next scale up, a nice 1:48 scale by AFV Club. Then after this one I have a 1:35 in the stash, so will have a whole set of four, all in differnt sizes! Lol....
Box and sprues, NB: I actually already started this one a couple of days ago whilst fiddling around with my Lynx Chopper build.
AFV Tiger 1_48 scale  (2) (Large).webpAFV Tiger 1_48 scale  (3) (Large).webpTiger 1_48 AFV orig pics apr26  (1) (Large).webpTiger 1_48 AFV orig pics apr26  (2) (Large).webpTiger 1_48 AFV orig pics apr26  (3) (Large).webpTiger 1_48 AFV orig pics apr26  (4) (Large).webpTiger 1_48 AFV orig pics apr26  (5) (Large).webpTiger 1_48 AFV orig pics apr26  (6) (Large).webpTiger 1_48 AFV orig pics apr26  (7) (Large).webp
 
Thread owner
This will be in desert sand yellow paint job, just like the other ones, as I want them all to look alike.
The kit appears to be nicely detailed and has only a few PE parts, mainly grills, and the horrid rubber tracks, although I've done a few now and I just superglue them together and put a weight on them and leave for few hours and they seem to set ok with a nice strong bond, so you have a bit of stretch, if needed when getting them on the wheels.
Started with the main body/chassis, good fit, no drama, no large gaps.
Then put the turret together, again, no drama, everything fitting as it should.
NB: I've done a couple of AFV builds now and they have all been good IMHO.
Then I gave the chassis and turret a coat of grey primer (Ammo One Shot).
Tiger 1_48 AFV pics1 apr26  (1).webp

Tiger 1_48 AFV pics1 apr26  (2).webp

Then decided to prime the parts on the sprue, I find this a bit easier, especially for the small parts, rather than painting them in situ trying to get into awkward little spaces, etc.
Tiger 1_48 AFV pics1 apr26  (4).webp
Then the rear bits went on, exhaust manifolds, etc. Then added the PE grills to the rear.
Tiger 1_48 AFV pics1 apr26  (5).webp

Tiger 1_48 AFV pics1 apr26  (6).webp
 
Thread owner
Made a bit of progress, the main chassis and turret build is mostly done now, just need to add the wheels and tracks and some pioneer tools, etc to add.
Rear exhaust added (2nd pipes) and little gap filled.
Tiger I 1_48 AFV pics3 apr26  (1).webp

Started the first top coat sand/dark yellow.... as with all brush painting, first coat always looks gash!

Tiger I 1_48 AFV pics3 apr26  (2).webp

Little bits added, eg: front lights, spare track, chain couplings/links, machine gun barrel, etc.

Tiger I 1_48 AFV pics3 apr26  (4).webp

Lots of bits added to the rear too, eg: rear chain couplings/links, baffles, engine cover handles, little side smoke/mortar thingies?

Tiger I 1_48 AFV pics3 apr26  (5).webp

Turret pretty much finished too, side smoke/mortar thingies, hatch covers and handles, access covers, etc.

Tiger I 1_48 AFV pics3 apr26  (6).webp

another view of the rear.....quite a detailed little kit TBH....

Tiger I 1_48 AFV pics3 apr26  (8).webp

Wheels painted up and tyres/rubber sections.....

Tiger I 1_48 AFV pics3 apr26  (9).webp

Whole body/turret now covered with first top coat, patchy, etc, so will need at least another two coats, second coat smooths things out and gets rid of most of the patchiness, third coat tends to give the final finish.

Tiger I 1_48 AFV pics3 apr26  (10).webp

Then we will be adding the wheels, etc .....
 
Thread owner
Oh B*gger, just noticed I've put the rear exhaust baffles on upside down!!! will need to turn them round....
 
Thread owner
Not done much today, other things on, etc...
But did manage to sort out the rear exhaust baffles, they were well attached, so rather than also remove the actual exhaust pipes, I cut the join and levered off the baffles. Cleaned them up, the re-attached but now the correct way round!
Will need tidying up, with a bit of gap filler and paint touch up, but it was bugging me, so had to be done, Lol.
Tiger I 1_48 AFV pics4 apr26  (1).webp

Have now also started on the wheels, one side is now fully attached, apart from the last drive drive/guide wheel.
AFV have used tiny, (and I do mean tiny!) little screws to secure alternate wheel sets in place.
I had to resort to my smallest electrical screwdriver, as its the only one small enough to fit the tiny screw heads!
I'm making sure I have really good secure connections for the wheels, as the horrid little rubber tracks will need to be stretched over the wheels as it looks like they will be a relatively tight fit, so don't want to have loose wheels at that point!
Tiger I 1_48 AFV pics4 apr26  (2).webp
 
Back
Top