Theme editor

Scale Model Shop

ARNHEM: Major General R E URQUHART'S HIDE OUT HOUSE Zwarteweg 14

Status
Not open for further replies.
Thread owner
DAY 3

Hi all,

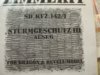
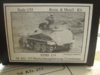
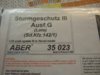
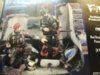
well did some research on the German troops mostly there where SS-troops from the 9th and 10th and Panzer grenadiers the Stug III should be one of the 280th.

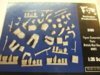
The Stug I have would fit the bill but the wheels have the wrong dimensions.

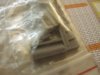
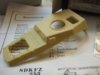
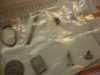
Found a cmk kit with some right wheel dimensions. And I think I will upgrade the kit with some Pe. parts. Found a Beobachtungs Panzer 250 halftrack in my stash that would fit as well, but I have to see how that fits in.

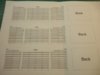
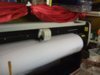
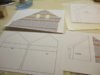
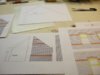
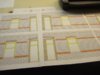
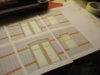
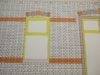
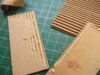
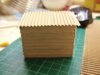
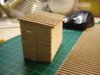
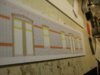
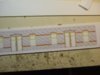
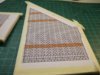
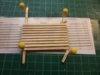
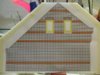
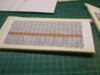
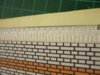
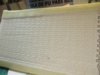
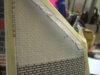
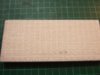
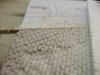
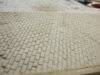
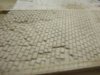
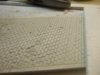
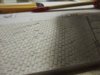
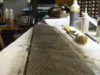
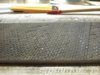
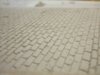
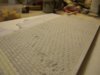
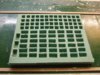
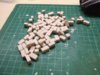
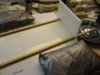
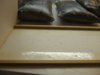
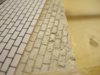
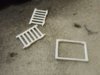
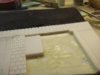
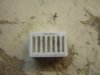
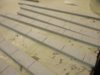
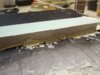
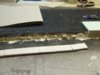
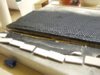
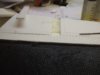
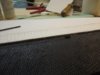
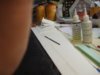
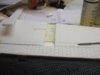
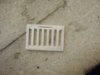
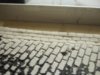
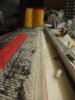
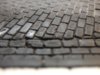
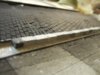
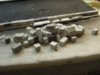
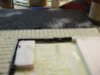
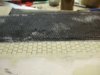
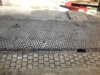
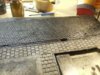
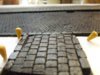
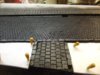
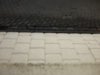
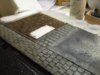
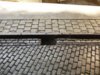
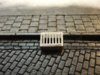
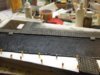
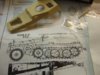
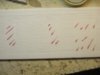
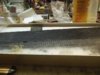
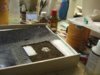
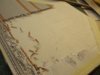
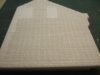
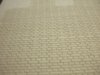
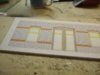
Printer is working overtime to print the parts I need to cut the Depron, also made some corrections on the building and street parts.

later on a couple of pictures, as for now

Cheers Richi

Here are the Pictures

View attachment 75672

View attachment 75673

View attachment 75674

View attachment 75675

View attachment 75676

View attachment 75677

View attachment 75678

View attachment 75679

View attachment 75680
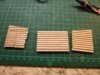

Printing all done

View attachment 188695

View attachment 188696

View attachment 188697

View attachment 188698

View attachment 188699

View attachment 188700

View attachment 188701

View attachment 188702

View attachment 188703
 

Attachments

  • DSCF0001.jpg
    DSCF0001.jpg
    1.6 KB · Views: 0
  • DSCF0018.jpg
    DSCF0018.jpg
    2.6 KB · Views: 0
  • DSCF0019.jpg
    DSCF0019.jpg
    2.4 KB · Views: 0
  • DSCF0024.jpg
    DSCF0024.jpg
    1.9 KB · Views: 0
  • DSCF0025.jpg
    DSCF0025.jpg
    2.1 KB · Views: 0
  • DSCF0026.jpg
    DSCF0026.jpg
    2.1 KB · Views: 0
  • DSCF0027.jpg
    DSCF0027.jpg
    2.3 KB · Views: 0
  • DSCF0030.jpg
    DSCF0030.jpg
    2.2 KB · Views: 0
  • DSCF0031.jpg
    DSCF0031.jpg
    1.8 KB · Views: 0
Thread owner
Hi all,

got some work done, I glued the base drawing on a piece of depron, its big.

View attachment 75687

View attachment 75688


and started off with the little Shed using 0,5mm Balsa wood.

View attachment 75681

View attachment 75682

View attachment 75683

View attachment 75684

View attachment 75685

View attachment 75686

View attachment 75689


Then i put on the pieces of paper that hat to be cut on depron,

View attachment 75690

View attachment 75691

View attachment 75692

View attachment 75693

View attachment 75694


started the cutting with the 2 smaller pieces for the small corner of the building on the left,

View attachment 75695

View attachment 75696

View attachment 75697

View attachment 75698

View attachment 75699


after doing that i went in with a small permanent marker that is filled with acetone and went trough the cutting lines. This will make a nice gab of about 0,5mm / 0,8mm between the single stones.

that all for today

Cheers Richi

View attachment 188704

View attachment 188705

View attachment 188706

View attachment 188707

View attachment 188708

View attachment 188709

View attachment 188710

View attachment 188711

View attachment 188712

View attachment 188713

View attachment 188714

View attachment 188715

View attachment 188716

View attachment 188717

View attachment 188718

View attachment 188719

View attachment 188720

View attachment 188721

View attachment 188722
 

Attachments

  • DSCF0015.jpg
    DSCF0015.jpg
    2.7 KB · Views: 0
  • DSCF0016.jpg
    DSCF0016.jpg
    2.6 KB · Views: 0
  • DSCF0017.jpg
    DSCF0017.jpg
    2.7 KB · Views: 0
  • DSCF0021.jpg
    DSCF0021.jpg
    1.7 KB · Views: 0
  • DSCF0022.jpg
    DSCF0022.jpg
    1.7 KB · Views: 0
  • DSCF0023.jpg
    DSCF0023.jpg
    1.6 KB · Views: 0
  • DSCF0028.jpg
    DSCF0028.jpg
    2.4 KB · Views: 0
  • DSCF0029.jpg
    DSCF0029.jpg
    2 KB · Views: 0
  • DSCF0033.jpg
    DSCF0033.jpg
    2.6 KB · Views: 0
  • DSCF0014.jpg
    DSCF0014.jpg
    2.5 KB · Views: 0
  • DSCF0005.jpg
    DSCF0005.jpg
    2.6 KB · Views: 0
  • DSCF0004.jpg
    DSCF0004.jpg
    2.3 KB · Views: 0
  • DSCF0034.jpg
    DSCF0034.jpg
    2.5 KB · Views: 0
  • DSCF0035.jpg
    DSCF0035.jpg
    2.4 KB · Views: 0
  • DSCF0037.jpg
    DSCF0037.jpg
    2.8 KB · Views: 0
  • DSCF0038.jpg
    DSCF0038.jpg
    1.8 KB · Views: 0
  • DSCF0041.jpg
    DSCF0041.jpg
    2.5 KB · Views: 0
  • DSCF0043.jpg
    DSCF0043.jpg
    2.3 KB · Views: 0
  • DSCF0044.jpg
    DSCF0044.jpg
    1.8 KB · Views: 0
Thread owner
Day 8

well I started to work on the base.

Made the middle street piece of a soft plaster poured directly on the base, also made some pieces for the sides.

View attachment 76000

View attachment 76001

View attachment 76002

View attachment 76003


After pouring the plaster and let it set for a couple of hours I started to draw the stones in it.

View attachment 76004

View attachment 76005

View attachment 76006

View attachment 76007


View attachment 76008

View attachment 76009

View attachment 76010


After i was done with the stones i made a solution of a little black paint, pva glue and a lot of water and sprayed it on the street, i will repeat this 2 or 3 times. This solution will seal the plaster and protect the details of the street, for further works like paint and weathering.

View attachment 76011

View attachment 76012

View attachment 76013


So thats all

Cheers Richi

View attachment 189023

View attachment 189024

View attachment 189025

View attachment 189026

View attachment 189027

View attachment 189028

View attachment 189029

View attachment 189030

View attachment 189031

View attachment 189032

View attachment 189033

View attachment 189034

View attachment 189035

View attachment 189036
 

Attachments

  • DSCF0020.jpg
    DSCF0020.jpg
    2.2 KB · Views: 0
  • DSCF0021.jpg
    DSCF0021.jpg
    2.2 KB · Views: 0
  • DSCF0022.jpg
    DSCF0022.jpg
    2.3 KB · Views: 0
  • DSCF0027.jpg
    DSCF0027.jpg
    2 KB · Views: 0
  • DSCF0031.jpg
    DSCF0031.jpg
    2.2 KB · Views: 0
  • DSCF0032.jpg
    DSCF0032.jpg
    2.9 KB · Views: 0
  • DSCF0034.jpg
    DSCF0034.jpg
    2.5 KB · Views: 0
  • DSCF0019.jpg
    DSCF0019.jpg
    1.9 KB · Views: 0
  • DSCF0018.jpg
    DSCF0018.jpg
    2 KB · Views: 0
  • DSCF0010.jpg
    DSCF0010.jpg
    3.2 KB · Views: 0
  • DSCF0011.jpg
    DSCF0011.jpg
    2.9 KB · Views: 0
  • DSCF0012.jpg
    DSCF0012.jpg
    2.6 KB · Views: 0
  • DSCF0014.jpg
    DSCF0014.jpg
    1.9 KB · Views: 0
  • DSCF0016.jpg
    DSCF0016.jpg
    2.5 KB · Views: 0
hi Richi,very nice ,great stuff will be watching this come along with intrest,
 
Thread owner
thanks' I will try to give an update every 5 or 6 days so u can see a little progress.

Cheers Richi
 
Excellent work so far richi will be following your progress.

Scott
 
Thread owner
Day 12

Hi all,

Here is a little update on my build.

Work on the street made a gutter from plaster, with 2 drain covers. I hope this is the right name for it.

The drain covers are made of 0,5mm plastic sheet.

Then I glued the border stones in place those are all made of plaster.

The walkway was made of Depron and was glued in.

After all the parts were in place the whole base received a clear coat to protect it, when I start the painting and weathering.

I have to make the pictures in 2 parts but I think the pictures are more self explaining I hope.

So here is part 1. Enjoy

View attachment 76375

View attachment 76376

View attachment 76377


View attachment 76378

View attachment 76380


View attachment 76381

View attachment 76382

View attachment 76383


View attachment 76384

View attachment 76385

View attachment 76386

View attachment 76387

View attachment 76388

View attachment 76389


View attachment 76379

View attachment 189398

View attachment 189399

View attachment 189400

View attachment 189401

View attachment 189402

View attachment 189403

View attachment 189404

View attachment 189405

View attachment 189406

View attachment 189407

View attachment 189408

View attachment 189409

View attachment 189410

View attachment 189411

View attachment 189412
 

Attachments

  • DSCF0007.jpg
    DSCF0007.jpg
    2.1 KB · Views: 0
  • DSCF0027.jpg
    DSCF0027.jpg
    2.2 KB · Views: 0
  • DSCF0012.jpg
    DSCF0012.jpg
    2 KB · Views: 0
  • DSCF0018.jpg
    DSCF0018.jpg
    2.2 KB · Views: 0
  • DSCF0019.jpg
    DSCF0019.jpg
    2.7 KB · Views: 0
  • DSCF0020.jpg
    DSCF0020.jpg
    2.4 KB · Views: 0
  • DSCF0021.jpg
    DSCF0021.jpg
    2.8 KB · Views: 0
  • DSCF0022.jpg
    DSCF0022.jpg
    1.8 KB · Views: 0
  • DSCF0023.jpg
    DSCF0023.jpg
    2 KB · Views: 0
  • DSCF0024.jpg
    DSCF0024.jpg
    2.4 KB · Views: 0
  • DSCF0026.jpg
    DSCF0026.jpg
    1.9 KB · Views: 0
  • DSCF0005.jpg
    DSCF0005.jpg
    1.9 KB · Views: 0
  • DSCF0001.jpg
    DSCF0001.jpg
    2.8 KB · Views: 0
  • DSCF0002.jpg
    DSCF0002.jpg
    2.8 KB · Views: 0
  • DSCF0003.jpg
    DSCF0003.jpg
    3 KB · Views: 0
Thread owner
 

Attachments

  • DSCF0030.jpg
    DSCF0030.jpg
    2.6 KB · Views: 0
  • DSCF0031.jpg
    DSCF0031.jpg
    2.5 KB · Views: 0
  • DSCF0033.jpg
    DSCF0033.jpg
    2.5 KB · Views: 0
  • DSCF0034.jpg
    DSCF0034.jpg
    2.3 KB · Views: 0
  • DSCF0035.jpg
    DSCF0035.jpg
    2.3 KB · Views: 0
  • DSCF0037.jpg
    DSCF0037.jpg
    2.8 KB · Views: 0
  • DSCF0038.jpg
    DSCF0038.jpg
    3 KB · Views: 0
  • DSCF0039.jpg
    DSCF0039.jpg
    2.9 KB · Views: 0
  • DSCF0040.jpg
    DSCF0040.jpg
    2.6 KB · Views: 0
  • DSCF0028.jpg
    DSCF0028.jpg
    1.7 KB · Views: 0
  • DSCF0041.jpg
    DSCF0041.jpg
    2.7 KB · Views: 0
  • DSCF0042.jpg
    DSCF0042.jpg
    3.3 KB · Views: 0
  • DSCF0043.jpg
    DSCF0043.jpg
    3.1 KB · Views: 0
  • DSCF0044.jpg
    DSCF0044.jpg
    3 KB · Views: 0
I forgot all about this rich , it surly has moved on from last time I visited , great choice on the stug and figures and your street is looking awesome :)
 
Hi Richi

Good shout on the Arnhem build. An ambitious build off to a great start will look forward to the progress on this.

Cheers P
 
wow Richi Awesome stuff, and the work on the grates is just superb, so you hand tooled them out,nice,

may i ask what size do you do your pavement stones att ? and also the border stones ? please,

i know you use and talk about depron , what is it a type off styrene, that much finer ,

look forward to the next update
 
Thread owner
Hi Moni,

Depron is a closed cell styrofoam foam in sheet form, it is a fantastic medium for building model aircraft, and also a popular medium for architectural model building, as well as model boats and prototype design.

my pavement stones are 4 x 8mm and the border stones are 30 x 15 x 3mm and the boardwalk stones are 8 x 8mm

Hope this helps a little.

Cheers Richi
 
hi Richi, thank you very much it dose help as my cobble stones are ok, just the others were not to sure on

as your,s look to be right,

think i will have to try to buy online for the Depron no one has it that i can find,spent hrs over 3 today to buy cork board

just silly so mite try horrible bay for that,
 
Thread owner
Hi Moni,

here are some retailers in NZ. that have Depron,

Link 1

Link 2

Hope this helps

Cheers Richi
 
hi Richi thank you so very much for the help and so sorry my firefox is acting up and ,

things just are not showing up for me i feel bad and once again very sorrry to off missed the post

and looking forward to see more of your outstanding work ;)

cheers
 
Thread owner
 

Attachments

  • DSCF0017.jpg
    DSCF0017.jpg
    2.8 KB · Views: 0
  • DSCF0018.jpg
    DSCF0018.jpg
    2.7 KB · Views: 0
  • DSCF0019.jpg
    DSCF0019.jpg
    1.6 KB · Views: 0
  • DSCF0020.jpg
    DSCF0020.jpg
    2.4 KB · Views: 0
  • DSCF0021.jpg
    DSCF0021.jpg
    2.5 KB · Views: 0
  • DSCF0022.jpg
    DSCF0022.jpg
    2.5 KB · Views: 0
  • DSCF0025.jpg
    DSCF0025.jpg
    2.6 KB · Views: 0
  • DSCF0026.jpg
    DSCF0026.jpg
    2.3 KB · Views: 0
  • DSCF0029.jpg
    DSCF0029.jpg
    1.8 KB · Views: 0
  • DSCF0016.jpg
    DSCF0016.jpg
    2.2 KB · Views: 0
  • DSCF0015.jpg
    DSCF0015.jpg
    2.3 KB · Views: 0
  • DSCF0001.jpg
    DSCF0001.jpg
    2.5 KB · Views: 0
  • DSCF0002.jpg
    DSCF0002.jpg
    2.8 KB · Views: 0
  • DSCF0004.jpg
    DSCF0004.jpg
    2.1 KB · Views: 0
  • DSCF0006.jpg
    DSCF0006.jpg
    1.6 KB · Views: 0
  • DSCF0009.jpg
    DSCF0009.jpg
    1.7 KB · Views: 0
  • DSCF0011.jpg
    DSCF0011.jpg
    2.2 KB · Views: 0
  • DSCF0012.jpg
    DSCF0012.jpg
    3.3 KB · Views: 0
  • DSCF0014.jpg
    DSCF0014.jpg
    3.5 KB · Views: 0
  • DSCF0030.jpg
    DSCF0030.jpg
    1.8 KB · Views: 0
nice to see things coming along nicely Richi, always wounder what you have for us, do like the looks off these conversion set,

just lov the little metal bits for the half track , looking forward too see that one built , dont realy understand what the 9th pic is ?

i must say my hats off to you with your brick work , dont know how you have the patients :oops: i get up after an hr or so and walk about ,

thats why it takes me so long to get any were :(

keep the great work coming and always look forward to your posts
 
Status
Not open for further replies.
Back
Top