Theme editor

Scale Model Shop

Atomic Annie.

Status
Not open for further replies.

ojays

New member
Joined
Oct 16, 2011
Messages
1,713
Reaction score
0
Points
0
1/3
Thread owner
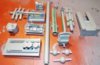
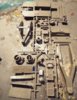
Finally got around to opening up the many polythene bags out of a rather large box.

Initial impressions were 'A lot of parts in here' then I took a closer look!

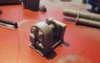
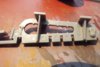
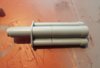
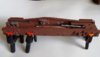
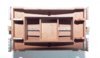
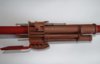
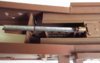
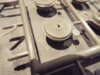
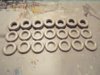
Unfortunately this kit shows it's age with plenty of flash, injection marks sinkage etc.

Variations in amounts of detail, some areas quite good, many areas very bland.

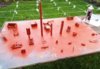
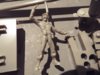
The crew look like extras from 'The Walking Dead' that is where they will remain.

As I have already seen some finished examples, and heard of the pitfalls/omissions, there are plenty of areas for improvement.

As I have always wanted to build one of these since being a little kid, I don't intend to go down the 'must be authentic route' and take months to build. Just a steady build and half decent paint job I hope.

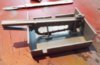
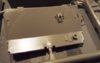
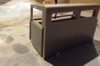
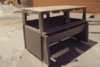
On removing the cab parts from the distorted sprue's (another fault) I found the roof/body joints will need some work, and the cab interior is sparse to say the least.

View attachment 81127

View attachment 81128

View attachment 81129

View attachment 81130

View attachment 81131

View attachment 81132

View attachment 81133

View attachment 81134


View attachment 194150

View attachment 194151

View attachment 194152

View attachment 194153

View attachment 194154

View attachment 194155

View attachment 194156

View attachment 194157
 

Attachments

  • Flash (3).JPG
    Flash (3).JPG
    3 KB · Views: 0
  • Automaton.JPG
    Automaton.JPG
    3 KB · Views: 0
  • Automaton (2).JPG
    Automaton (2).JPG
    2.8 KB · Views: 0
  • Chassis (2).JPG
    Chassis (2).JPG
    3.4 KB · Views: 0
  • Cab Floor.JPG
    Cab Floor.JPG
    2 KB · Views: 0
  • Cab 2.JPG
    Cab 2.JPG
    2.1 KB · Views: 0
  • Cab 3.JPG
    Cab 3.JPG
    2.3 KB · Views: 0
  • Wheels Wheels & More Wheels.JPG
    Wheels Wheels & More Wheels.JPG
    2.7 KB · Views: 0
I too have looked at this kit and have been intrigued by it...it does look bad though, although I am sure you can sort it. I think you are right leave the figures alone, they look like they have been on the other end of the gun than firing it.

Si:)
 
Thread owner
Anyone got ideas on how to replicate footplate grill, as I want to change the poor plastic footplates on this kit!

Thanks

Gregg
 
And the challenge begins.

If the grating you are after is square mesh, the pound shop can probably come up with a set of sieves/tea strainers that can be cut up for that.

If they are diamond plate, You can buy that is sheet from model shops.

Ian M
 
Thread owner
\ said:
And the challenge begins.If the grating you are after is square mesh, the pound shop can probably come up with a set of sieves/tea strainers that can be cut up for that.

If they are diamond plate, You can buy that is sheet from model shops.

Ian M
Thanks for that Ian, popping into my local pound shop today. Luckily open all weekend here.

Will let you know what I find.

Gregg
 
Thread owner
[here is a good sit for info Gregg http://www.theatomiccannon.com/

Thanks for the info Steve.

I had already downloaded Wimm Vinks build and purchased the Paul Gaertner's scale plans when I purchased the kit.

It was reading their builds, that I realised that I had looked in wonder at it all those years ago, through childhood eyes..

I spent so long building my Boote, I have decided to build Annie almost out of the box, with a few extra details added.

There are several sites dedicated to the weapons deployment in Germany in the 50s. These being run by ex-cannoneers,

with their own remeniscences of how difficult it was to redeploy from one area to another, on the narrow winding roads of Europe.

View attachment 81226

View attachment 81227


.

View attachment 194249

View attachment 194250
 

Attachments

  • at0mcan3.jpg
    at0mcan3.jpg
    2 KB · Views: 0
  • at0mcan4.jpg
    at0mcan4.jpg
    2.2 KB · Views: 0
Thread owner

Attachments

  • Sub Assembly (2).JPG
    Sub Assembly (2).JPG
    2.2 KB · Views: 0
  • Sub Assembly.JPG
    Sub Assembly.JPG
    2.7 KB · Views: 0
  • Sink Marks.JPG
    Sink Marks.JPG
    2.6 KB · Views: 0
  • Sub Assemblies.JPG
    Sub Assemblies.JPG
    2.8 KB · Views: 0
  • Great Fit Not.JPG
    Great Fit Not.JPG
    1.8 KB · Views: 0
Yep, all my tank bits where outside earlier this week with a coat of red oxide. Looking good Gregg.

Si:)
 
Looking good Gregg, love the big guns myself so i'll be watching.

John
 
Thread owner
\ said:
And the challenge begins.If the grating you are after is square mesh, the pound shop can probably come up with a set of sieves/tea strainers that can be cut up for that.

If they are diamond plate, You can buy that is sheet from model shops.

Ian M[/qu

\ said:
Thanks for that Ian, popping into my local pound shop today. Luckily open all weekend here.Will let you know what I find.

Gregg
Didn't find anything suitable in poundland or poundstretcher,

However found this supplier with various meshes etc., as well as many other items that could be helpful to our hobby.

www,eileensemporium.com

Well worth a look.

Gregg
 
\ said:
And the challenge begins.If the grating you are after is square mesh, the pound shop can probably come up with a set of sieves/tea strainers that can be cut up for that.

If they are diamond plate, You can buy that is sheet from model shops.

Ian M
Or you can still buy the tea strainer and turn it on it's corner :rolleyes: :D
 
Thread owner
Didn't find anything suitable in poundland or poundstretcher,

However found this supplier with various meshes etc., as well as many other items that could be helpful to our hobby.

www,eileensemporium.com

Well worth a look.
 
Thread owner
Just been into my local car spares retailer for some oil, and low and behold 'CAR-PLAN' aluminium mesh for car body repairs.

Considering I have used this item many times in the past, I now realise my Alzheimer's has really kicked in. :oops::oops::oops::oops:
 
Thread owner
View attachment 86580

View attachment 86581

View attachment 86582

View attachment 86583

View attachment 86584

View attachment 86585

View attachment 86587

Made little headway recently, maybe get more done when the nights start closing in.
The age of the kit is definitely showing, (1957) as much manipulation/cutting/filing is necessary to make some the parts to fit correctly.

I wish I hadn't primed before starting the assembly, as I have found it necessary to scrape off some of this on many parts, just to get them to fit.

Because of all the sinkage, injection marks etc going to build OOTB as I would as a child.

It's amazing how your childhood memory of this 'Awesome Model', diminishes with age and experience.

View attachment 199603

View attachment 199604

View attachment 199605

View attachment 199606

View attachment 199607

View attachment 199608

View attachment 199610
 

Attachments

  • DSCF2333.JPG
    DSCF2333.JPG
    1.9 KB · Views: 0
  • DSCF2335.JPG
    DSCF2335.JPG
    1.6 KB · Views: 0
  • DSCF2337.JPG
    DSCF2337.JPG
    2.1 KB · Views: 0
  • DSCF2338.JPG
    DSCF2338.JPG
    1.6 KB · Views: 0
  • DSCF2339.JPG
    DSCF2339.JPG
    2 KB · Views: 0
  • DSCF2342.JPG
    DSCF2342.JPG
    2.3 KB · Views: 0
  • DSCF2343.JPG
    DSCF2343.JPG
    2.3 KB · Views: 0
Really admire the perseverance you are demonstrating, I would have been closing the bin lid by now! liking this a lot.
 
Wow Gregg you're hammering this pig of a kit into shape for sure,the figure in the first pic would fit more in a modern day Zombie flik for sure!
 
Status
Not open for further replies.
Back
Top