Theme editor

Scale Model Shop

Chris' 1/144 Ye-50 'Not another -21 prototype!)

Steve-the-Duck

Active member
SMF Supporters
Joined
Jul 3, 2020
Messages
2,185
Reaction score
750
Points
113
First Name
Chris
Location
Medway Towns
1/3
Thread owner
Okay, decided on the next mini-MiG, as this one is going to need the most work

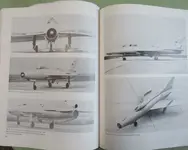
The Ye-50 was a rmixed-power interceptor, based on the Ye-2, with an added rocket motor. It turned out to have the highest performance of the early family, but was very short-ranged
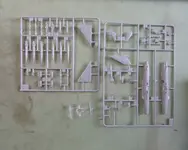
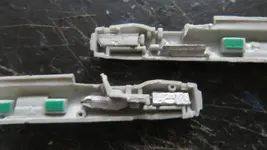
IMG_4084.webpModifications will be the usual shortening of the undercarriage, and also a heavily modified tail, and a nose extended half-a-metre
Oh and the wings. Which gives me another spare pair to go with a spare MF fuselage...

I really ought to do some later service types, of actual MiGs rather than F-7s, but there are just so many fun prototypes. Even if the GB ends first, I'll still do a PD (VTPL) and a Ye-8
 
Thread owner
This really is the perfect GB for you. So many Migs, and as much time as you want.
Well, I could spice it up with a -15 or a -29!

Or finish my half-built -3. Not that that would count for the GB!
 
Thread owner
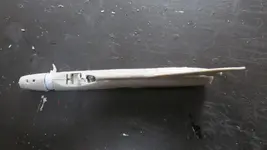
Okay, this is the bird I'm doing here
IMG_4085.webp
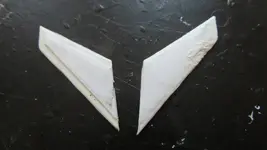
So: nose extension; new wings; new tail fin with rocket motor; modified tailplanes; new small strakes mounted on pipes

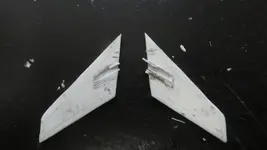
Using my new sandwich method for the wings, but now I'm leaving off the extra lower pane, as on the Ye-2 replacement wings, and cutting the undercarriage bay directly into the main 30 thou piece. Clamping on the 10 thou skin does require a bit of sanding and filling extra
On the left, without the skin, on the right complete so far wit filling
IMG_4086.webp
I'm seriously thinking about re-doing the fuselage of my Ye-2 when I do the Ye-2A, cannibaliosing what went right with the initial build

But that's another story
 
Thread owner
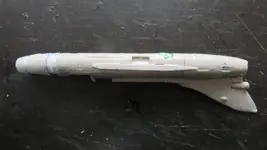
Okay so, tail adjustments first
IMG_4089.webp
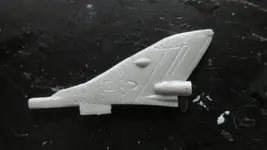
Chord shortened, and the rocket exhaust added - which is out of a SNEB rocket pod in the kit. Lot's more work on the base needed, pit of edge thinned and shaped plasticard probably, plus the rudder to re-scribe
IMG_4088.webp
The various ports and rail have to be filled, and shaped, plus the airbrake position
IMG_4090.webp
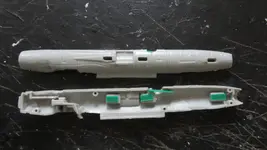
Added a lot of weight to the nose, what with all the additions going into the tail
IMG_4091.webp
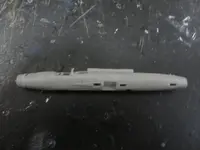
Bad pic sorry. Fuselage halves together, and spine behind the cockpit removed for when the extra canopy piece is added (I have a cunning plan for that this time). Added a small shim in the nose to fill around, but nit's going to need an extra 2mm added
IMG_4092.webp
And the black line, just ahead of the canopy, is where the extra will be added. That should save me having to shape the extra to the right angle (which did not go so well on the Ye-2)
Although the J/F-7 has a long nose, it's still not quite as long as the Ye-50 extension, as is only really obvious when the thing is together
I'll have to be cutting through the nose weight though
Fortunately, my cutting back the nose wheel bay has put the back of that in the right place

Lot's more shimming and filling to go now. So, happy birthday to me!
 
Thread owner
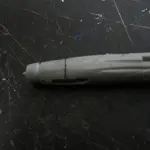
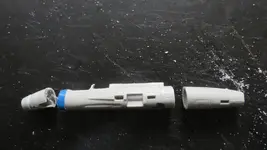
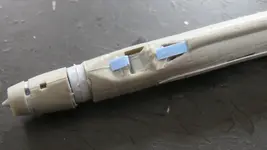
Sawing time
IMG_4097.webp
The blue tape is a straight edge guide, and is AK's curvable masking stuff, BTW. As a mask it's okay, from first attempt (the August First J-7MG)
The F/J-7 is slightly longer than the equivalent -21, so needs shortening by a mil-or-so in front of the tail. And this even though the Ye-50 is longer than any of the other -21 prototypes or derivatives!
Cutting through the nose weight bars was no hassle, and where the front of the modified nose-wheel bay is, at the cut, is actually the right place (the J/F-7s nose wheel is further forward, for some reason)
The Ye-50 had a much longer nose to reduce drag, rather like how longer ships are faster than fatter ones!

IMG_4098.webp
The spacer is actually two wheel hubs from my Airfix Ju-88s. So many useful bits in that kit. And I got an Italeri Ju-88A4 for my birthday (without any prompting my partner), so that's on the cards to finally do a Regia Aeronautica night-fighter
The bit sticking out is a 5 thou shim just bto straighten stuff up. The tail is on fine, and the rear fuselage join fitted perfectly. I'm not adding the usual engine exhaust part, as the Ye-50 had a different, smaller, engine than the -21
IMG_4099.webp
The -21s and variants all have very prominent separate wing roots, which hides a few gaps here! Going to need to get rid of that access panel below the root piece too.
IMG_4101.webp
Usual extra cockpit detail added, which covers gaps that are invisible when it's all painted black anyway!
The spaces at the sides of the rear cockpit panel I've left for the insertion of the curved acetate sheet cockpit rear transparency. Each time I do one of theses, sopme new idea or modification comes up (which is why the original Ye-2 I did is going to be cannibalised to make a better version, alongside a Ye-2A. Though whether they're next or not is another matter)
 
Last edited:
Thread owner
Last two bits today.
The main undercarriage bays I cut in the wings are, of course, in the wrong place. So a bit of cutting and shimming puts them right
IMG_4102.webp
Lining them up before hand, no matter how much I 'measure twice cut once, never seems to quite work out. I've got one more set of these wings to do, so they should be perfect first time
He said without a hint of irony

Finally
IMG_4103.webp
Building up the tail base has begun. First added a parachute cover cone from the end of some stores with the kits, Then a 10 though spacer-former for the root shape. This will probably be covered by a 5 thou skin to shape, though I just know that's going to need shaping, filling and sanding and all the usual
Going to finish that before I do the tail-plane mounts (another thin g I missed off the Ye-2 build!)
 
Back
Top