You've just induced a nightmare Arnie!!!Looking good Doug!
LOL! 1/72 too small, such nonsense! You need to build one in 1/144!
") :tears-of-joy: :tears-of-joy:
:tears-of-joy: :tears-of-joy:
You've just induced a nightmare Arnie!!!Looking good Doug!
LOL! 1/72 too small, such nonsense! You need to build one in 1/144!
:tears-of-joy: :tears-of-joy:YES Doug i think Arnie is right as they are dear little kits in 1/144 scale as on my USS NIMITZ carrier i built 54 revel aircraft includein 4 choppers in 1/144 scale an they were 2 sea hawks an one super sea stallion an a even smaller R/N lynks an that was a test on the ole eyesight then but they looked very good even fitted nav lights an motors for engines in the hawkeyes SO its all possible an Doug HAVNT you got a head an eye magnifiyer to see the small parts as i found it was very helpfull on the ole mark 1 eyeball lolLooking good Doug!
LOL! 1/72 too small, such nonsense! You need to build one in 1/144!

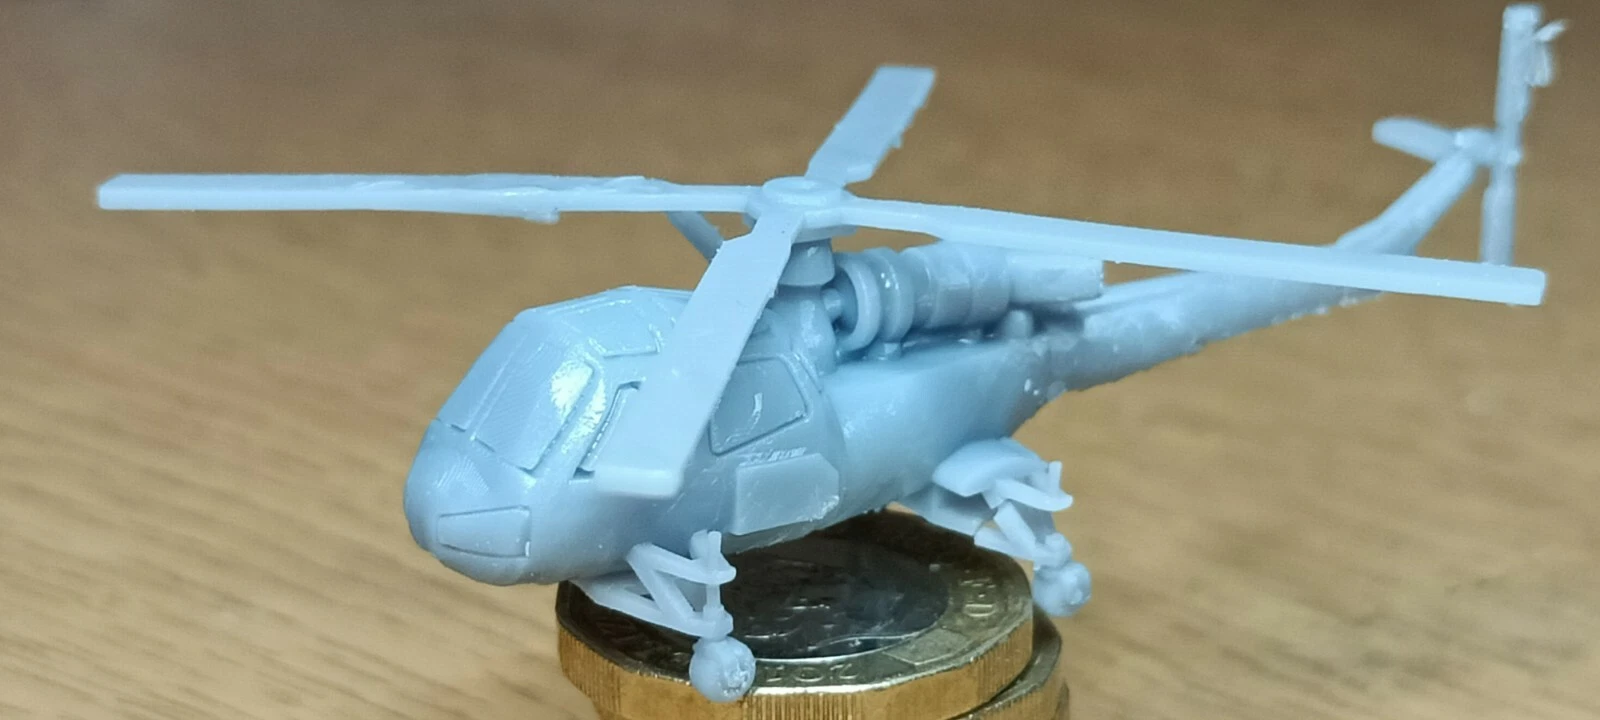
WELL Doug why dont you get one as when i started modelin again in 2019 it was the first thing i bought as i knew as you get older the eyesight goes down so thats what you need an ive wore up 3 of them in my 5 yrs back online but they are not to bad on priceOk perspective time!! I have sat on Nimitz 1:1 flight deck in a Wasp and the rotor diameter is just as wide as Nimitz white centre line when landing zoomies!!!
That said, in 1/72 my eyes simply struggle to cope!! And nope, I as yet don’t have a magnifying aid. I only wish I did!!! It’s high on my wish list. :thumb2:


Until now using an aid other than reading glasses has been pride. Always had very good eyesight. (I could hit a 4 inch smoke float from 7000 yards with a AS12). However, reality has hit hard with this ere modelling malarky.WELL Doug why dont you get one as when i started modelin again in 2019 it was the first thing i bought as i knew as you get older the eyesight goes down so thats what you need an ive wore up 3 of them in my 5 yrs back online but they are not to bad on price
chrisb
WELL Doug think its old age gettin to us im afraid as the optisain says ive got very good sight for my age an now better since i had a new lens fitted in my left eye an i can stll see great an even read the tiny lettering on my tomcat warning decals but a head magnifier saves gettin eye strain so if i was you sir id get oneUntil now using an aid other than reading glasses has been pride. Always had very good eyesight. (I could hit a 4 inch smoke float from 7000 yards with a AS12). However, reality has hit hard with this ere modelling malarky.
Thank you Tim. I don't feel as comfortable as it may appear with this one. I think you're right, it is like scratch building. Every part is an individual nightmare. Not one part has been simple. It's almost like the instructions are for a different kit. The instructions show holes and detents where parts should fit into - but there are none! I will finish this but it has certainly dented my confidence. LF as a kit manufacturer is right off my shopping list.Just had a good catch up on this. Stellar work going on here Doug. It’s looking excellent. Your methodical approach and attention to detail are pay off big time :thumb2:
A good way to think about this is that you are building a 1/72 model of a Wasp using an LF kit as a starting point. Sort of like scratch building using ready made parts. It helps the mental anguish when things don’t fit…..
No worries Doug. Beating challenges like this are how you grow your abilities, by the way. Once you’ve finished the sense of achievement will be all the greater.Thank you Tim. I don't feel as comfortable as it may appear with this one. I think you're right, it is like scratch building. Every part is an individual nightmare. Not one part has been simple. It's almost like the instructions are for a different kit. The instructions show holes and detents where parts should fit into - but there are none! I will finish this but it has certainly dented my confidence. LF as a kit manufacturer is right off my shopping list.
I have just spent 2.5 hours and all I have achieved is the assembly of the front undercarriage and AB'd transparent blue on the canopy top panels!
Apologies for the late response by the way, it only popped up on my PC just after 3 even though it's telling me you posted before 8 this morning!!


Thank you Garry but I'm looking at things from what I think is a realistic viewpoint. I like to do like a warts and all type blog and this is to me, infected!! I keep dreaming of hammers!!! To the point I have moved my bashing sticks well out of reach. The times I have been tempted to just keep on closing the vice jaws is more than the fingers and toes!!! It's unbelievably unenjoyable and it's only my love of the little helicopter that is keeping me going.You're too hard on yourself Doug, you're doing a fine job.
Hi Jim and welcome buddy. Not proving to be the nice little build I was hoping as you have probably gleaned. Yeah, Tims analogy is bang on. I have to admit it is testing my patience but there are so many things wrong/missing or incorrectly proportioned. It's making me boil!!!I missed this Doug but just had a catch up. I love Tim's analogy that you are scratch building a helicopter using kit parts. I've never heard of LF kits but seeing this I don't think I'll be buying one anytime soon.
You're doing a great job. Your patience, skill and care have made a decent model from a very unpromising kit. Well done, nearly there.
Oh I'll keep going Jakko. I just keep getting these urges to use a big bashing stick on it. It passes. No! I won't quit, If nothing else, it's experience, (ok - not a nice one) but I'll learn something from it. Hopefully Mr Airfix or one of the better manufacturers will bring a Wasp out in a bigger scale. I live in hope!!Juts think of the model you’ll be building after this one, that might keep you going


 ).
).scalemodelling.co.uk is a privately operated online discussion forum. All content posted by members reflects their own views and opinions and does not necessarily represent those of the forum owners or administrators. While reasonable efforts are made to moderate content, no responsibility is accepted for user-generated material. By using this site, you agree to comply with UK law and the forum rules.