
You are using an out of date browser. It may not display this or other websites correctly.
You should upgrade or use an alternative browser.
You should upgrade or use an alternative browser.
dragon 1/35 flak 88mm
- Thread starter shovelhead 1977
- Start date
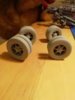
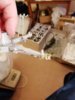
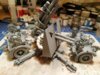
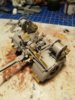
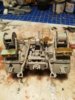
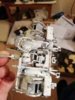
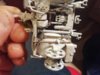
coming along nicely, Im using a set of voyager pe parts, but the kit is very well detailed so all the pe parts will not be used. some really fiddly bits such as the winding handles on the cable reels, but its worth it, thinking about building this on the floor as that's where most of the small parts seem to end up !. no problems with the build as yet, but the instructions could be a bit clearer in some areas !
Attachments
-
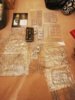 dragon 135 88mm flak (2) all the parts.jpg2.6 KB · Views: 0
 -
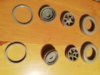 parts for one set of wheels.jpg2.5 KB · Views: 0
 -
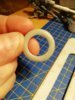 tyre, notice flat spot and bulge on bottom of tyre to simulate weight on tyre.jpg3.5 KB · Views: 0
 -
 wheels done.jpg2.2 KB · Views: 0
 -
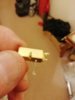 bogie mounted toolbox done (1).jpg2.2 KB · Views: 0
 -
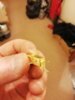 bogie mounted toolbox done (2).jpg2.4 KB · Views: 0
 -
 bogie seat with pe part.jpg2.7 KB · Views: 0
 -
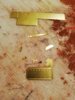 parts for one bogie mounted toolbox.jpg2.6 KB · Views: 0
 -
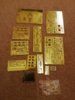 set of photo etched parts.jpg2.3 KB · Views: 0

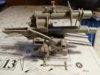
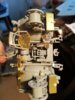
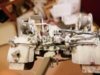
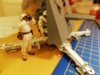
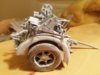
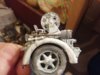
there we are, pe parts all on , grey is to be done, last photo is all sprayed in grey ready for its winter coat !
Attachments
-
 all photo etched parts on ready for spraying (7).jpg2.8 KB · Views: 0
 -
 all photo etched parts on ready for spraying (8).jpg2.8 KB · Views: 0
 -
 all photo etched parts on ready for spraying.jpg3.3 KB · Views: 0
 -
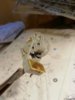
 one crew member in place (1).jpg2.6 KB · Views: 0
 -
 one crew member in place (2).jpg2.8 KB · Views: 0
 -
 all painted grey ready for the white coat.jpg3.6 KB · Views: 0
 -
 all photo etched parts on ready for spraying (6).jpg2.8 KB · Views: 0
 -
 all photo etched parts on ready for spraying (5).jpg2.9 KB · Views: 0
 -
 all photo etched parts on ready for spraying (1).jpg3.3 KB · Views: 0
 -
 all photo etched parts on ready for spraying (2).jpg3.4 KB · Views: 0
 -
 all photo etched parts on ready for spraying (3).jpg3.6 KB · Views: 0
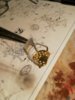
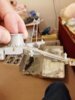
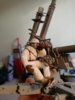
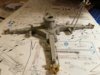
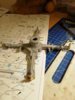
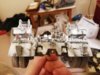
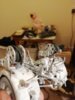
these have had a coat of 'whitewash 'slapped on, apparently if no proper white paint was available then white sheets or whitewash was used to cover the grey. did read that whitewash was just slapped on haphazardly, it also tended to come off when it got to wet !
Attachments
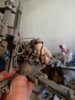
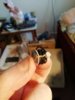
some more bits finished, very well detailed kit without the extra pe parts !
Attachments
Looking very good indeed and sorry for being so far!!! As you say and from what I gather, I don't think they were particularly careful about how they got the whitewash on.
Looking forward to seeing this finished!!
Well done again and ATB.
Andrew
Looking forward to seeing this finished!!
Well done again and ATB.
Andrew
Looking very good indeed and sorry for being so far!!! As you say and from what I gather, I don't think they were particularly careful about how they got the whitewash on.
Looking forward to seeing this finished!!
Well done again and ATB.
- Joined
- Apr 27, 2018
- Messages
- 14,899
1/3
Ray,
Looking good.
Looking good.
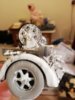
thanks , not far of being finished now just a few odds and ends to do ,the other three crew members to be done as well i'll probably be making a diorama for this once its finished so the rest of the crew will be finished once I decide on what i'm going to do .these figures are not actually part of this kit so I will probably have them lazing about or something !, thanks for your interest
Legal Notice
scalemodelling.co.uk is a privately operated online discussion forum. All content posted by members reflects their own views and opinions and does not necessarily represent those of the forum owners or administrators. While reasonable efforts are made to moderate content, no responsibility is accepted for user-generated material. By using this site, you agree to comply with UK law and the forum rules.