Theme editor

Scale Model Shop

FROG 1/72 de Havilland DH 60 g Gypsy Moth

yak face

Moderator
Staff member
Moderator
SMF Supporters
Joined
Jun 13, 2009
Messages
14,562
Reaction score
1,341
Points
113
Age
61
First Name
Tony
Location
Sheffield
1/3
Thread owner
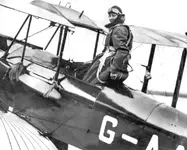
Heres one Ive been wanting to do for ages , the 1/72 DH Gypsy Moth that Amy Johnson flew solo from England to Australia in 1930 , an incredible feat that took 19 days .
The kit is the venerable FROG offering , a decent enough base with very reasonable exterior detail but ,par for the course for 1964 - no interior detail apart from a seat , and comes with a seated pilot ( not brilliant ) and a standing figure representing Amy Johnson ( quite nice actually ) .
Luckily the cockpit on these was very sparse and not much will be seen through the small opening . The decals ( not pictured here as I filed them away till later ) are still very usable all these years later .
I’ll be adding a few bits to the cockpit and also the very poor engine , plus a couple more extra details .IMG_6891.webpIMG_6892.webp
 
Not a lot to this kit so room for your improvements.
Almost a hundred years ago - one hell of an achievement. I don't think I'd want to fly far in such a flimsy looking plane. 😳
 
You have your work cut out Tony, but I know you will turn this into a gem. It was a great period in aviation, the age of airborne explorers, pioneers and record breakers.
 
Thread owner
Got this started today , plenty to get my teeth into ! First off the top and bottom wings had some nasty ejector pin marks which were filled and sanded carefully to preserve as much of the raised detail as possible.There was one more big mark bang in the middle of the wing fuel tank section , which is a corrugated structure . Obviously this cant be filled and sanded without destroying the detail so a solution had to be found. The old faithfull wine foil was used , marked with a scriber to replicate the corrugations then cut and glued on . IMG_6904.webpIMG_6905.webpIMG_6906.webpIMG_6907.webpIMG_6908.webpIMG_6909.webp
 
Thread owner
Been studying period photos of Jason at the time of the record attempt and a spare propeller was carried on the journey , lashed to the port side of the fuselage . The kit doesnt supply one ( only the actual propeller ) and I didnt have anything similar in the spares box so the only thing I could think of was to whittle one out of balsa . A very delicate operation but I managed to get it looking something like .IMG_6893.webpIMG_6894.webpIMG_6913.webp
While we were on the subject of propellers , the kit one has a blunt , featureless spinner whereas the actual one was more pointed and had 8 fastening bolts . I got an old bomb out of the spares and razor sawed 8 slots into the end then sanded it pointed and cut it off . The prop nose was sanded off and the replacement spinner stuck on . To say its a tiny piece I’m chuffed with how it came out .IMG_6914.webpIMG_6915.webpIMG_6916.webp
 
Thread owner
Interesting to compare that photo with that of her arrival in Darwin, Australia. The lashings seem to have changed.
View attachment 1282284
Indeed there's lots of pics which show the aircraft in different set ups . For example there are a few that are captioned as being on the record attempt but show the front cockpit open , whereas it was covered over for the flight ( probably so it could be used for storage )
 
Great work Tony. The corrugated tank cover, the spare prop and the corrected spinner - all credit to you.
 
Thread owner
Made a start on the cockpit . Only the rear one as the front was faired over for the record breaking journey . Found plenty of photos online but many different layouts ( most were of restored or currently flying - hence modernised - machines but I found enough of period age to get an idea of what was needed ) although one was of GA-AAH albeit black and white.
I’m using the kit seat , just shaped a little , but everything else is having to be scratched including the ( thankfully !) basic instrument panel . Wine foil was used again for the rear of the front seat visible at the front of the rear cockpit. I’ll be using some etch belts for the early sutton type harness .IMG_6898.webpIMG_6899.webpIMG_6902.webpIMG_6903.webpIMG_6911.webpIMG_6912.webp
 
Thread owner
Cockpit has had a few more additions ( map pocket ,compass , map light ) and the instrument panel and control column have been fitted . Its all now painted and washed ready for the seat to go in after ive fitted the belts.
As I mentioned earlier the engine is very poor just four blank cylinders so this had to be sorted . Ive cut out the kit engine to leave a nice hole and while i was at it cut out the vertical slot on the front at the other side . I’m going to use bits of wound guitar string to represent the finned cylinders which will be fitted through a piece of plastic card that has been drilled and cut to shape. The exhaust ( short on this aircraft at this time ) will be added to the top of the cylinders after , probably using a bit of solder or fuse wire . IMG_6922.webpIMG_6923.webpIMG_6924.webpIMG_6897.webpIMG_6925.webpIMG_6926.webpIMG_6927.webpIMG_6928.webp
 
Back
Top